Configuring Android Emulator with Burp Suite for HTB Challenges
In this guide we will be configuring an Android Virtual Device (AVD) that will be able to proxy traffic through Burp Suite through HTTP and HTTPS for HTB Challenges. The difference between this guide and configuring-android-emulator-with-burp-suit is the way certificates are installed on the AVD. Recent versions of Android need the Burp Certificate to be installed as a SYSTEM certificate. This guide is to show how to setup a certificate under USER Trusted Credentials. The API Version for HTB Challenges needs to be level 29 or earlier.
The tools we will use will be:
- https://developer.android.com/studio – Android Studio (Free Resource to create Android Emulators)
- https://developer.android.com/tools/adb – Android Debug Bridge (Android Bridge to transfer files and run commands from host machine to emulator)
- https://portswigger.net/burp – Burp Suite (HTTP/S Proxy Program)
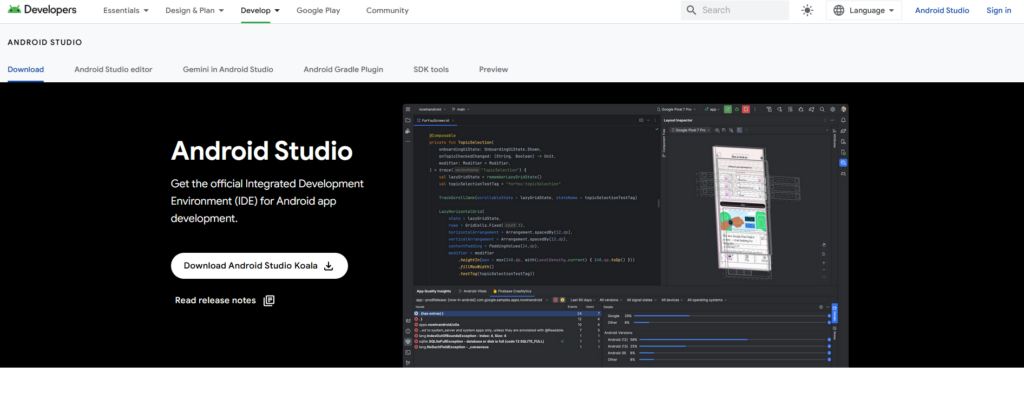
First let’s install Android Studio. This will allow us to create emulators for testing rather than using a physical device.
https://developer.android.com/studio
Once Android Studio is downloaded you can install it. Android Studio can be installed on Windows, MacOS, and Linux.
Next we will install Burp Suite.
https://portswigger.net/burp/communitydownload
Finally we will install Android Debug Bridge (ADB).
https://developer.android.com/tools/adb
The first program we will use is Android Studio. This will allow us to create emulators for Android Devices.
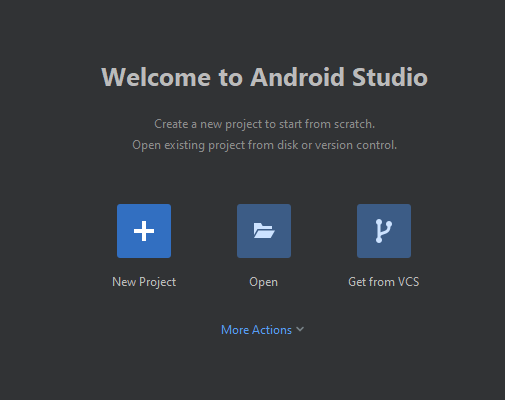
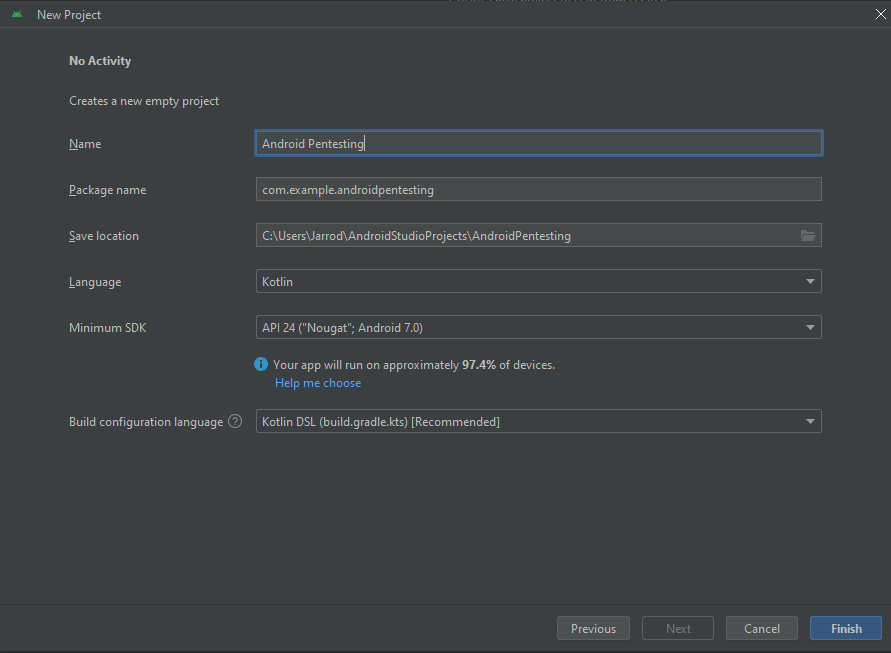
When starting Android Studio for the first time we will need to create a project.
I will name the Project Android Pentesting.
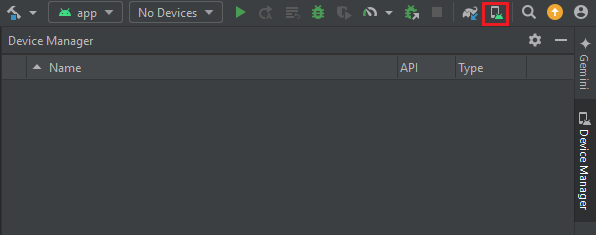
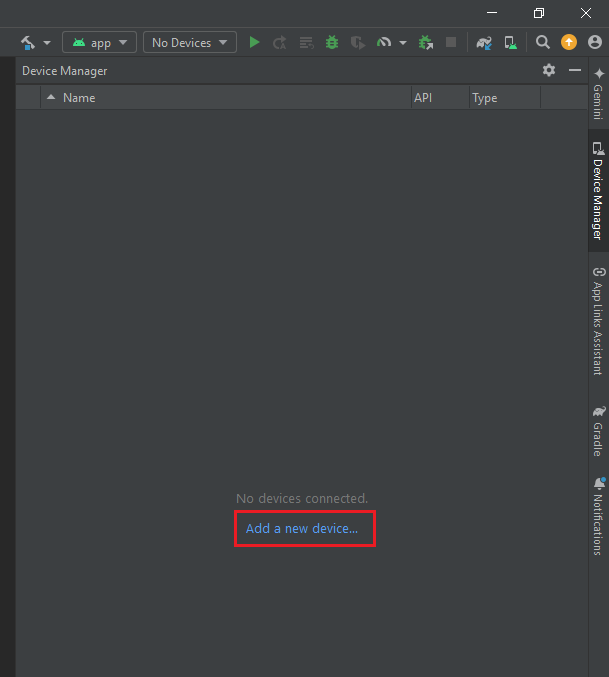
Click the phone with Android Icon in the Top Right Corner.
Click on “Add a new device…”
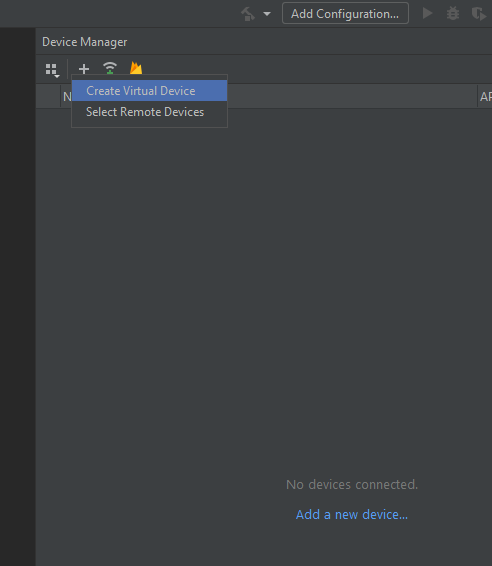
Next select Create Virtual Device.
Feel free to experiment with this section. You can setup multiple devices with access to the Play Store and specify the API. For the purpose of this guide I will be using a Google Pixel 6 device that does not have access to the Play Store. *Note that a device with the Google Play Store cannot be rooted. Devices without the Play Store Icon are rooted devices.
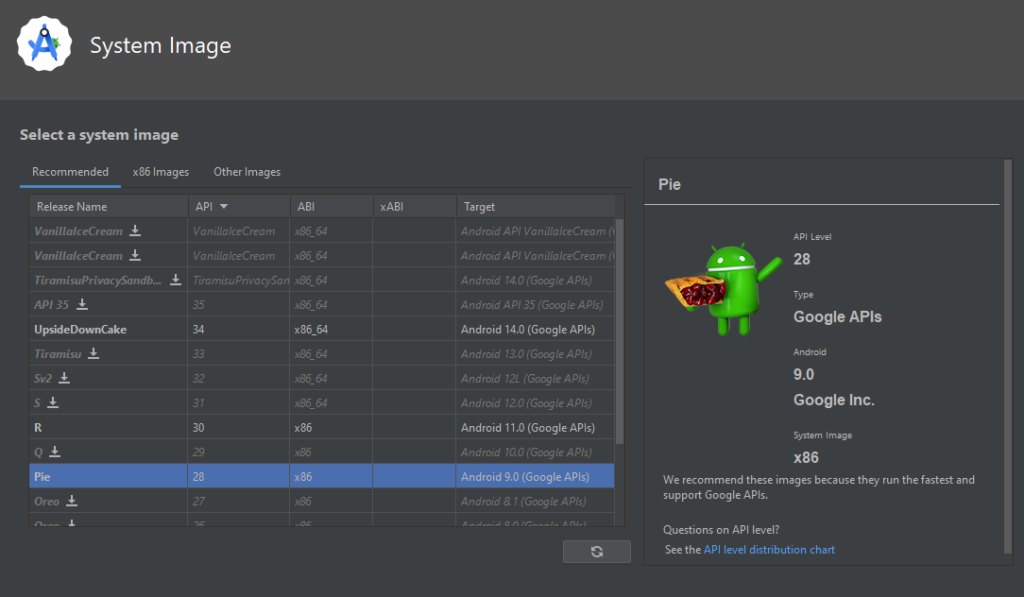
The next step is to select the API Version. I will be using version 28. Feel free to experiment with the various versions of the API.
The last step for this will be naming our device. I chose Pentesting Device. You can name it whatever you prefer.
Now we can click the Play button on the right side and our emulator should display. It might take a few minutes on the first boot.
Now we have a device to do Android Testing. It is absolutely possible to do testing on a physical device. This is a cost effective approach without the fear of bricking a phone.
Next we can get Burp Suite setup. You can use either Community or Pro.
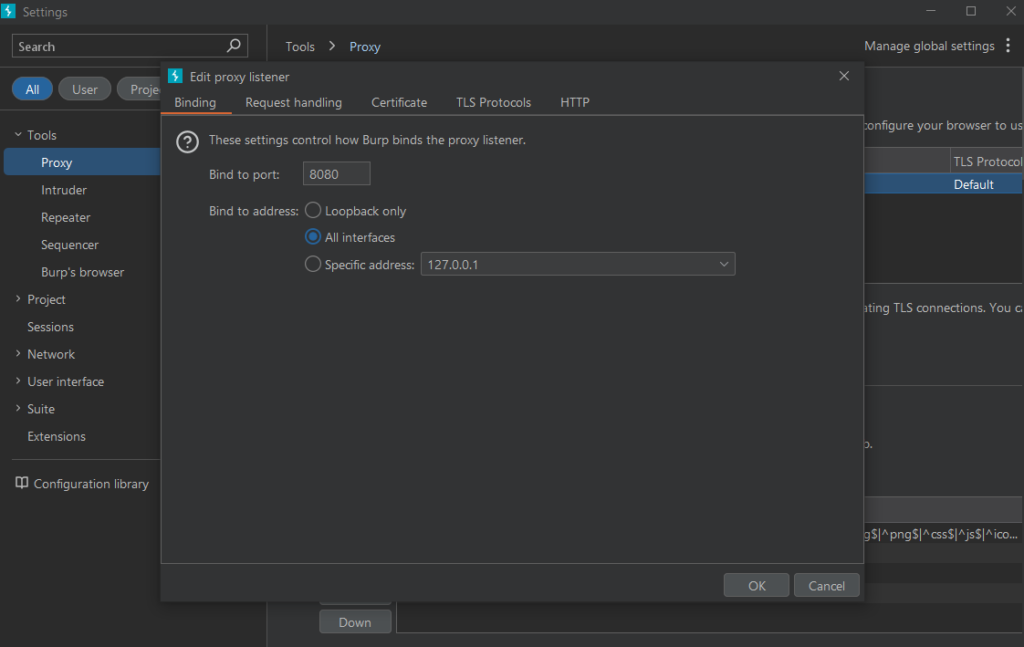
The first step to get Burp to work with Emulator (or physical device if that is what you are using) is to configure the Proxy Listener.
Click on the Proxy Menu and then click Proxy Settings.
Next click on the 127.0.0.1:8080 and click the Edit button.
Change the Bind to address to All interfaces.
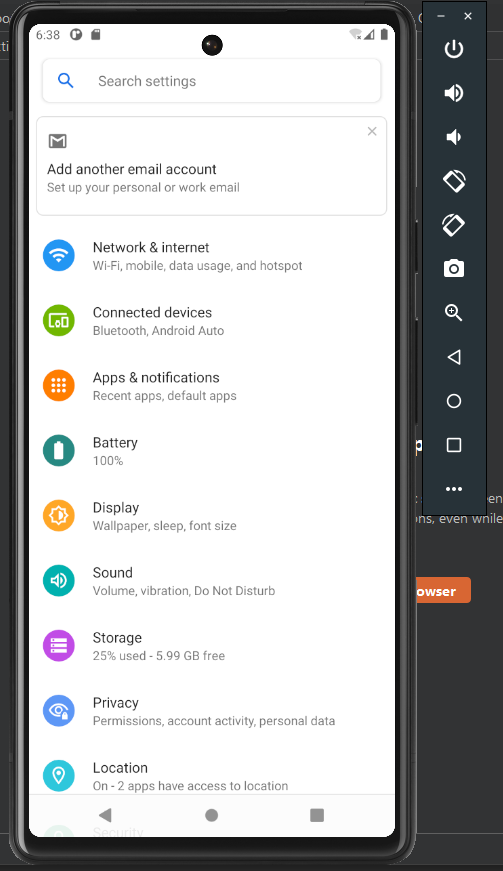
Back on our phone we want to open the Settings on our Pixel device.
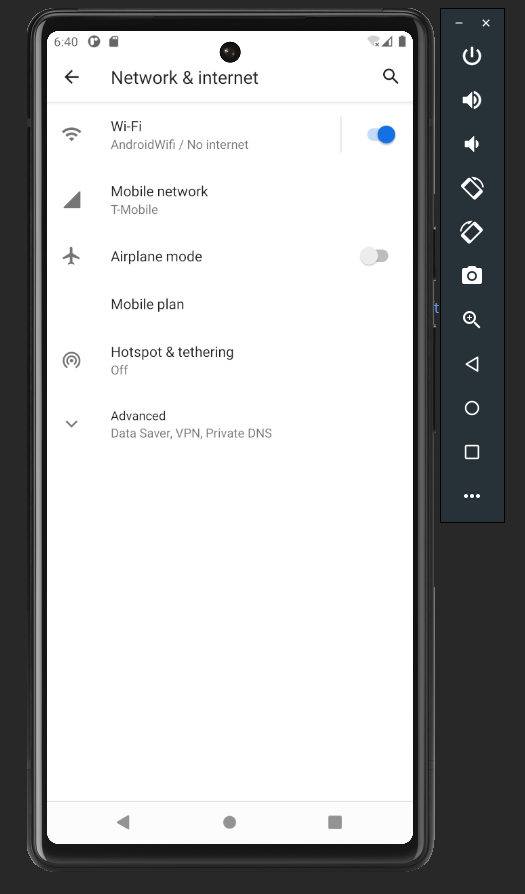
From the Settings we want to open Network & Internet
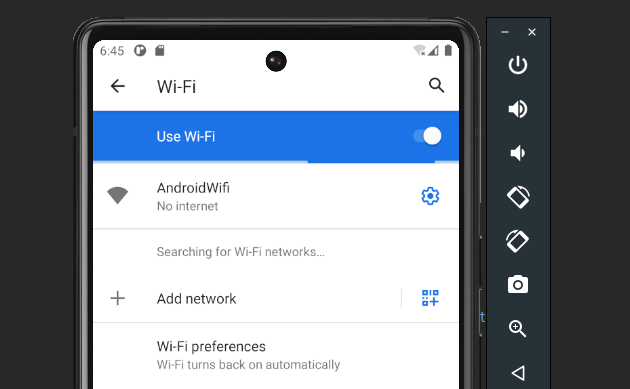
Next we want to select Wi-Fi.
Now click Android Wi-Fi.
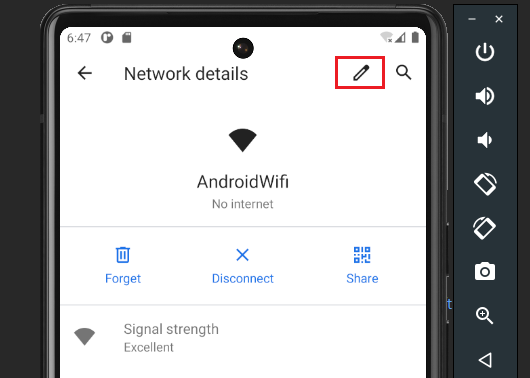
Now click the pencil icon in the top right.
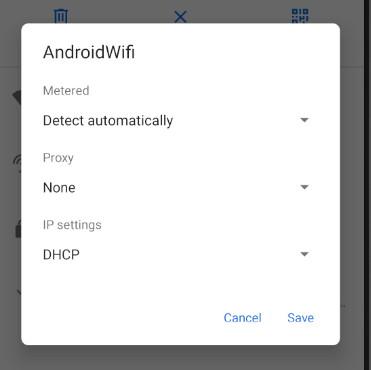
Click Advance Options and then Proxy.
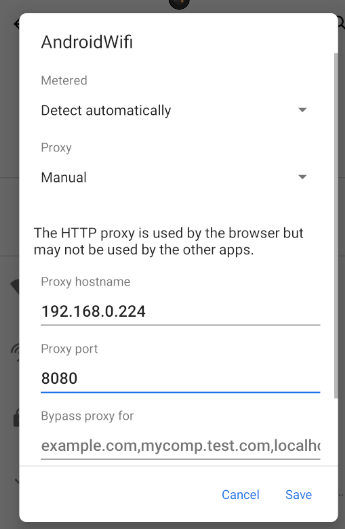
Here we can setup our proxy. We will need to use our host machines IP Address. Mine is 192.168.0.224. You will need to gather your Internal IP Address from ipconfig/ifconfig/ip addr.
The port will be 8080. This is the Burp Default port.
Now click Save.
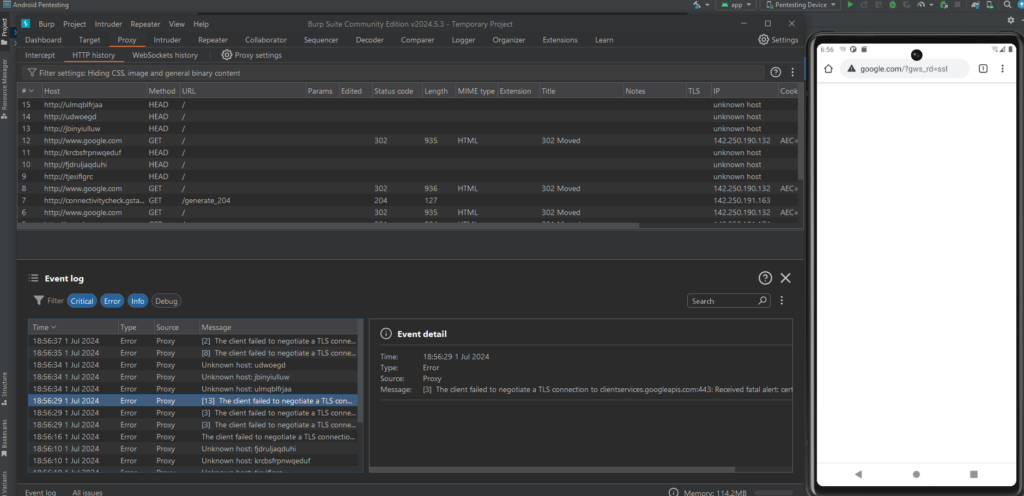
Back in Burp we can see traffic flowing through, but we have an issue with TLS. The next step will setup a certificate from Burp onto the Android Device. This way TLS traffic will work through our proxy and Burp.
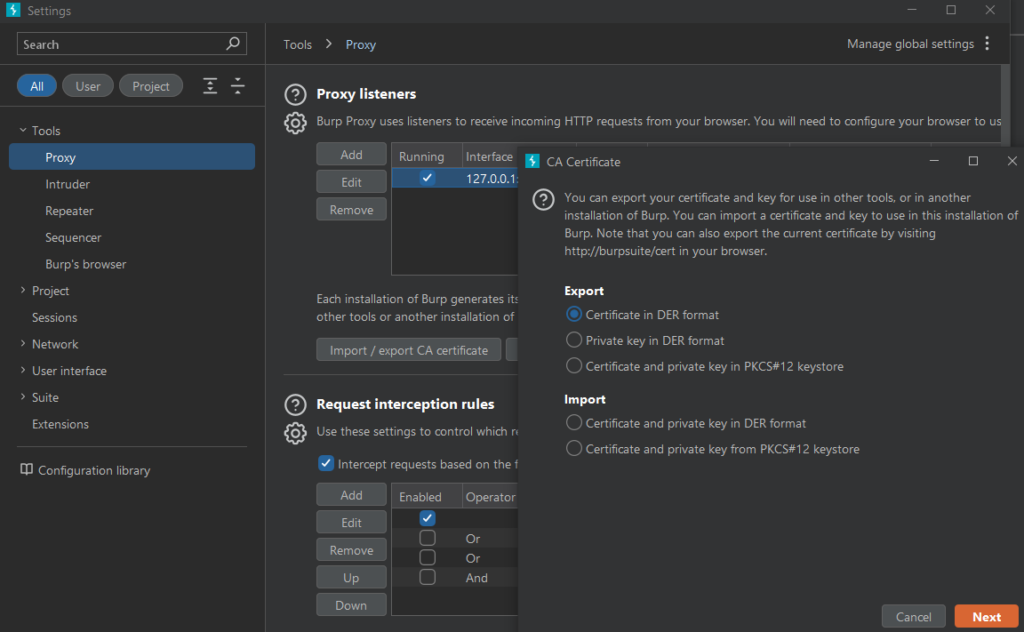
Back in the Proxy Listeners section we can click “Import / export CA certificate”. Click on that and then Export Certificate in DER format.
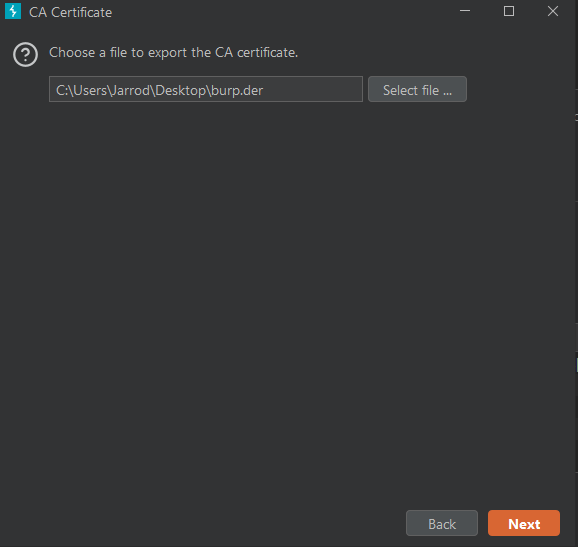
Save the certificate onto your host machine. I named my burp.der.
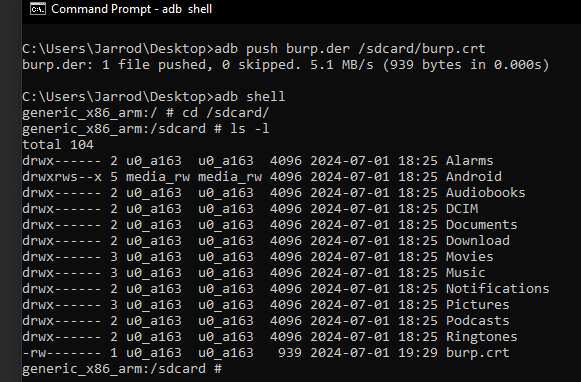
The next step will be using Android Bridge to transfer the certificate to our device.
Using the command
will send the certificate to the sdcard of our device.
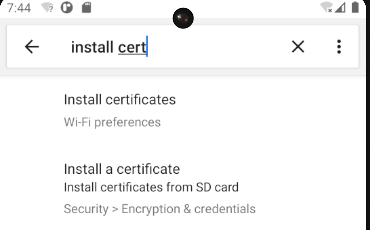
We can now install the certificate on our device. Open the Settings on the device and search “Install Cert”. Click Install certificates from SD card.
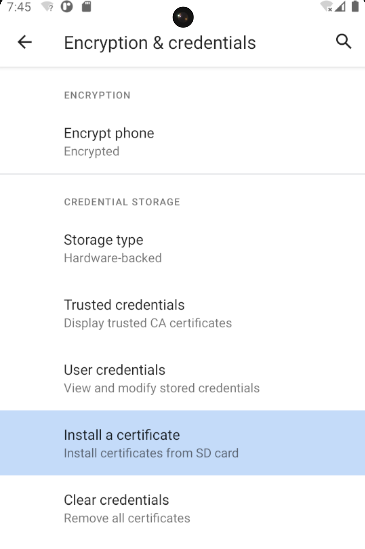
Next select “Install a certificate”.
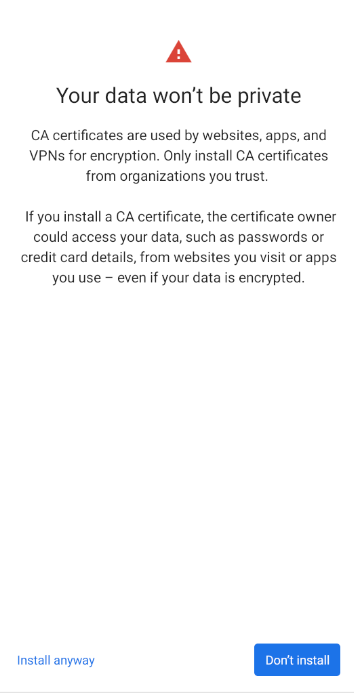
The Android Device will give you this warning. Click Install anyway on the bottom left.
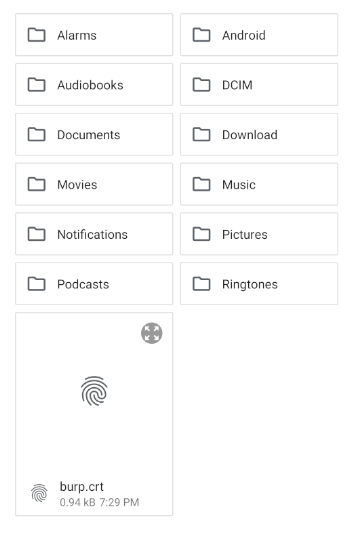
You should save the burp.crt certificate.
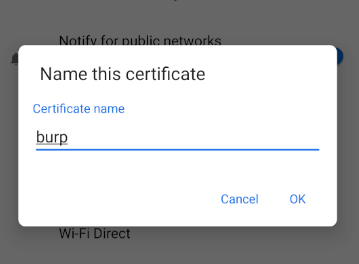
Click on the burp.crt file and name the certificate burp.
You might be prompted to set a PIN. I kept it super simple with 1111.
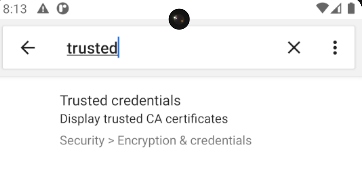
You can verify if the certificate was installed by searching Trusted and clicking Trusted credentials.
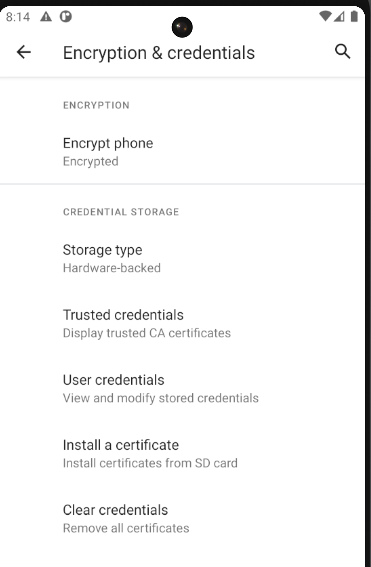
Click on Trusted credentials.
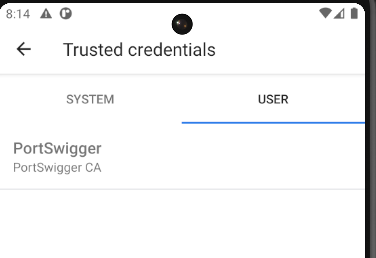
Now, clicking on USER will show the PortSwigger Cert.
This is when I reboot the device. When I re-launch the emulator and make sure the proxy is running on port 8080, I can verify that HTTPS traffic is now navigating through Burp Suite. This means we can now analyze and test HTTPS and HTTP with Burp just like a website.
If you are having issues please retrace your steps and try rebooting the emulator and Burp if needed.
That completes this Configuring Android Emulator with Burp Suite for HTB Challenges guide.
If you found this helpful, please send me a tweet and tell me what you thought! Feedback is always appreciated!
Jarrod


