
Configuring iOS Device with Burp Suite
In this guide we will be configuring an iPad that will be able to proxy HTTP and HTTPS traffic through Burp Suite. We want to set up Burp Suite with iOS for pentesting to intercept and analyze app traffic between the device and servers. This helps identify security flaws like insecure data transmission, API vulnerabilities, server-side vulnerabilities, and improper certificate handling.
We will need a physical iPad device or iPhone to do this.
I have discovered at the time of writing this guide that it is easier, but more expensive, to setup iOS devices either with emulators or physical devices than Android devices. This is because the burp certificate issue is not as complicated as it is with Android. You could still run into issues with SSL Pinning hurdles, but this applies to Android as well.
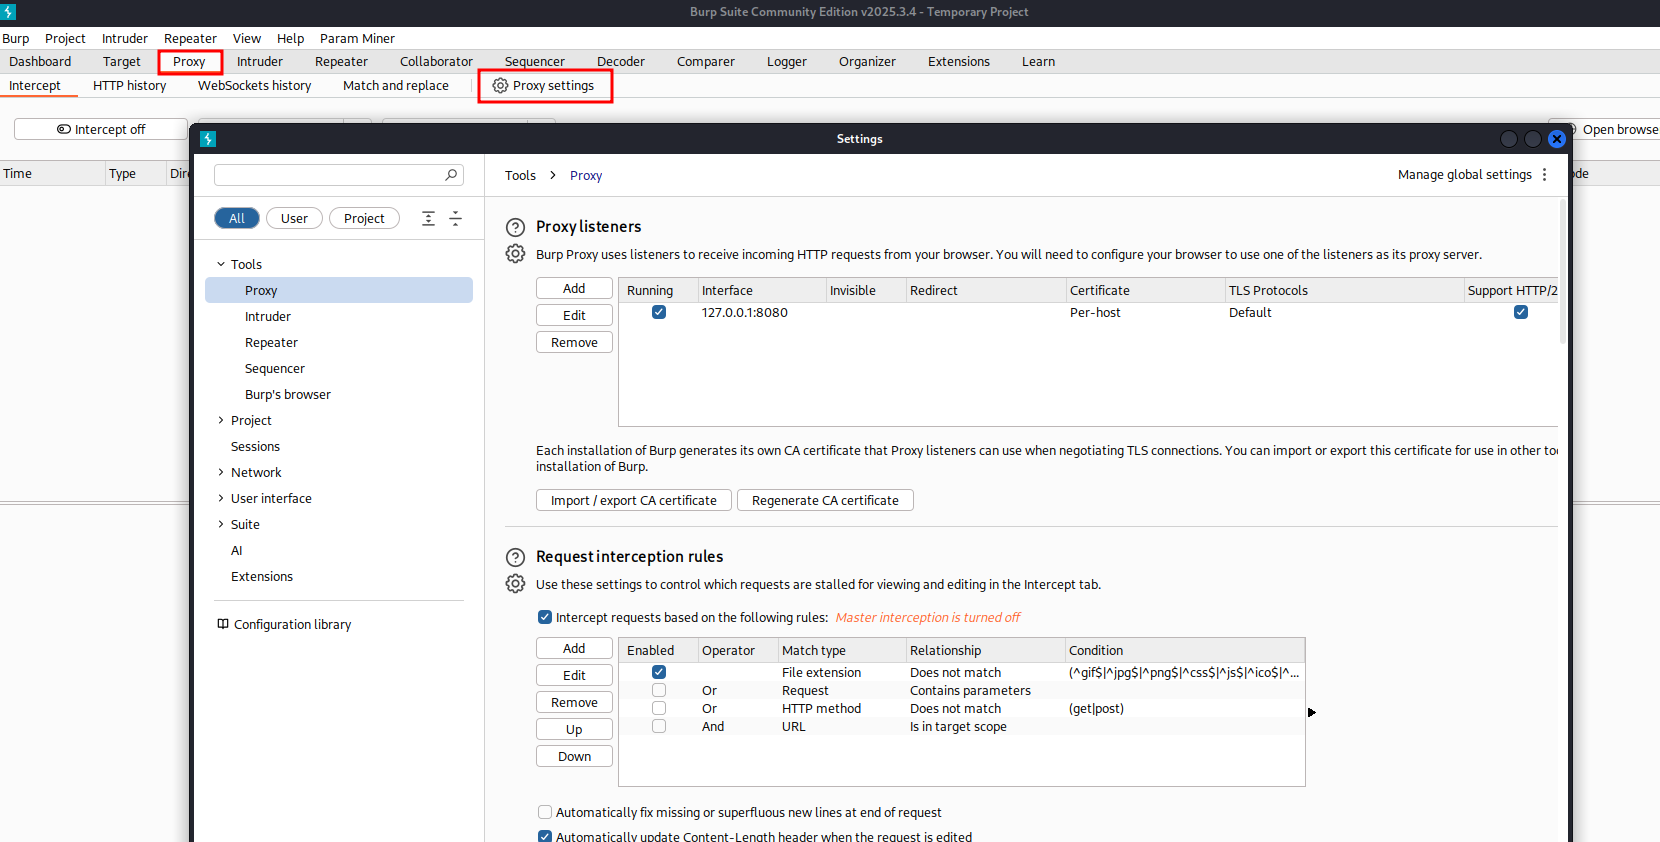
In Burp Suite (either Community or Professional) we need to select Proxy -> Proxy Settings.
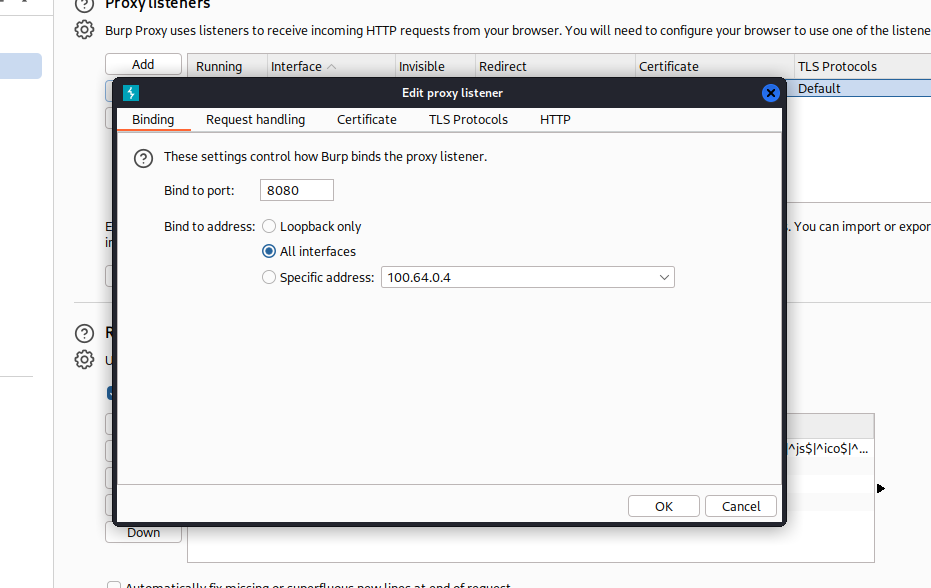
Click on Edit.
Select All interfaces to Bind to Address. You can either keep the default port or change it to something else.
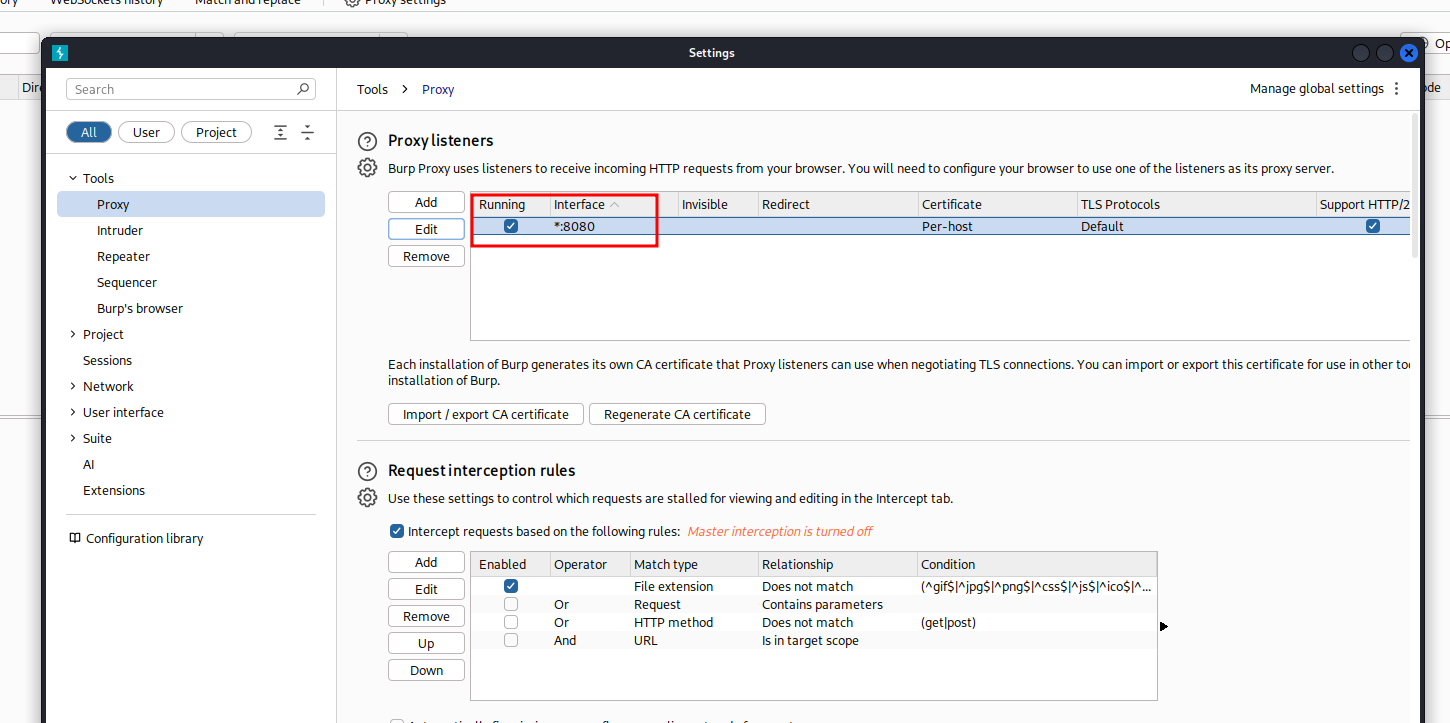
This will now give Burp Suite the ability to listen on all interfaces and can intercept the iPad/iPhone network traffic, as long as the device is on the same network.
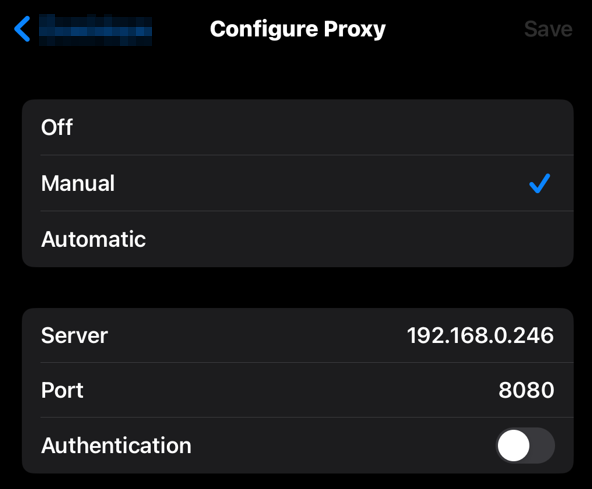
Back on our iPad we can navigate to Settings and picking Wi-Fi. The SSID we are connected to will display our iPads Network information along with the Configure Proxy setting. We need to click that.
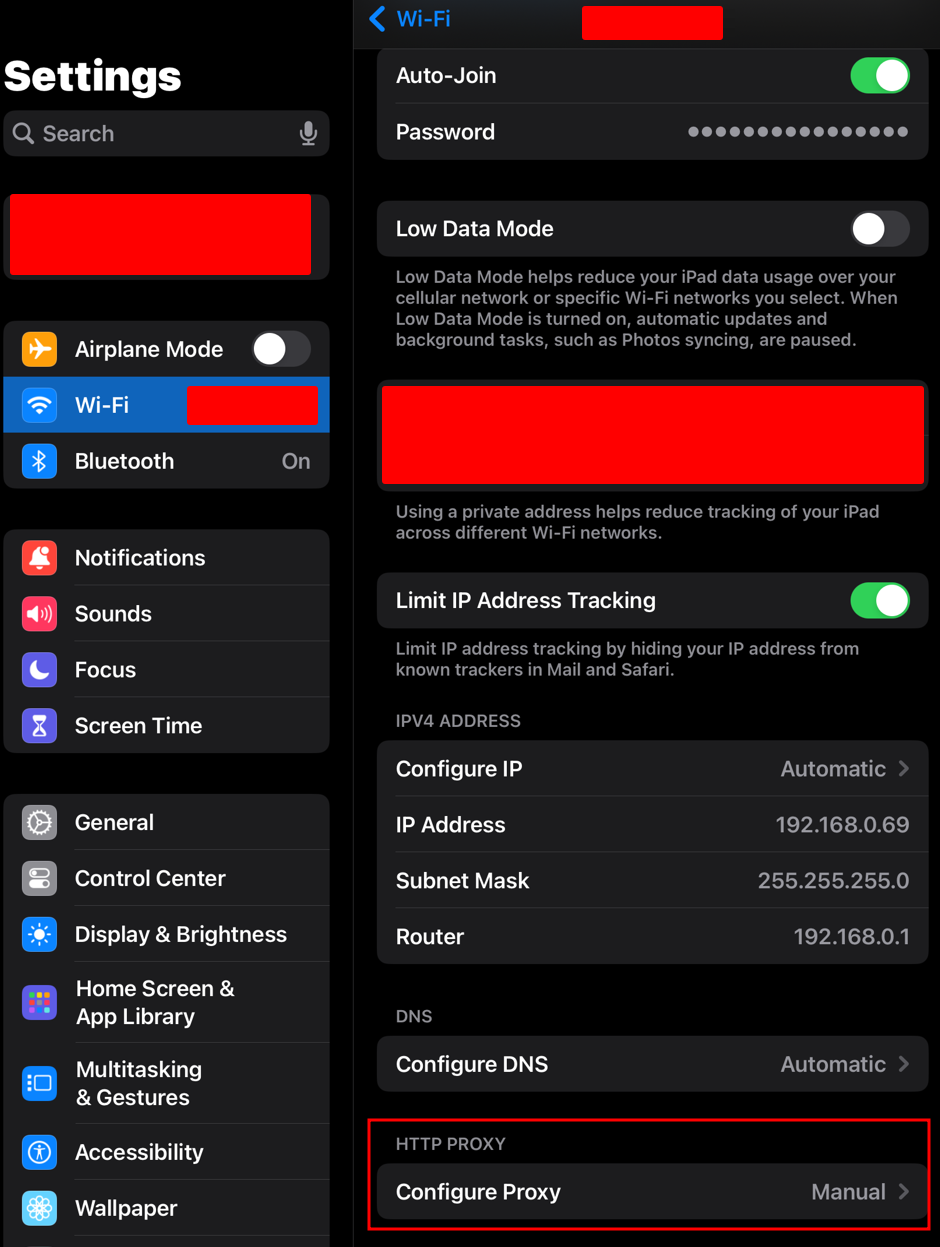
From here we need to select Manual and supply the IP Address of the Kali machine (or whatever you are using, it just needs to be on the same network) and the port Burp is listening on. Click Save.
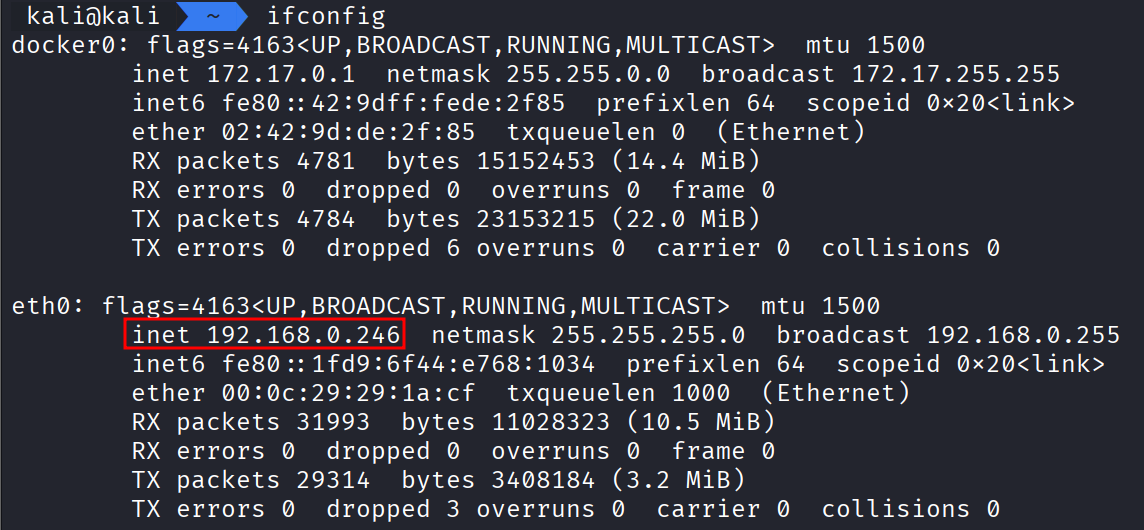
I was able to get my Kali IP with ifconfig.
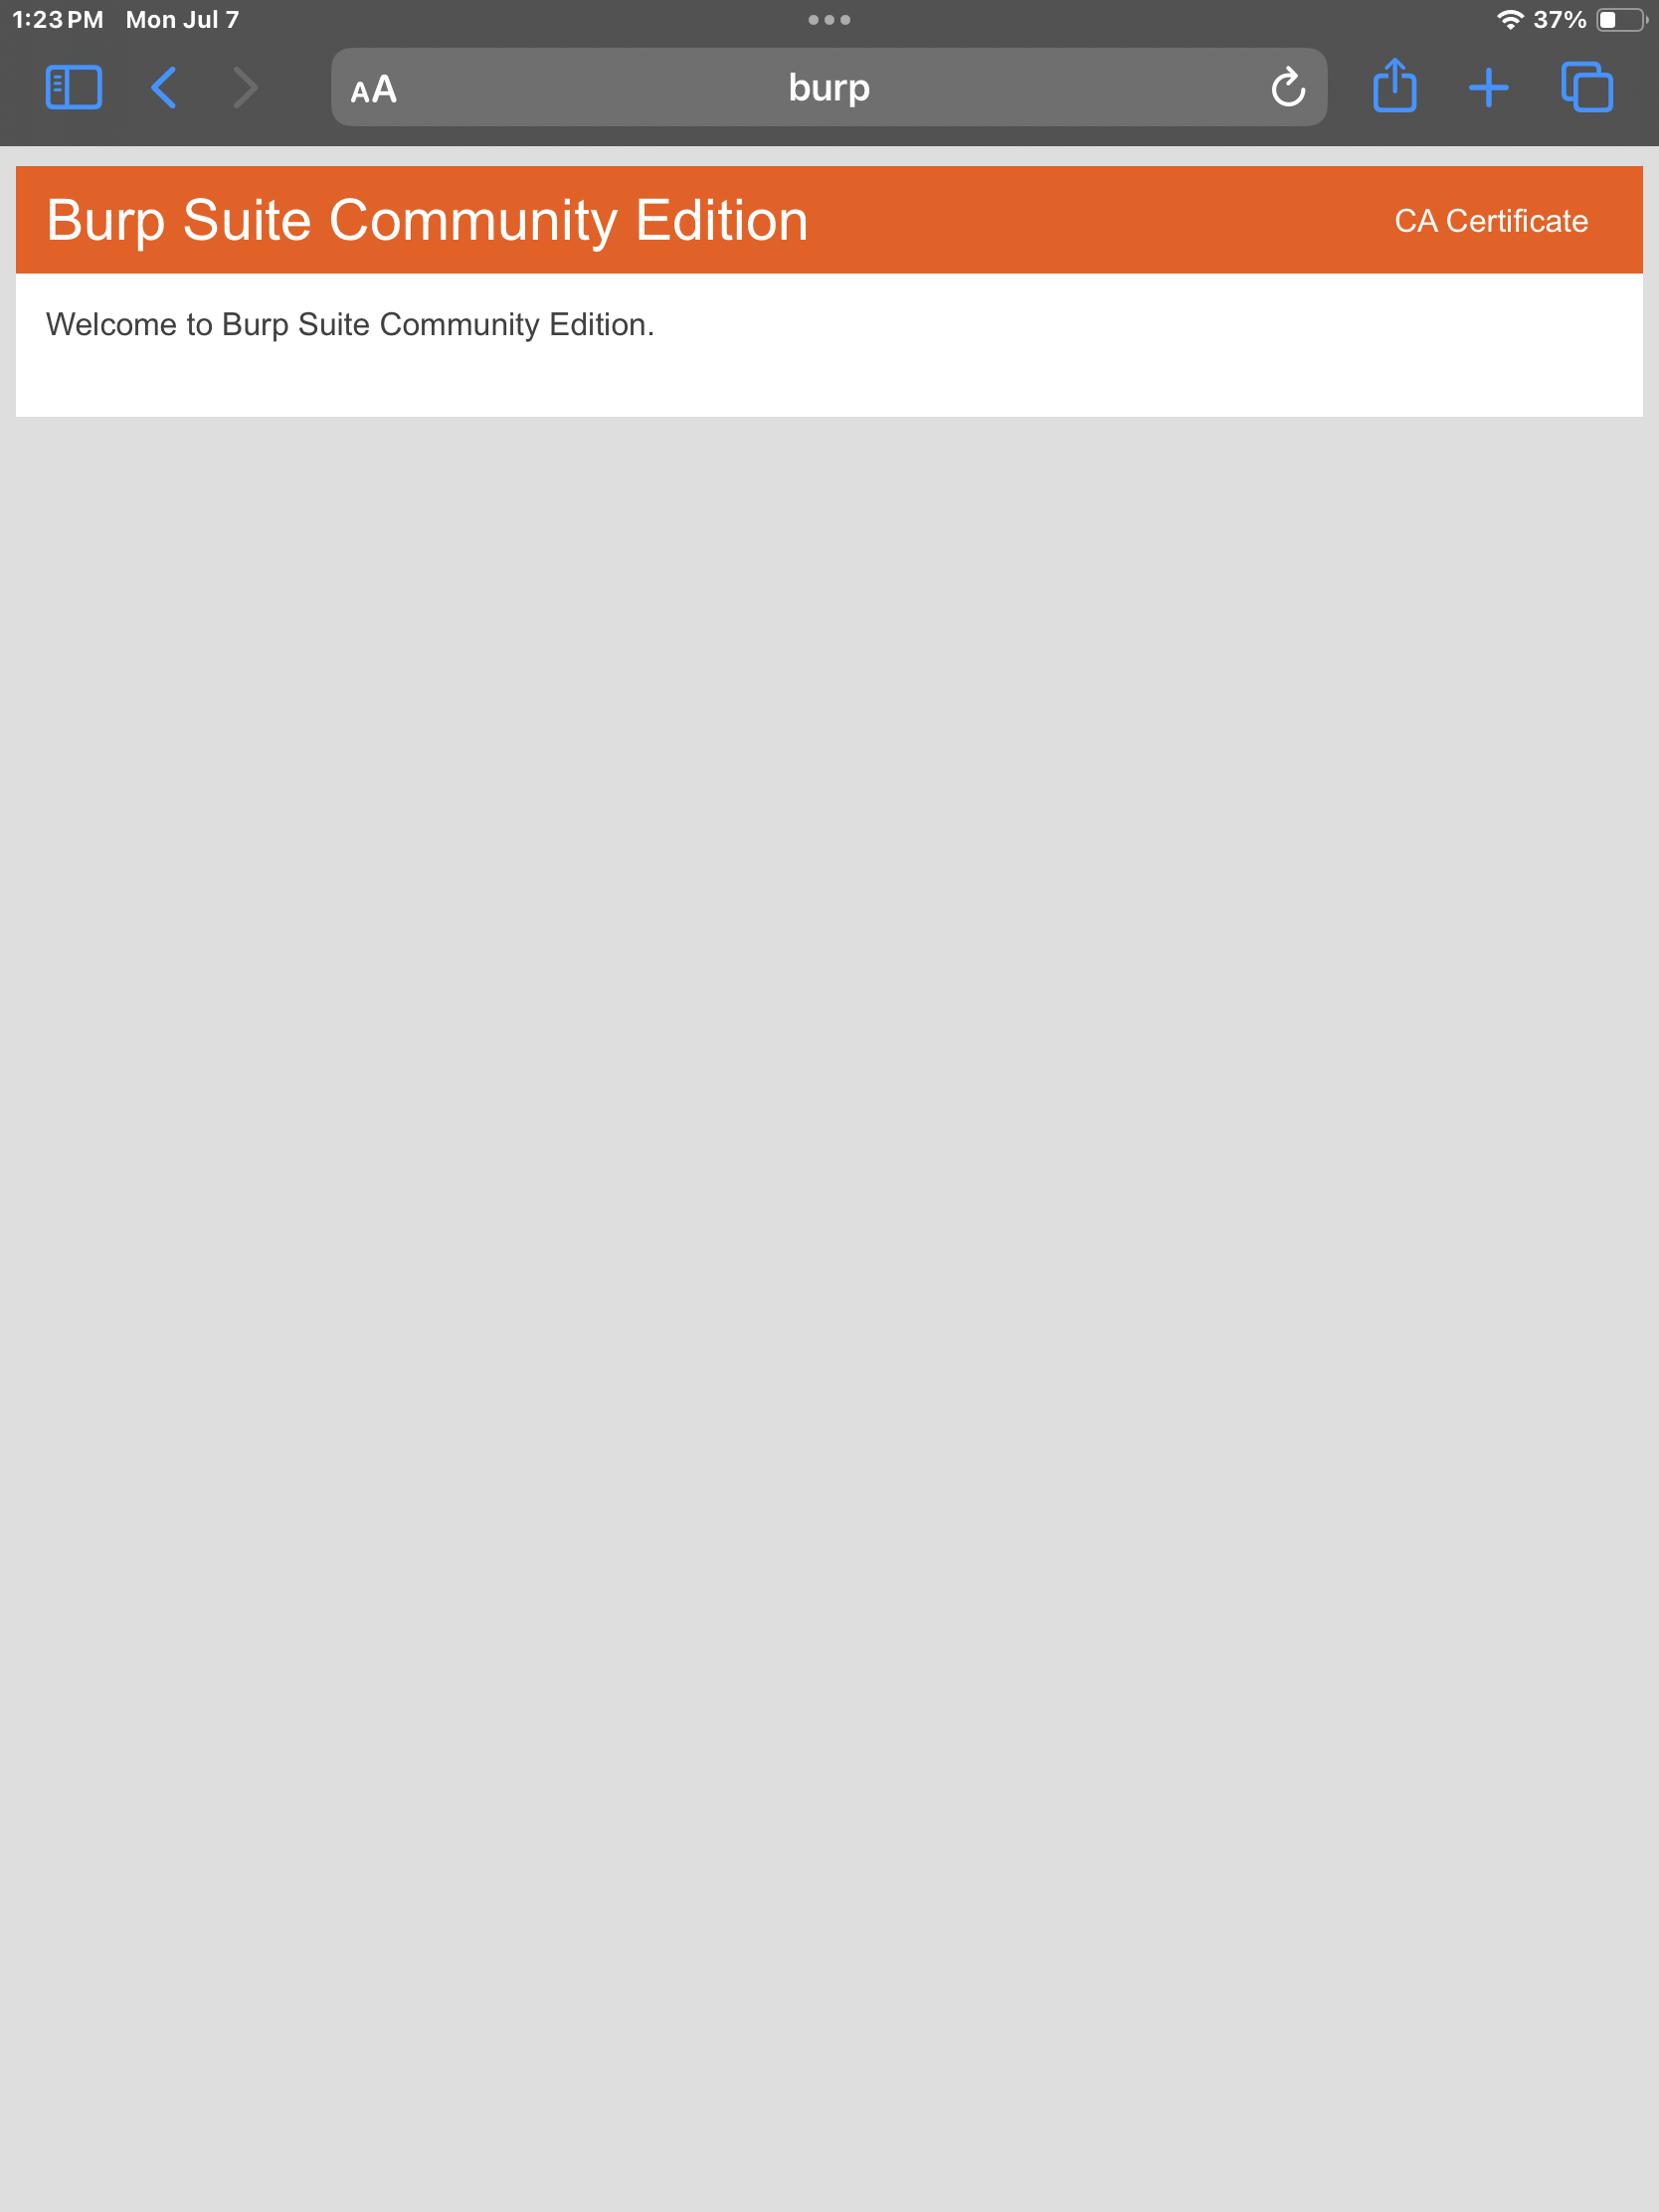
On the iPad, navigating to a web browser and going to http://burp should display the web page to download the CA Certificate.
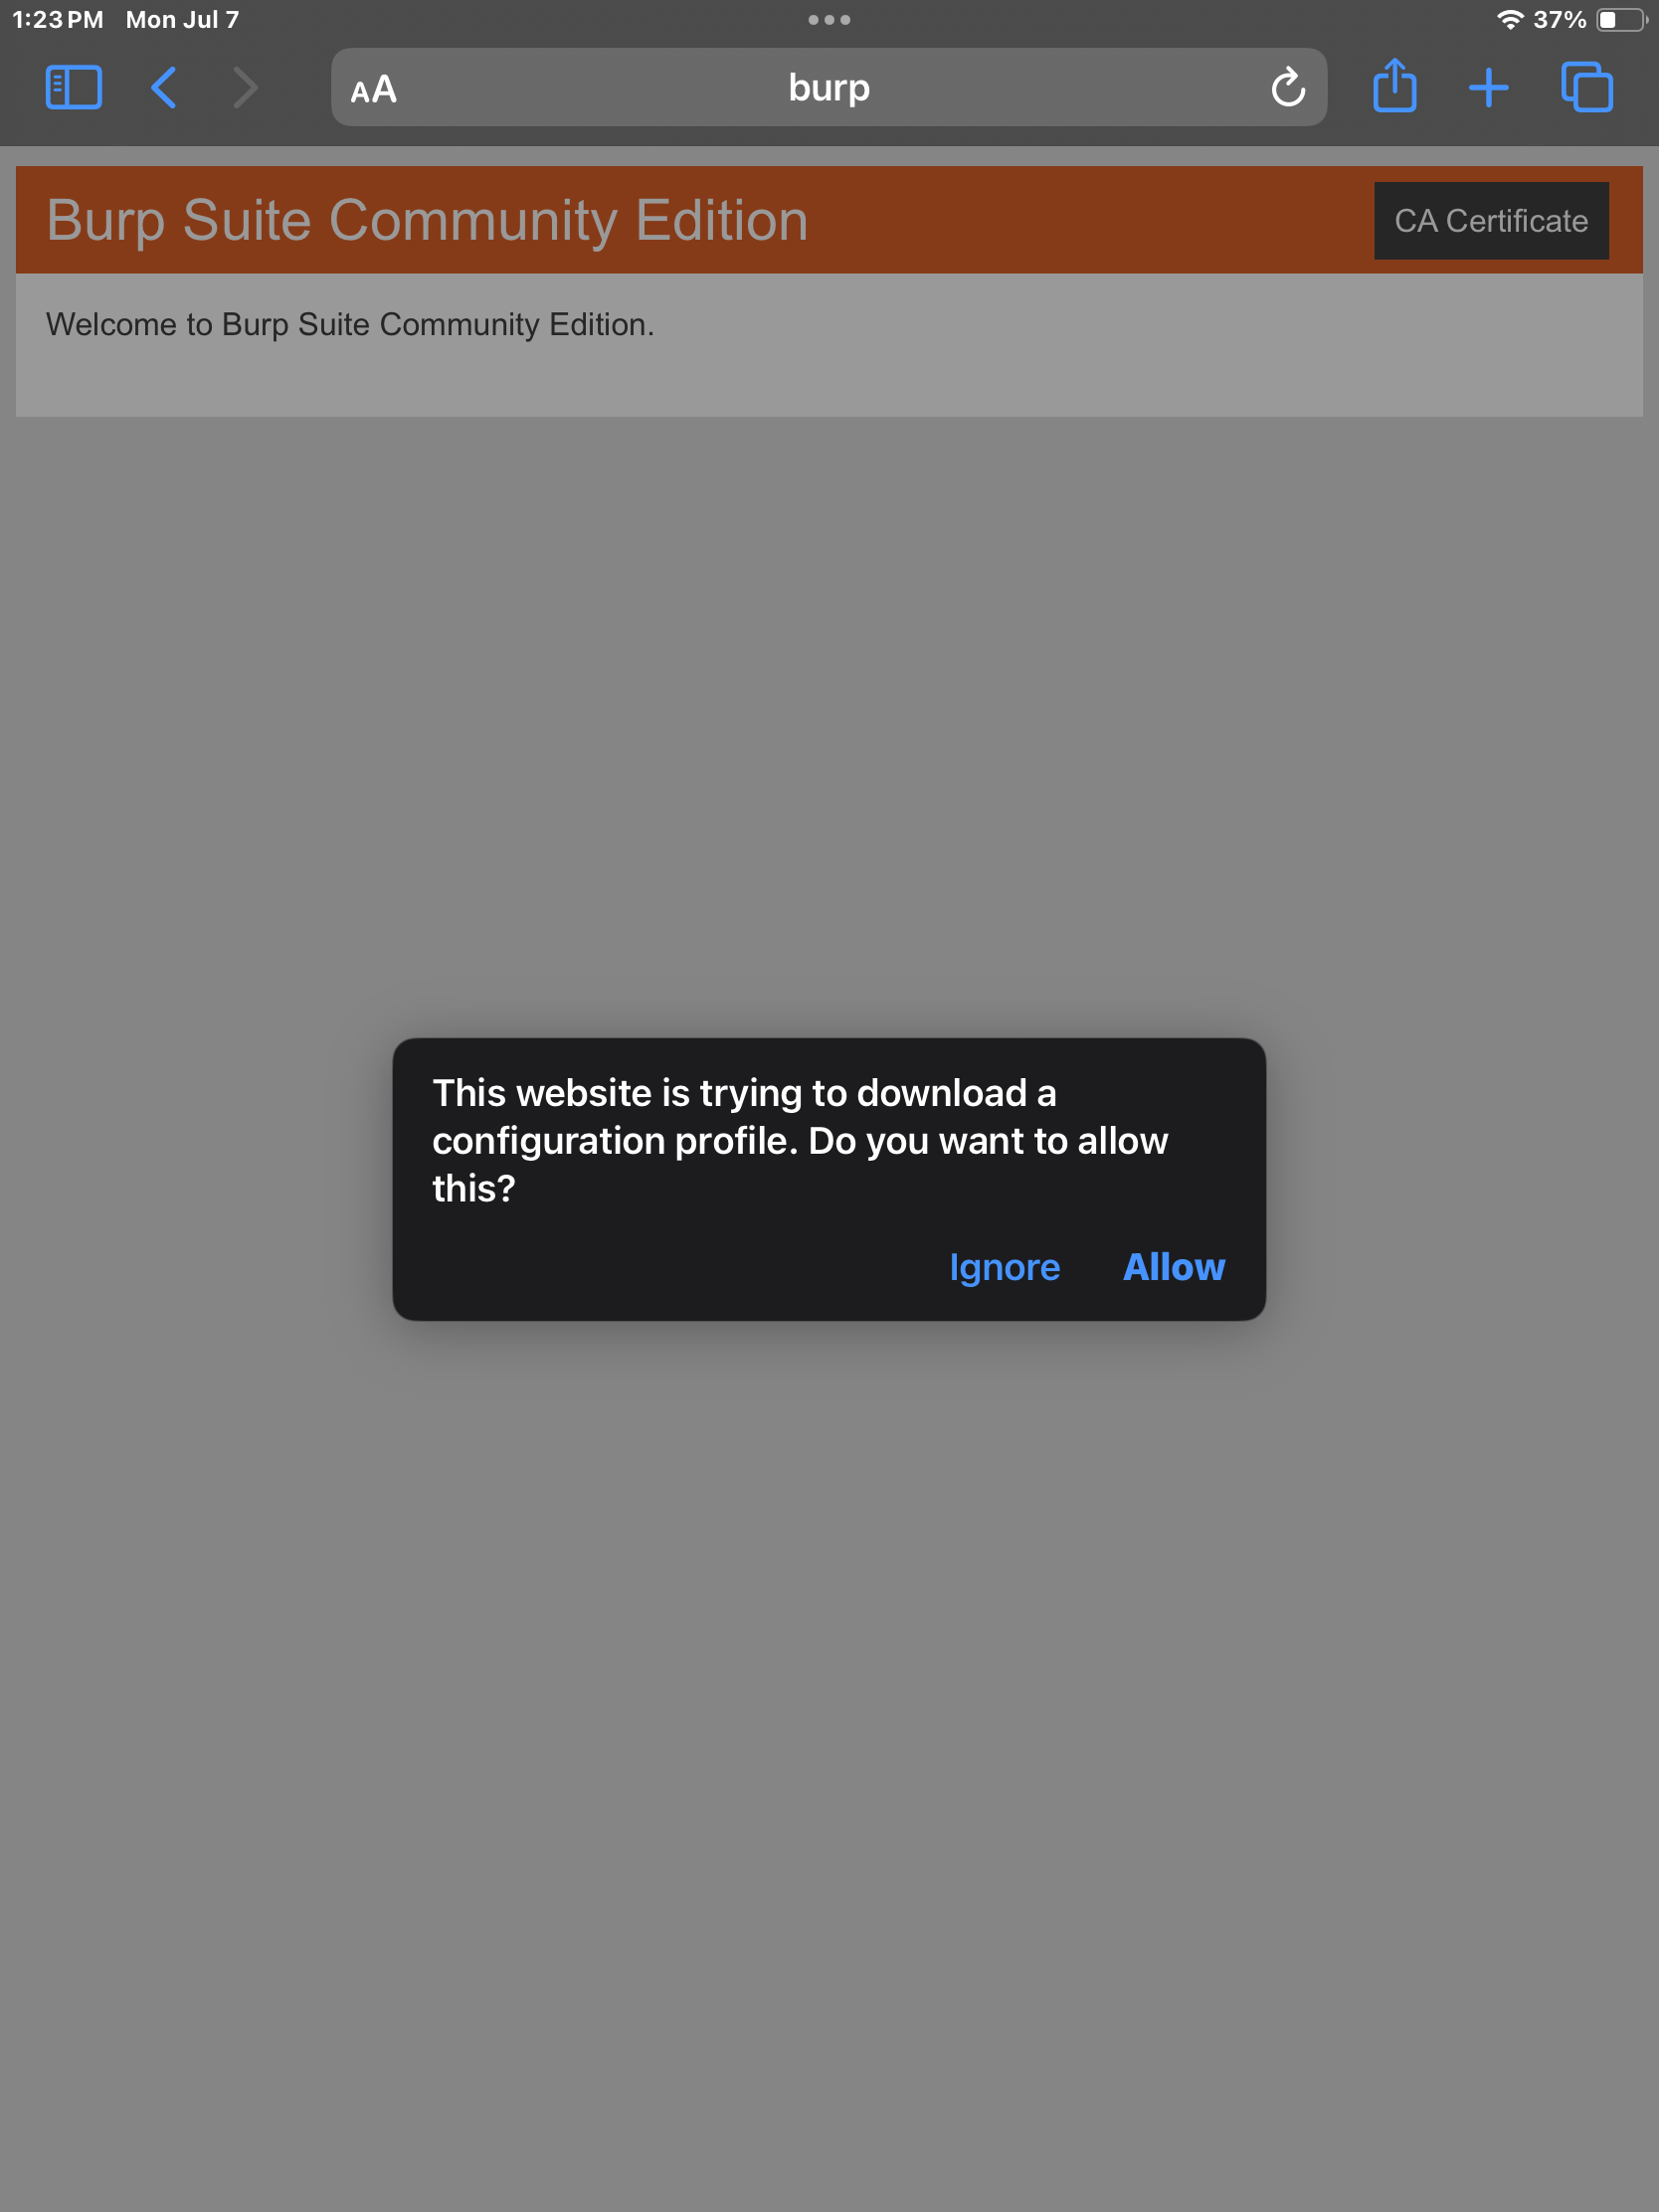
Clicking the CA Certificate button should allow you to download Burps Certificate. We can install this so the HTTPS traffic will go through Burp.
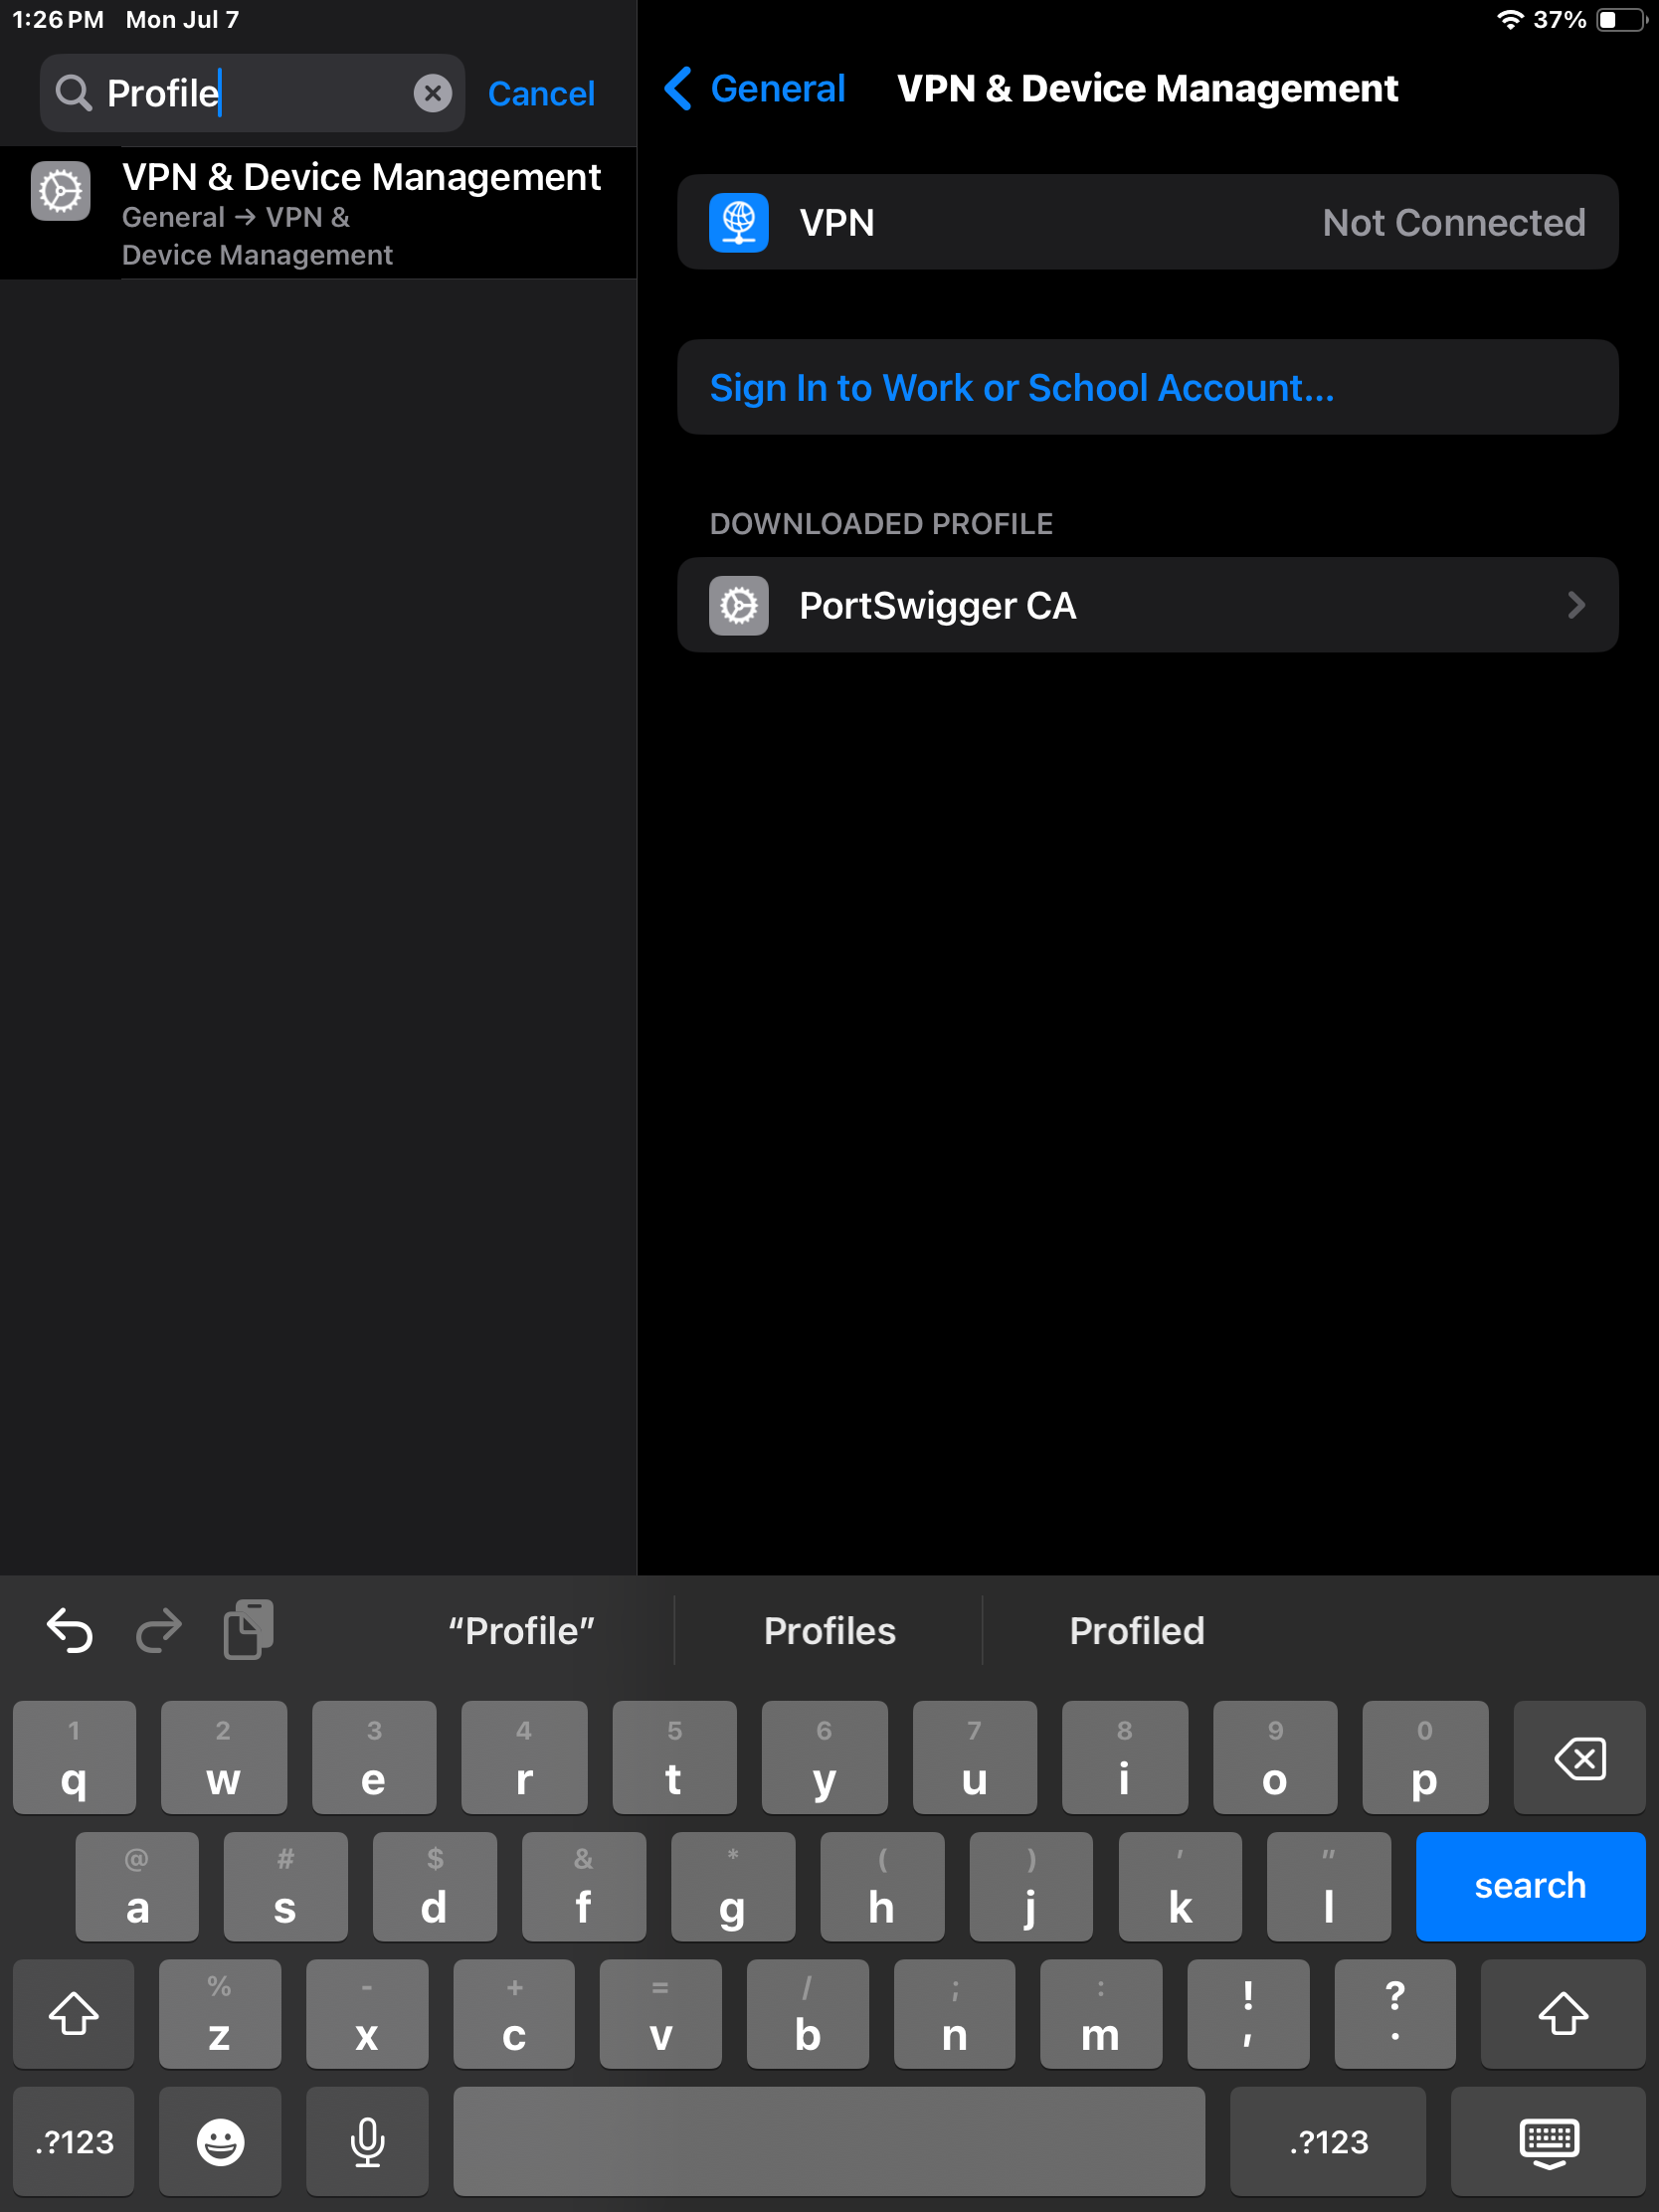
The next step is back in Settings. Navigate to the Downloaded Profile and install it. At the time of writing that is under VPN & Device Management.
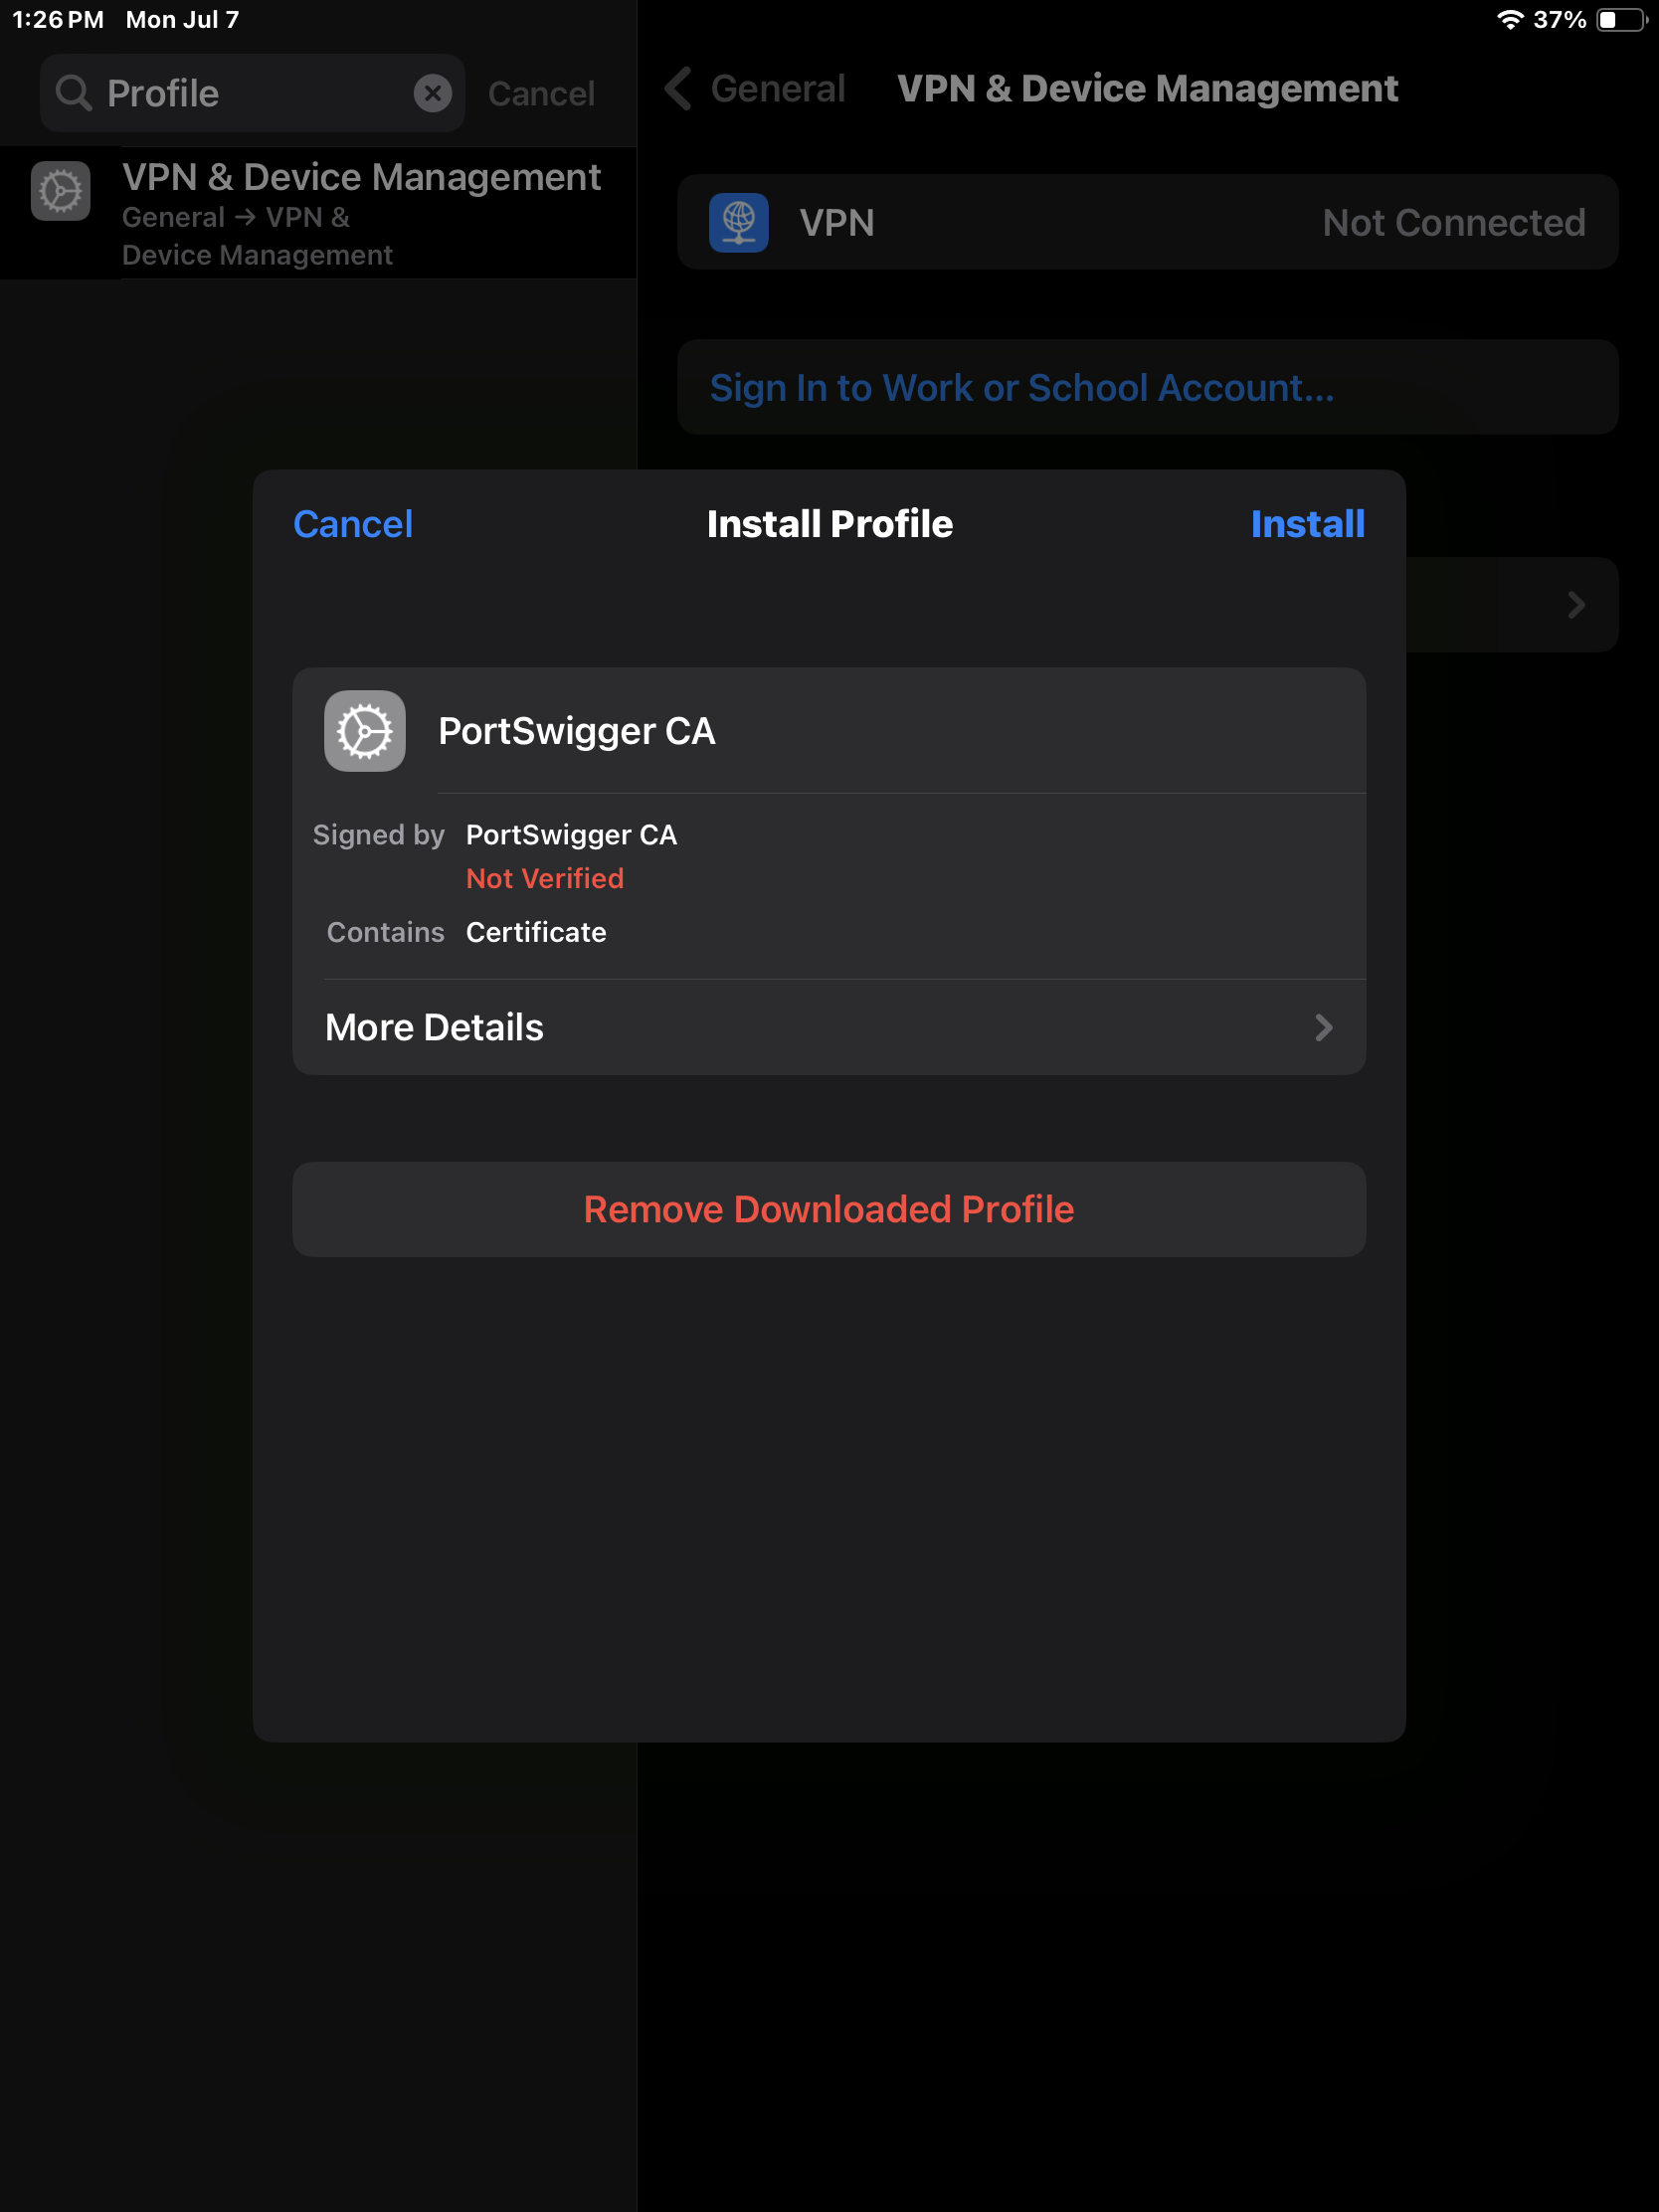
Clicking on the Certificate Profile will now prompt us to install the cert. Click Install.
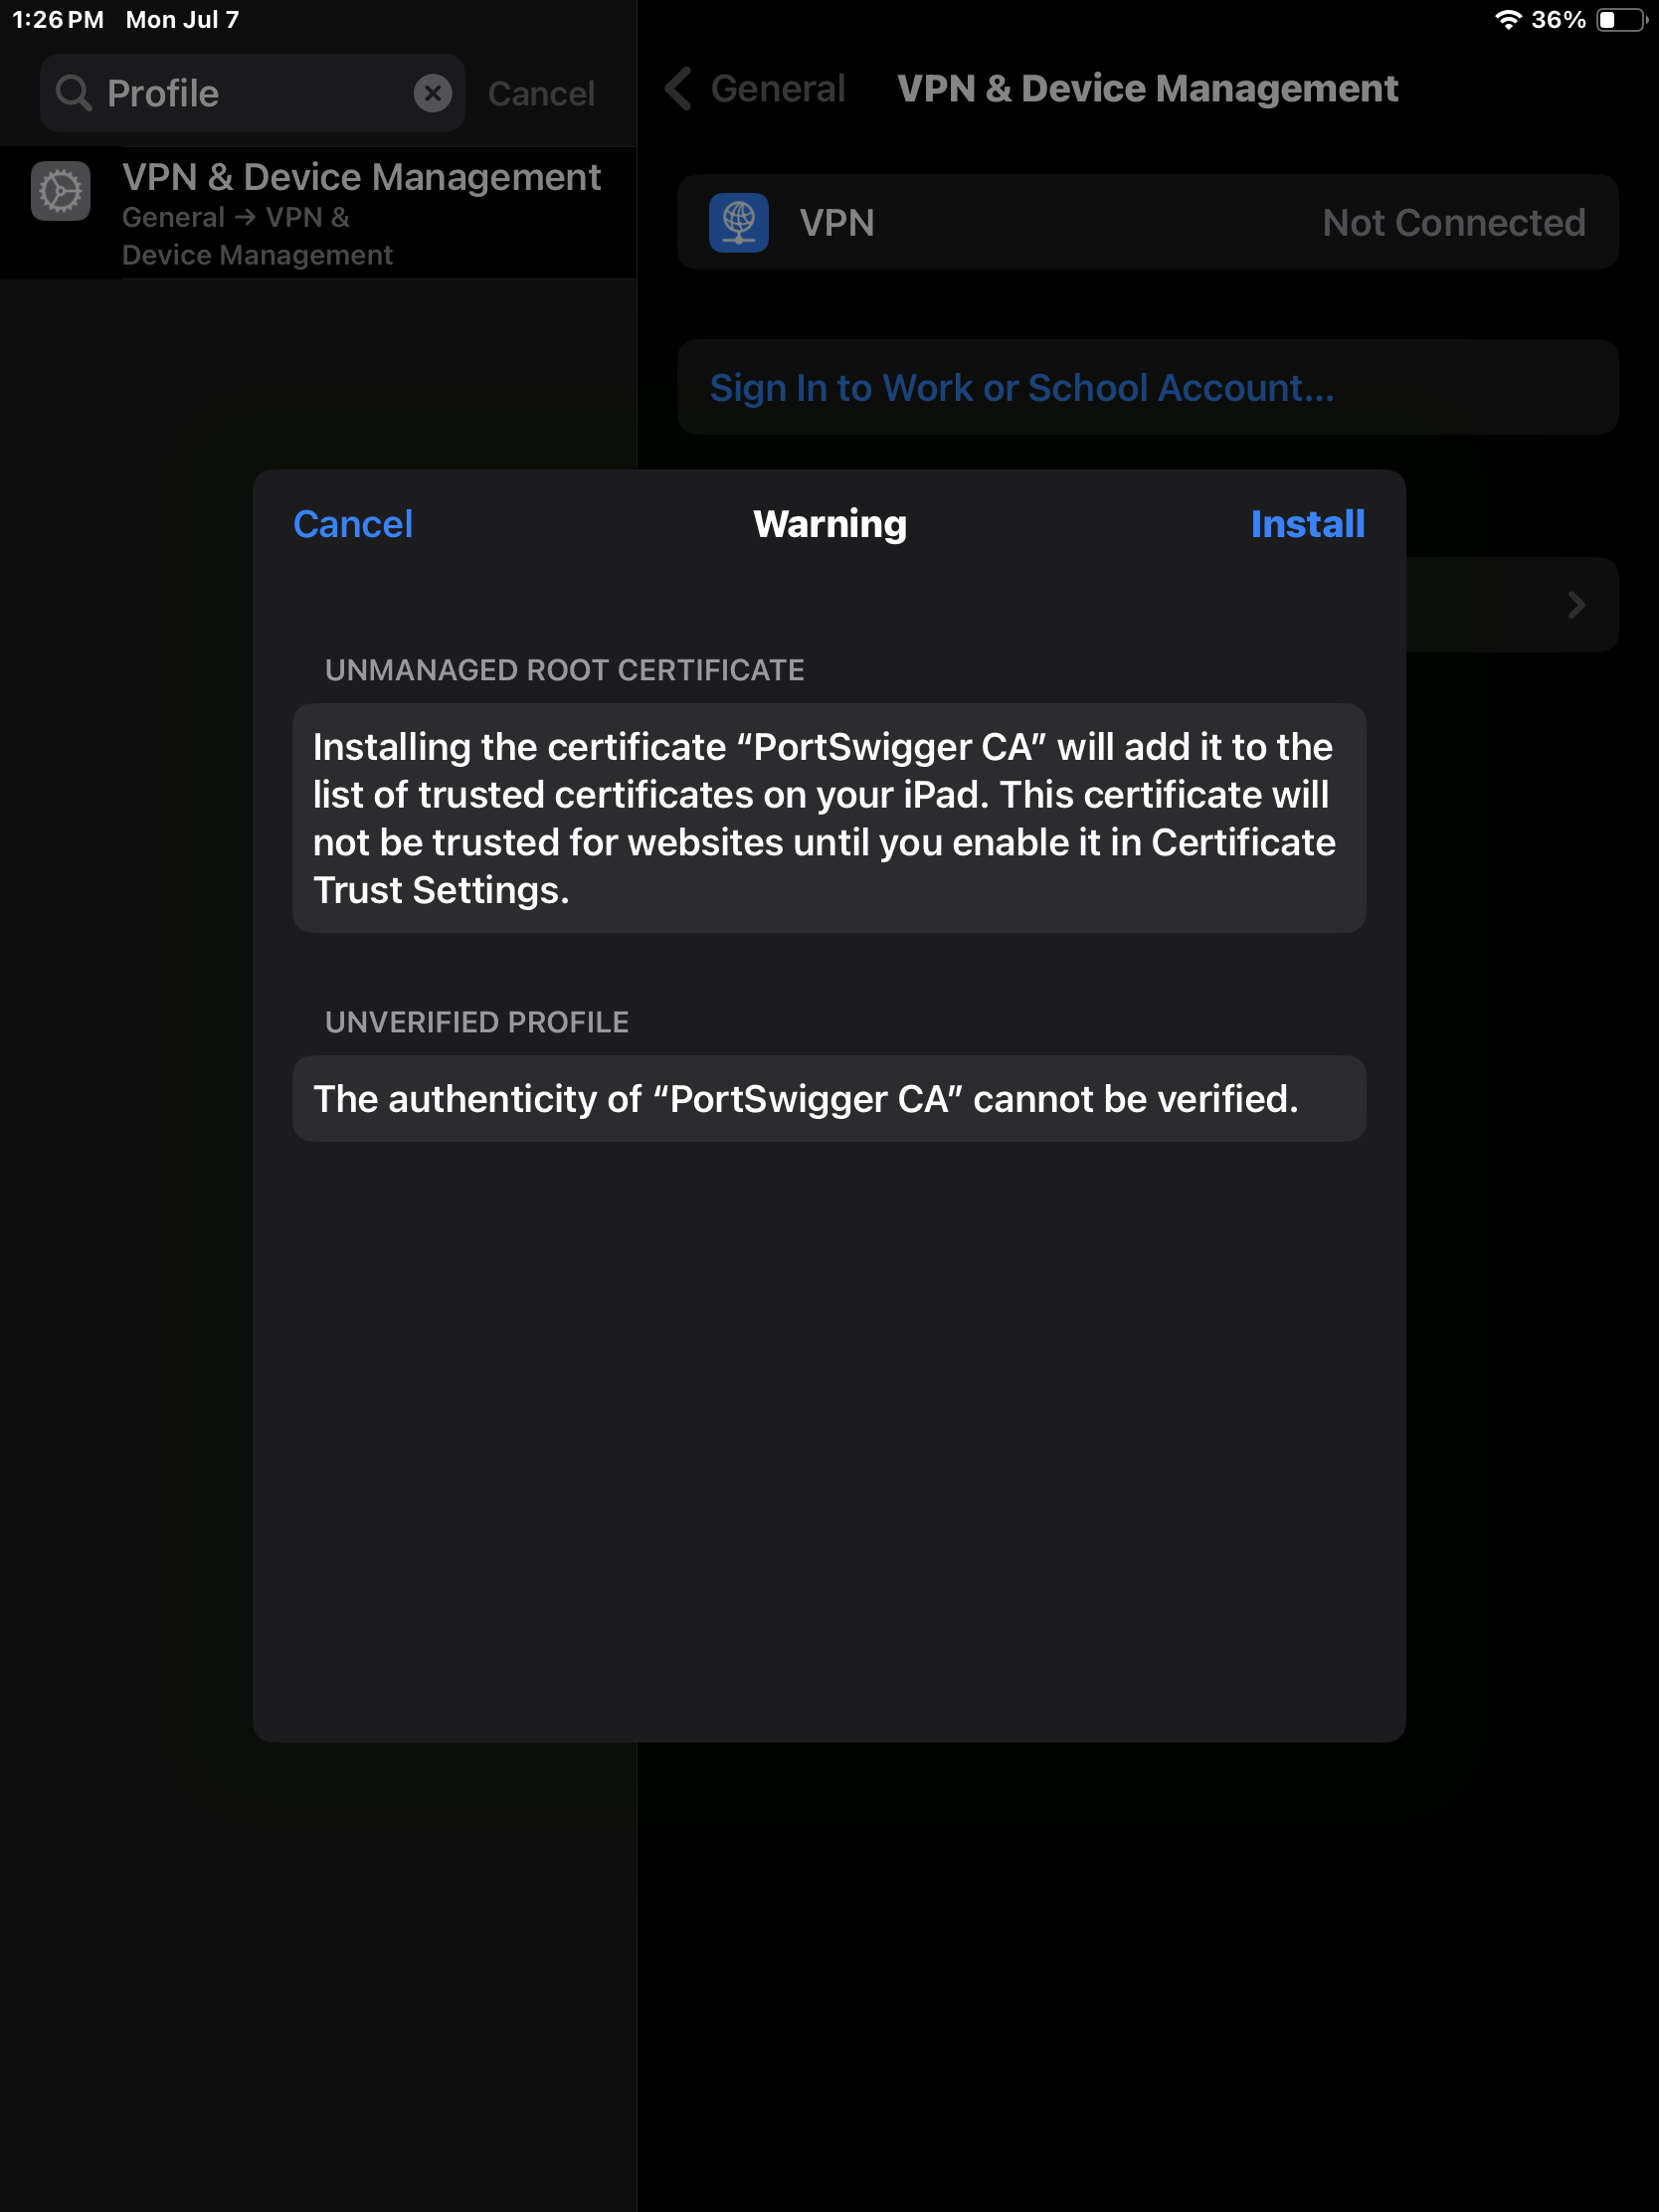
Now click Install again.
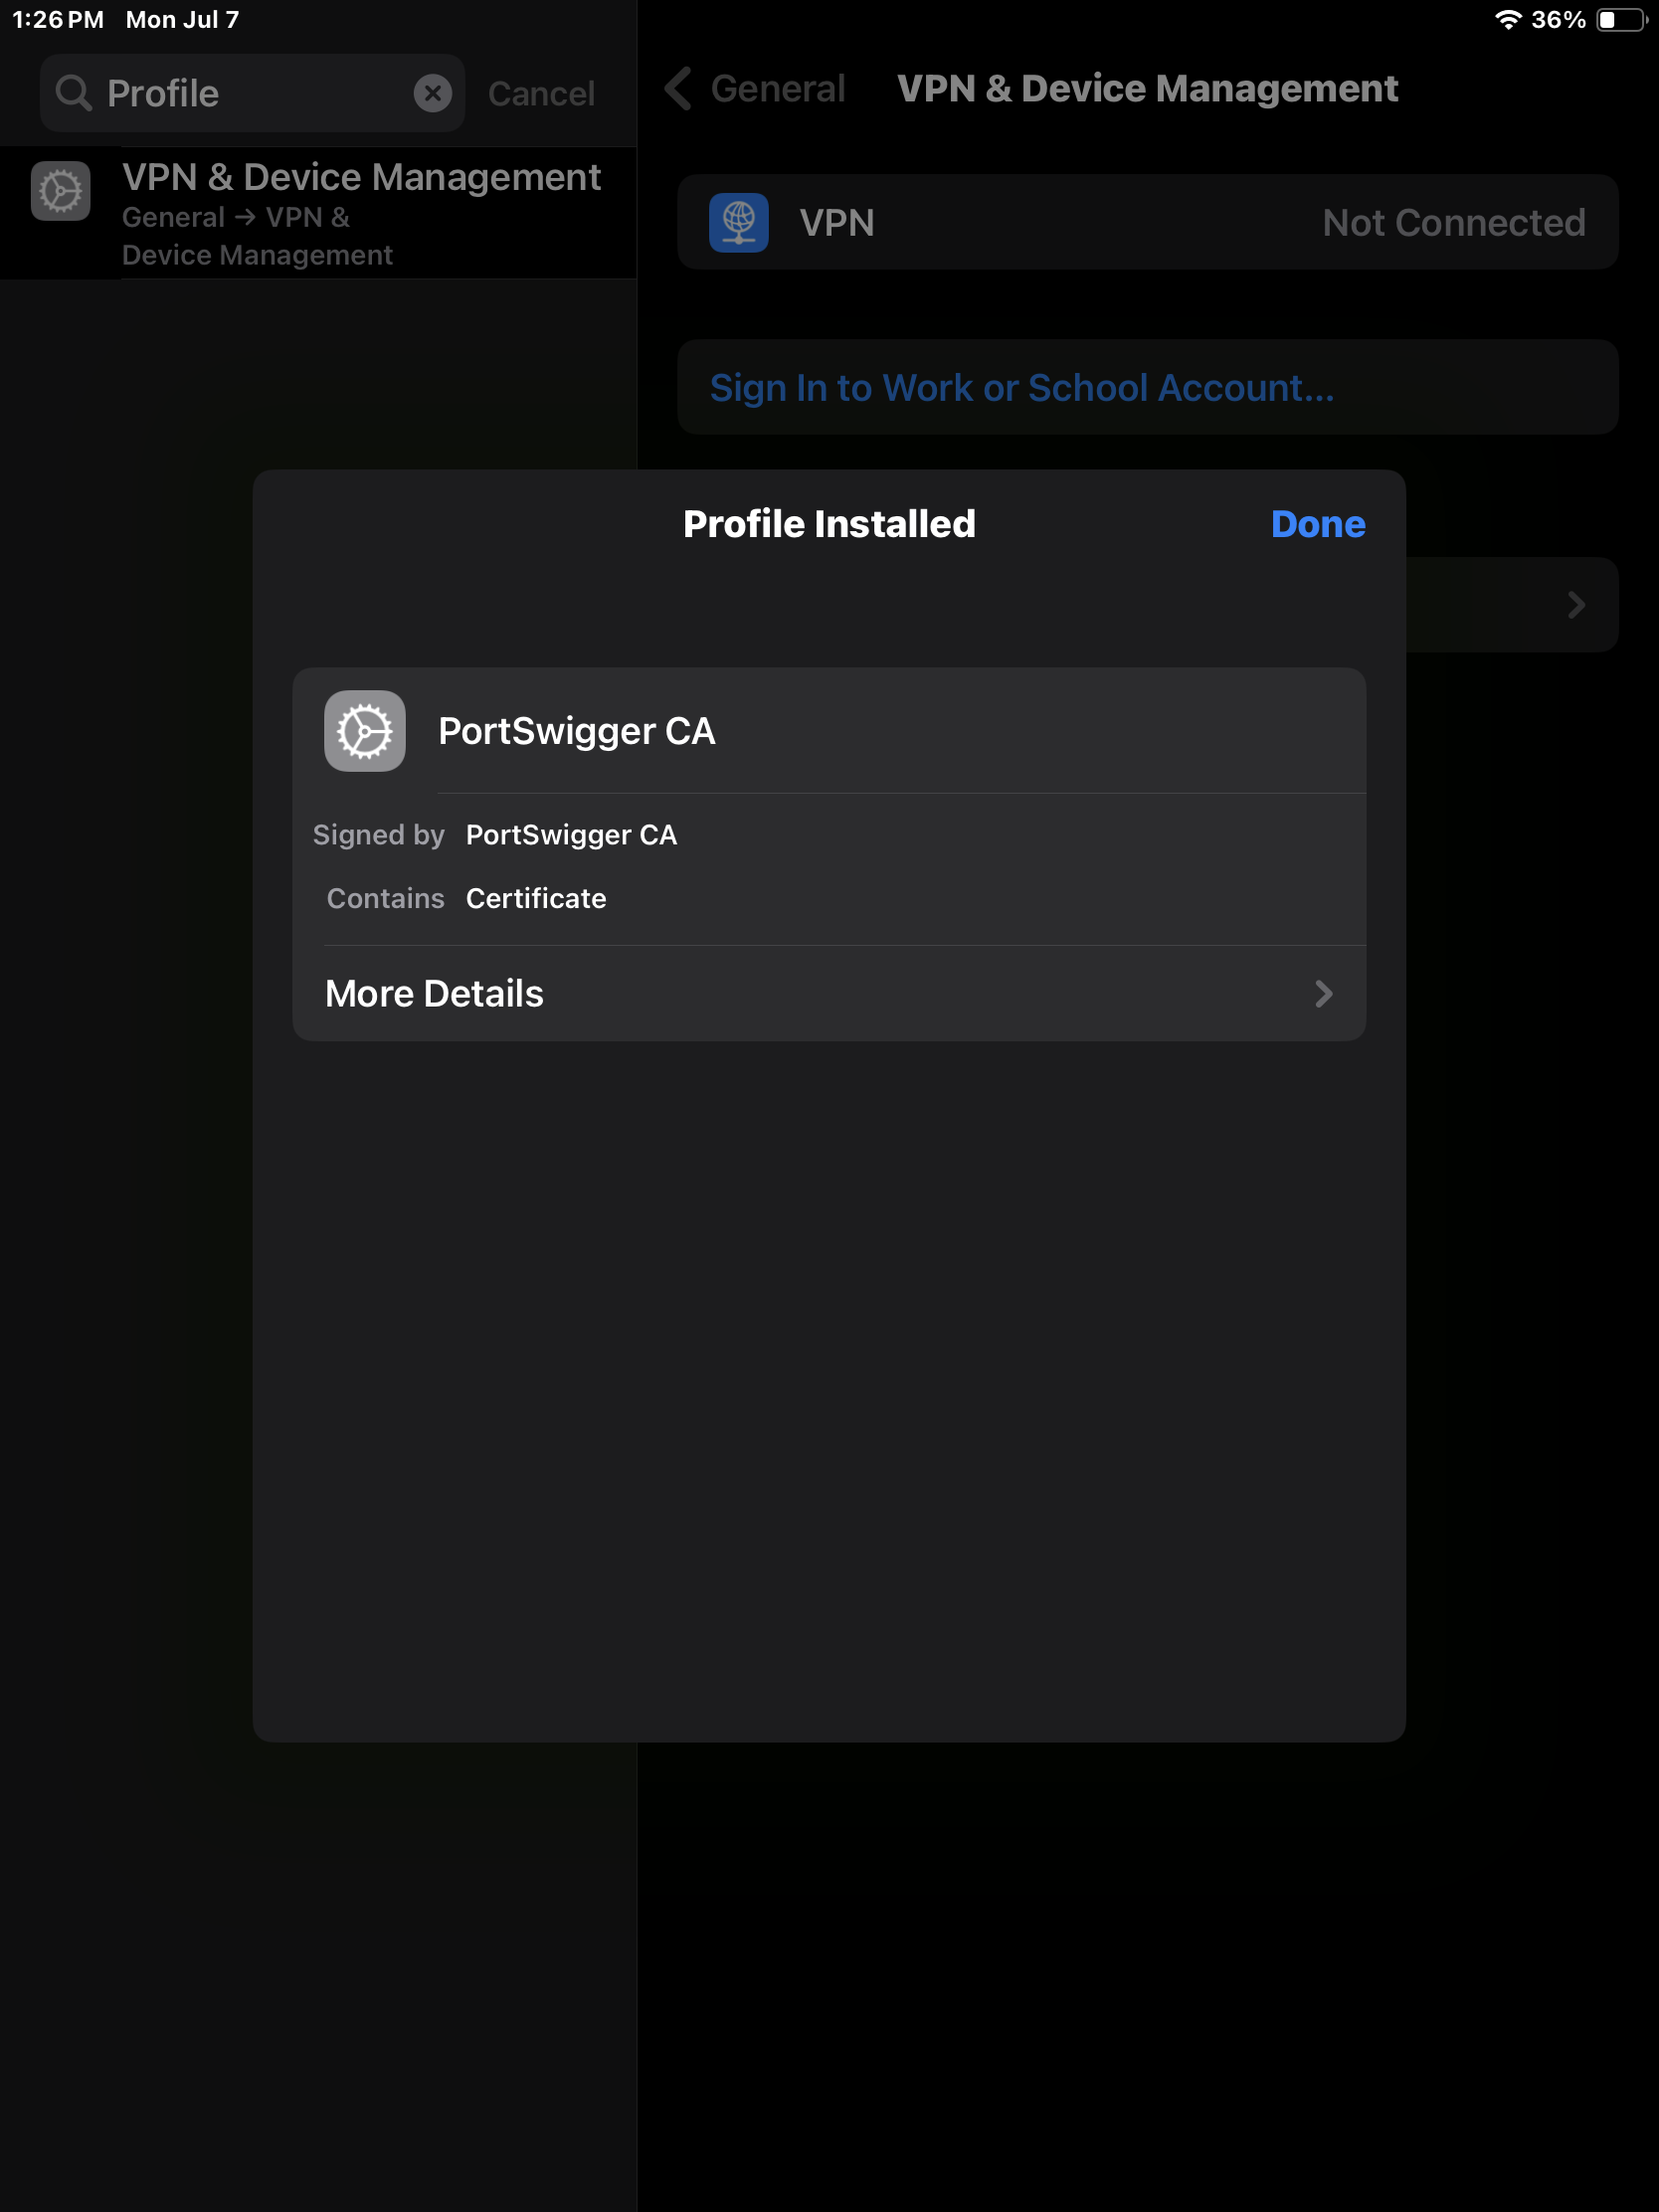
Our Burp Certificate should now be installed.
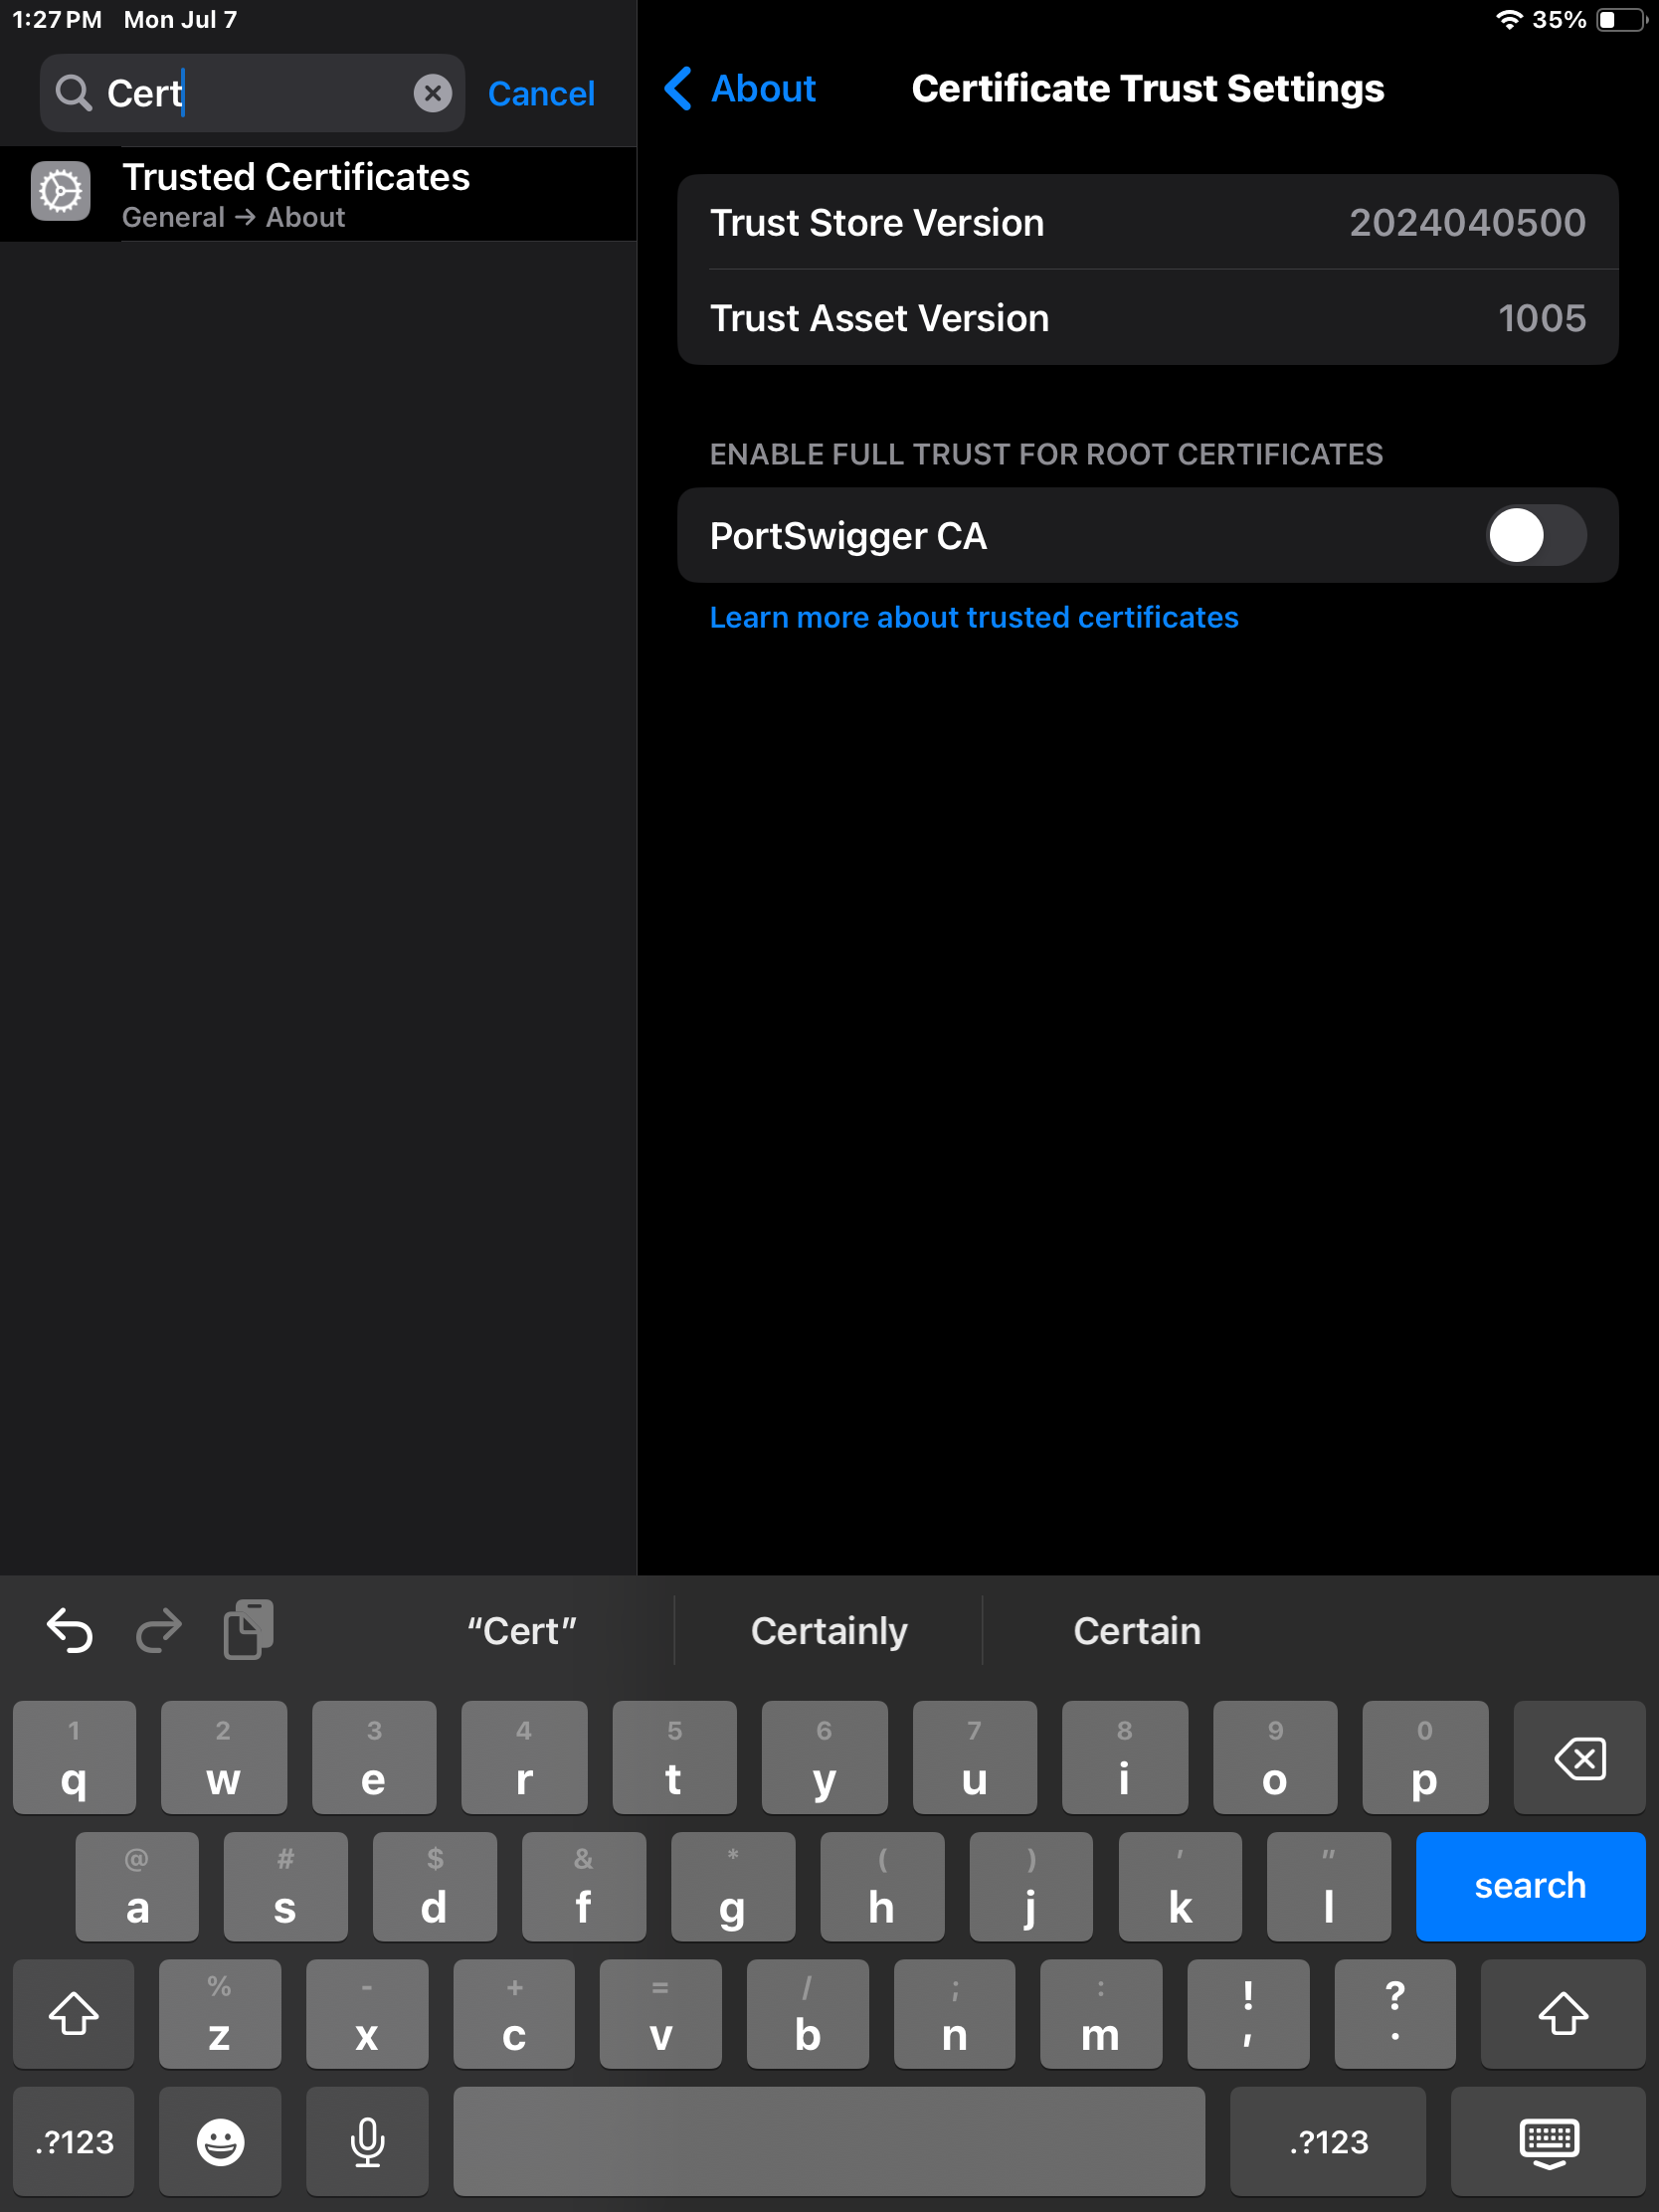
Finally, we need to navigate to Trusted Certificates and enable PortSwigger CA.
Click Continue.
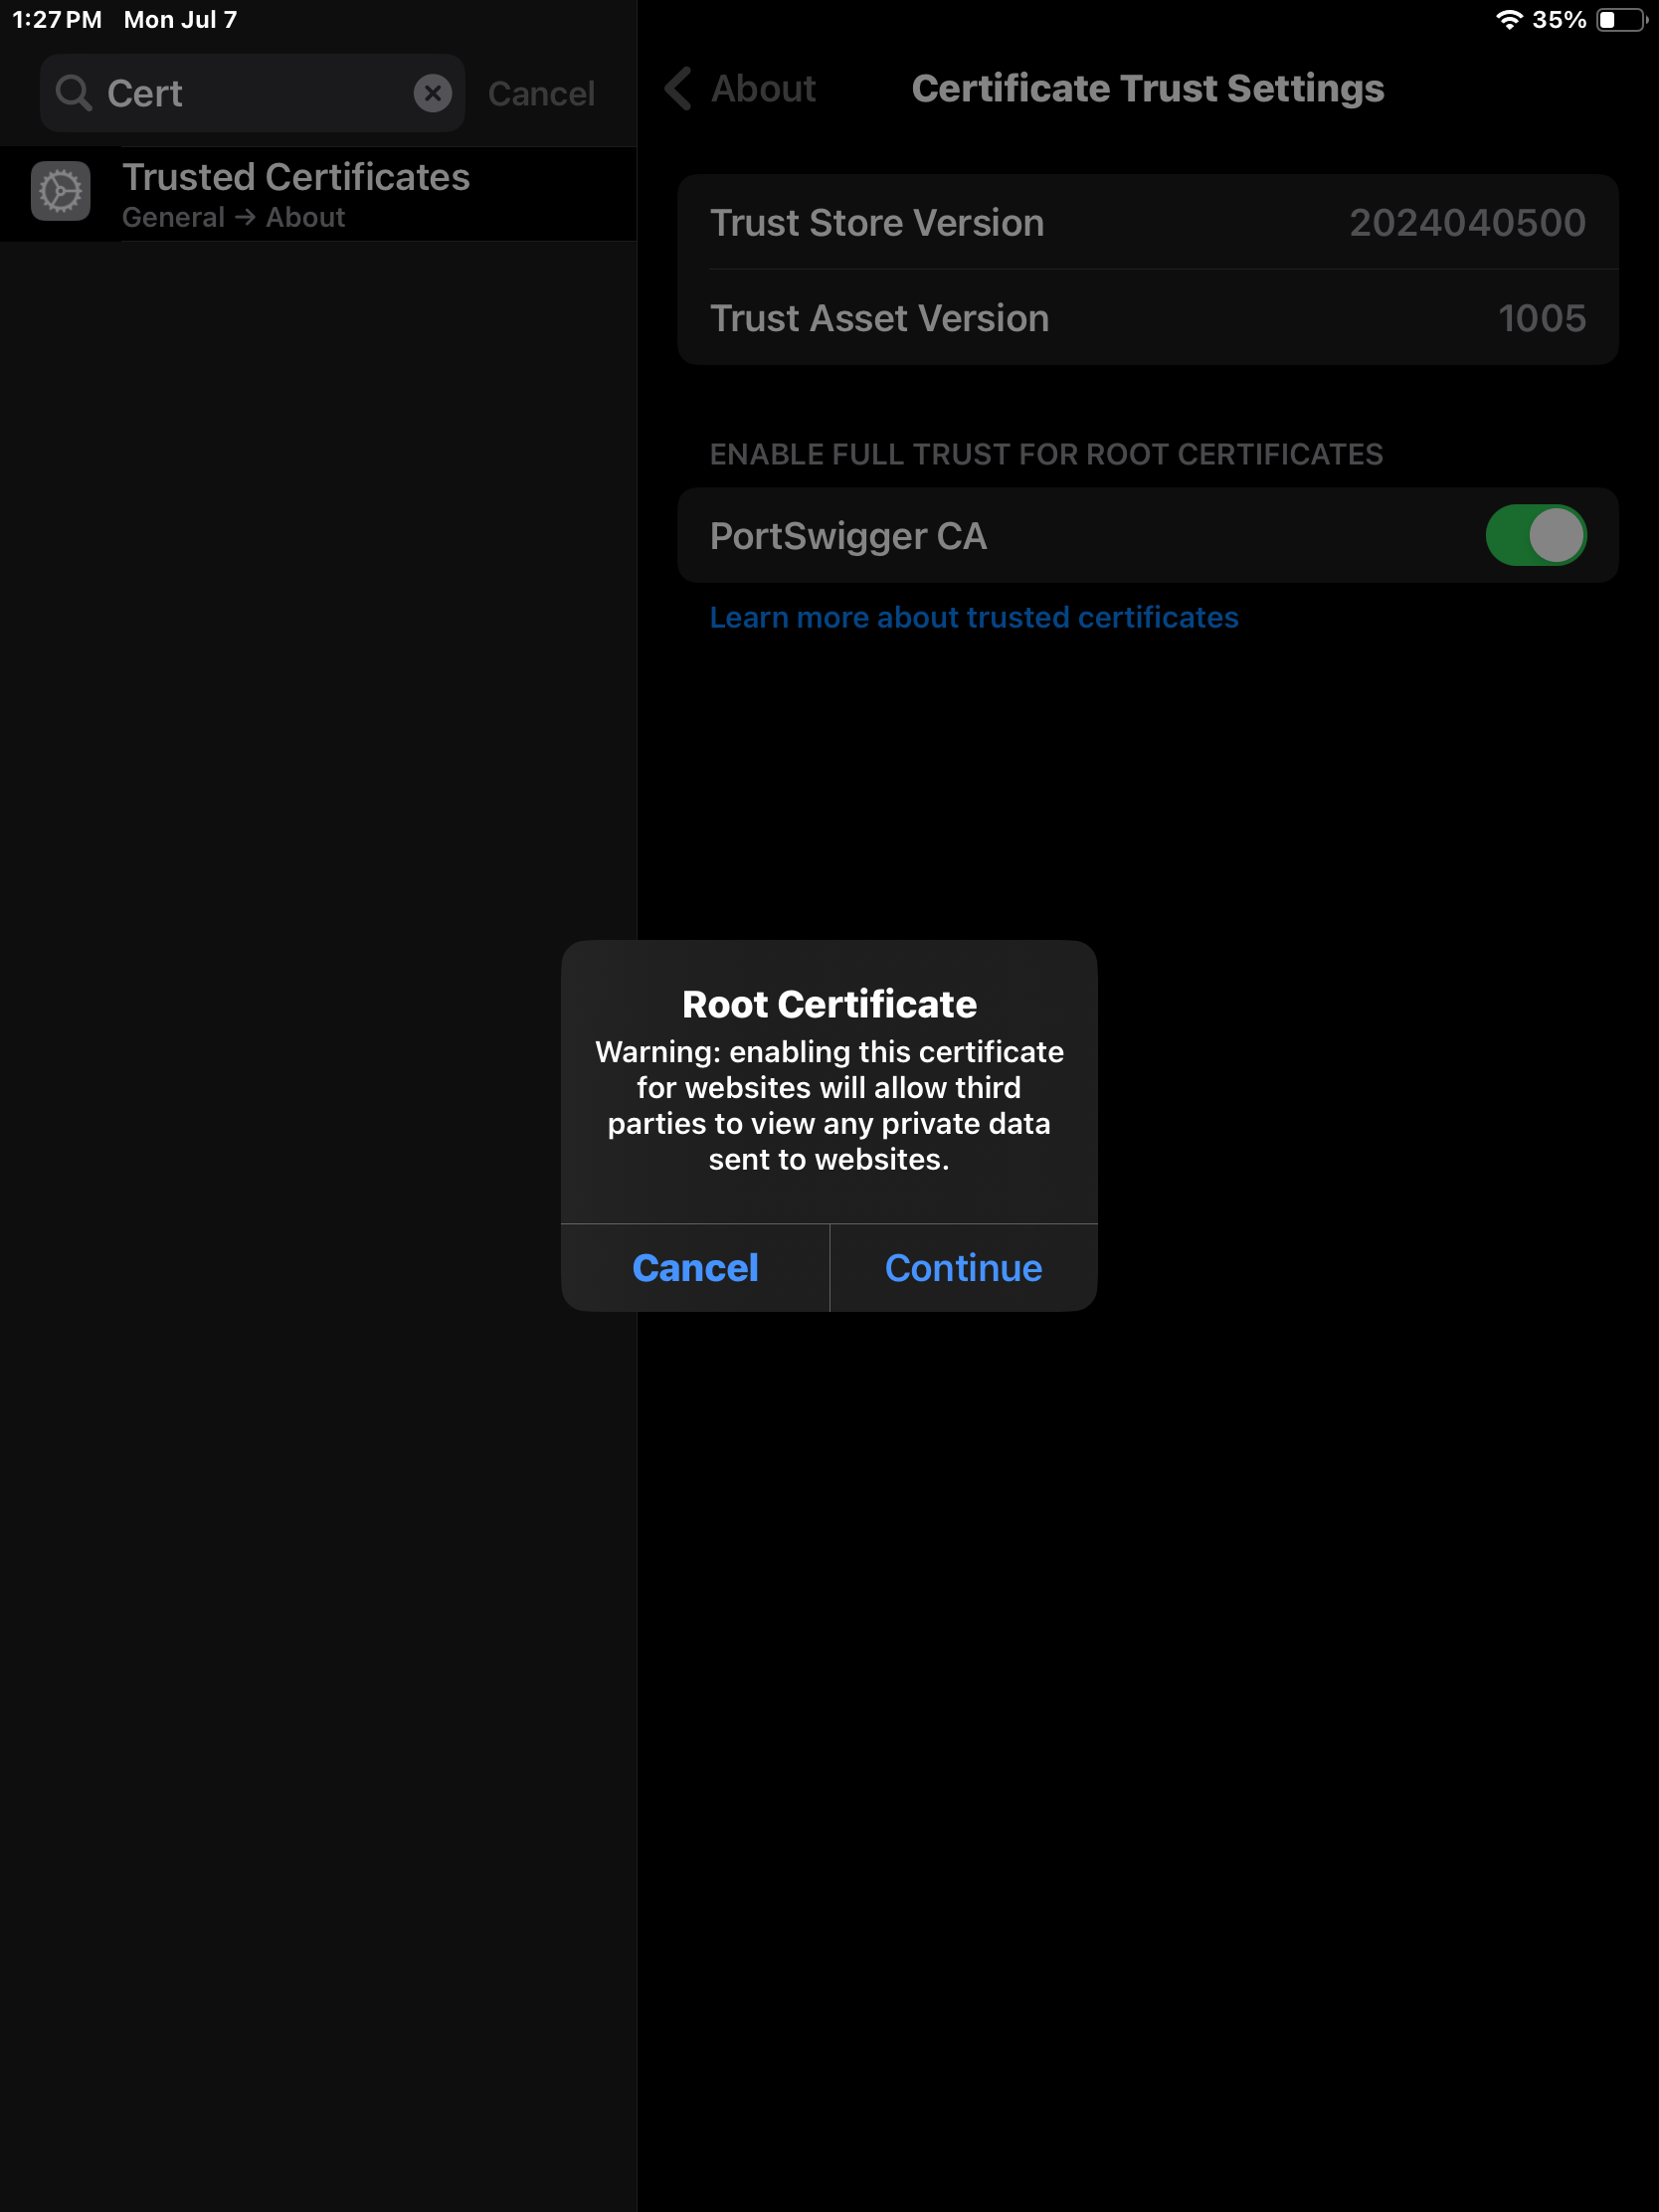
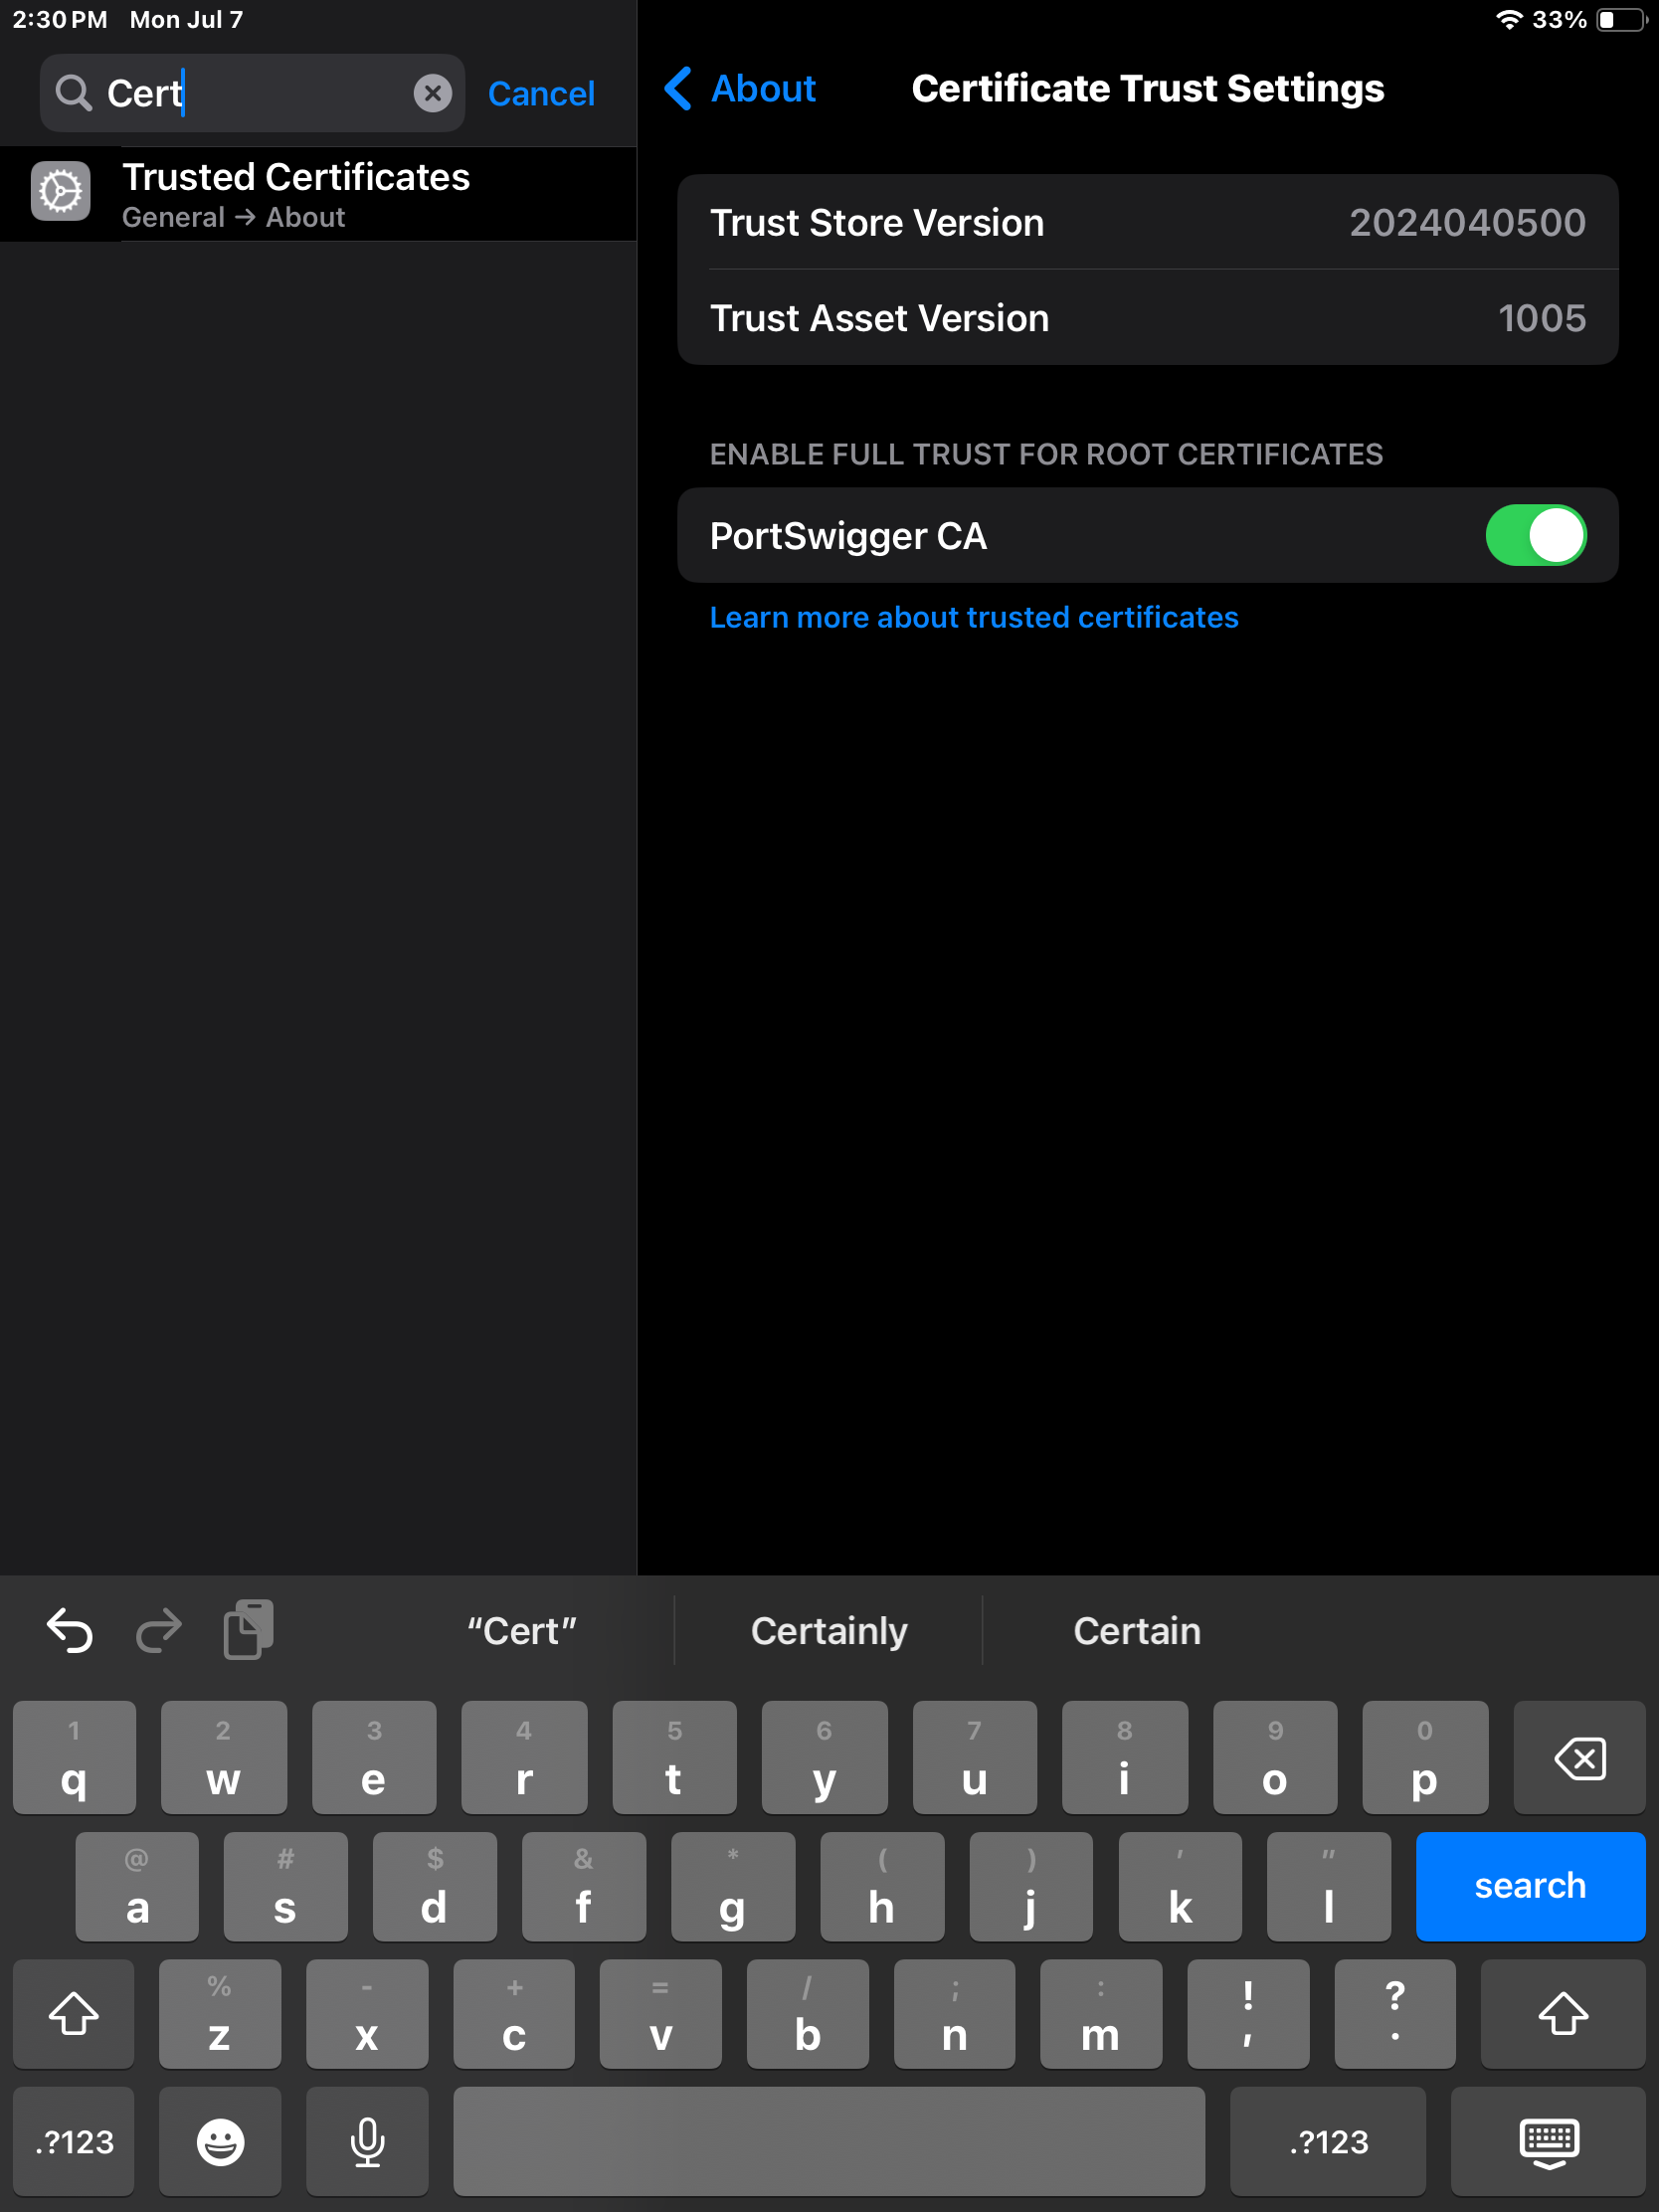
The Root Certificate should now be enabled and we can intercept HTTPS traffic through Burp Suite.
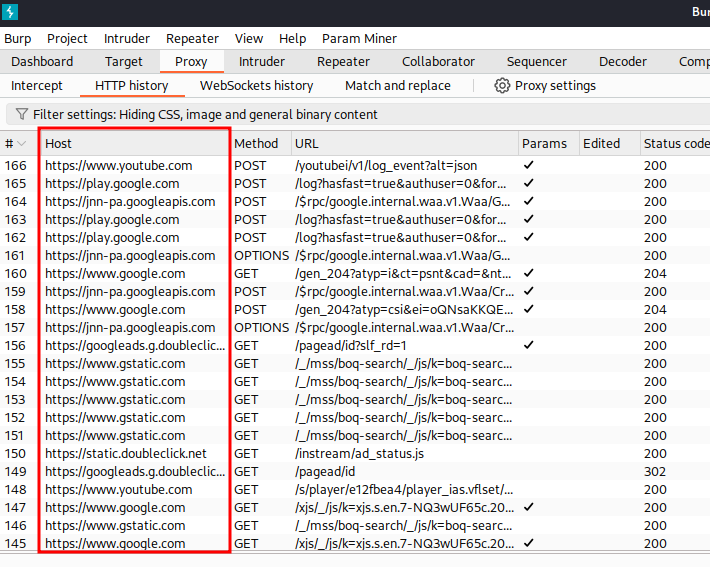
Back in Burp Suite and using a web browser on the iPad we should see secure network flowing through Burp.
That completes Configuring iOS Device with Burp Suite Guide. I hope you found value in this content.
Jarrod