
Leveraging Frida to Bypass Mobile Application Security Controls
At DEFCON 34 I gave a talk introducing Frida: what it is, what it’s capable of, and how to put it to work during a penetration test. In it, I walk through a recent engagement where I used Frida to run an application on a jailbroken device and bypass the app’s jailbreak detection. This blog is a reflection of that talk and content.
Reviewing The iOS Application
This application, named DarkBank, is based on a recent penetration test. Running on a jailbroken iPad, the app would detect the jailbreak on startup and display the message: “We have detected your device to be jailbroken which is not compatible with our app.” My goal was to get the application running on this jailbroken iPad, which uses palera1n. The Frida server is already installed on the iPad.
What is Frida
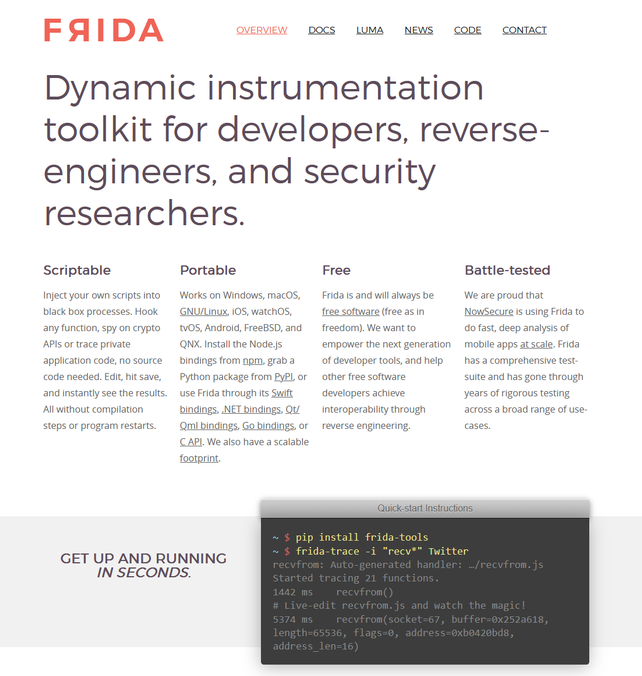
Frida is an open-source dynamic instrumentation toolkit that enables developers, reverse engineers, and security researchers to inspect, intercept, and modify the behavior of running applications in real time. By injecting JavaScript-based hooks into native or managed processes, Frida provides deep visibility into function calls, memory, APIs, and system interactions without requiring access to the application’s source code or rebuilding the target binary.
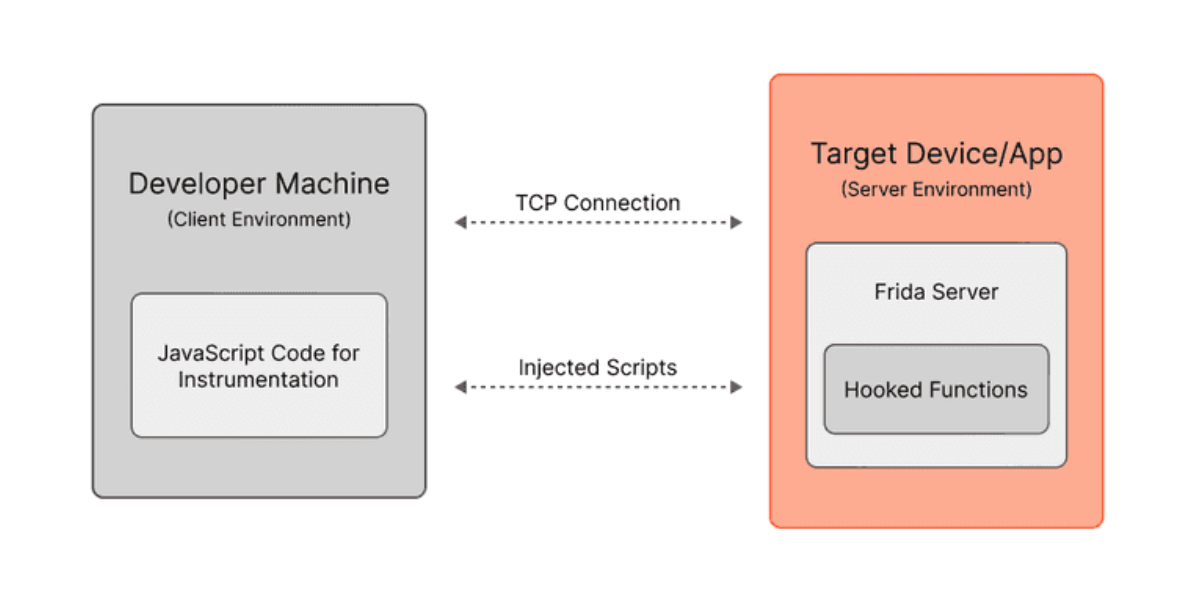
Frida follows a client-server architecture. On the developer machine, you write JavaScript instrumentation code that defines which functions to observe or modify. This script is sent to the Frida server running on the target device, which attaches to or spawns the target process and injects the Frida agent into it. The injected agent then executes the JavaScript within the context of the target process.
Once loaded, the agent enables hooks that intercept function calls and observe or modify application behavior at runtime without changing the application’s binary on disk.
Enumerating The Application
The video below runs frida-ps -Uai and shows the output once connected to the jailbroken iPad. It lists all the applications on the device, including their names, identifiers, and PIDs.
This was just to make sure communication with the iPad was established.
The first script I wrote enumerates the classes found in com.darkbank.defcon.
if (ObjC.available) checks whether the Objective-C runtime is present in the target process, a quick confirmation that Frida has attached to an Objective-C app. If true, it logs a success message and the for loop iterates over ObjC.classes, a live listing of every Objective-C class currently loaded in the process, printing each class name to the console. If the runtime isn’t available, the else branch runs instead, logging that Objective-C wasn’t detected so you know not to go further.
if(ObjC.available){
    console.log("[+] Successfully Connected and Detected Objective-C");
    for (const className in ObjC.classes){
        console.log(className);
    }
}
else{
    console.log("[-] Objective-C not available");
}
The video below shows the results from running the script above with frida -U -l list_classes.js -f com.darkbank.defcon
Because the output was too much to go through I decided to filter for a specific term and used a regex filter of /jailb.+/i. The only change below is adding a regex variable and matching against it with className.match(regex).
if(ObjC.available){
    console.log("[+] Successfully Connected and Detected Objective-C");
    const regex = /jailb.+/i;
    for (const className in ObjC.classes){
        if(className.match(regex)){
            console.log(className);
        }
    }
}
else{
    console.log("[-] Objective-C not available");
}
The video below shows the results from running the script above with frida -U -l list_classes_filter.js -f com.darkbank.defcon.
The script discovered IOSSecuritySuite, so I decided to look more into that.
IOSSecuritySuite
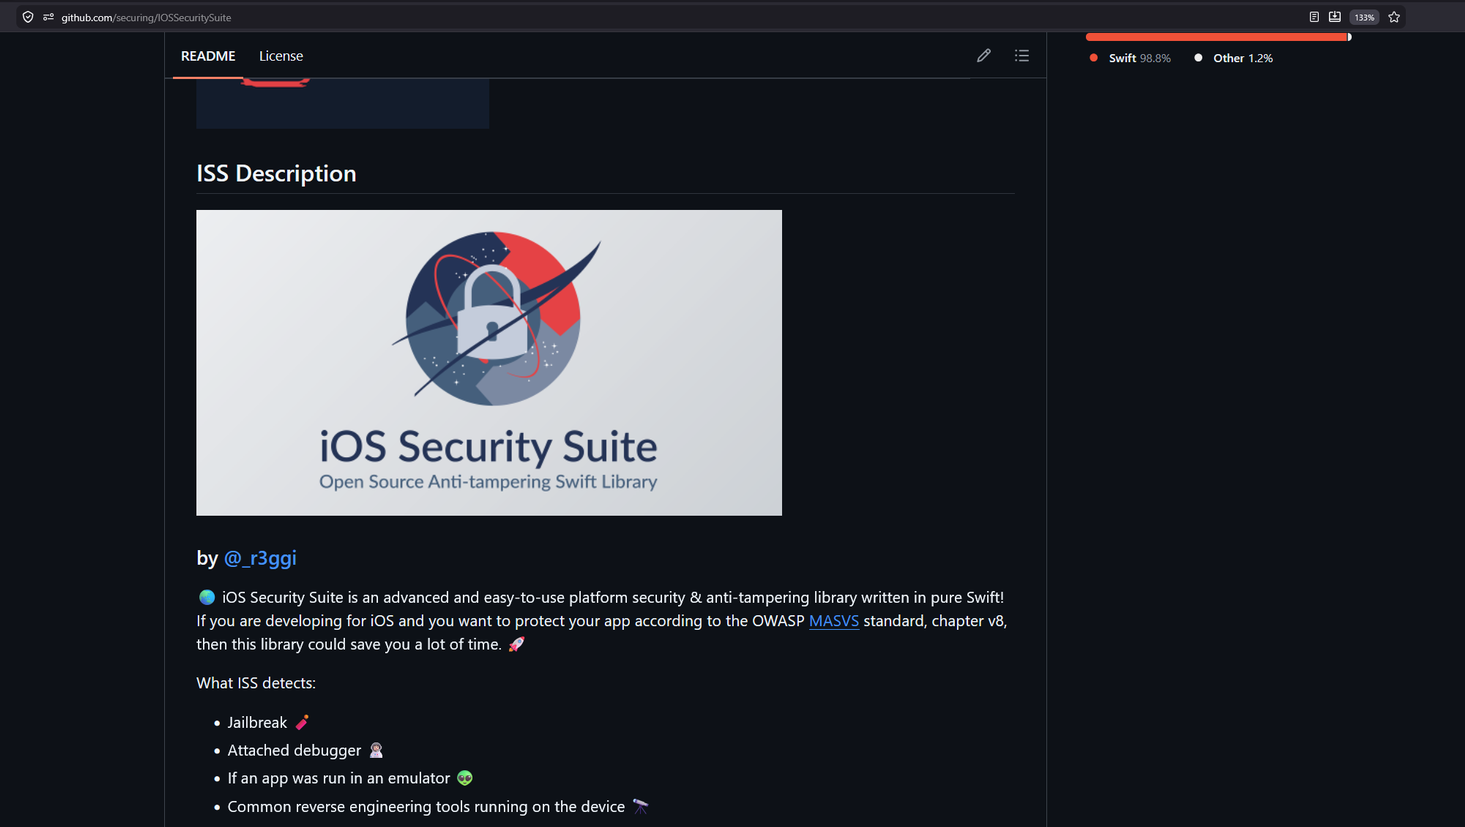
IOSSecuritySuite is a Swift-based iOS security library that provides jailbreak detection, debugger detection, and anti-tampering checks. Because it is open source, we can read through the code if we wished.
Displaying ObjC Methods
My next goal was to review the methods on the IOSSecuritySuite.JailbreakChecker class, looking through the Objective-C methods for anything useful.
After the usual ObjC.available check the script grabs a handle to the IOSSecuritySuite.JailbreakChecker class from ObjC.classes and stores it in cls.
From there it reads the class’s $methods property, which lists every method registered on that class with the Objective-C runtime, and loops over them to print each one to the console. The result is a full method listing for the jailbreak checker. So instead of a class name alone we can now see the individual methods it exposes.
if (ObjC.available) {
    console.log("[+] Successfully Connected and Detected Objective-C");
    console.log(ObjC.classes["IOSSecuritySuite.JailbreakChecker"]);
    const className = "IOSSecuritySuite.JailbreakChecker";
    const cls = ObjC.classes[className];
    console.log("[*] Methods on " + className + ":");
    cls.$methods.forEach(function (m) {
        console.log(" " + m);
    });
}
else{
    console.log("[-] ObjC not available");
}
The video below shows the results from running the script above with frida -U -l list_methods.js -f com.darkbank.defcon.
The method listing was useful for confirming the class exists and understanding its contents, but it didn’t give us a foothold we could actually hook. IOSSecuritySuite’s checks run as compiled Swift, and the Objective-C method table doesn’t expose the native addresses or functions we need to intercept them. So the next move is to drop down a layer and enumerate the Swift symbols, where those functions live with real, hookable addresses.
Time to Pivot?
Since we learned earlier that IOSSecuritySuite is built in Swift, we should shift our approach and scripting from Objective-C to Swift.
- Objective-C classes expose methods through the Objective-C runtime, allowing Frida to enumerate them with ObjC.classes and $methods.
- Pure Swift methods are generally not registered with the Objective-C runtime unless explicitly exposed, so they cannot be discovered through ObjC.classes.
- Instead, we enumerate Swift symbols (when available) and use Swift’s mangled symbol names to locate native functions for analysis and instrumentation.
The next step is to obtain the Swift mangled symbol names.
Get Swift Symbols
The script below starts by checking Swift.available, which confirms the Swift runtime is present in the target process. If it comes back false the script reports that and stops. If it comes back true it logs a confirmation and moves on to the search.
From there it builds a ModuleMap, which is Frida’s inventory of every module currently loaded in the process, including the app binary, the system frameworks, and any bundled libraries. The script then iterates over each module with moduleMap.values() and calls enumerateSymbols() on it, which lists that module’s symbols: the named functions, methods, and variables it exposes. Each symbol list is passed through a filter() that keeps only the entries whose name contains IOSSecuritySuite, the open source library that apps use to detect jailbroken devices. This is the pivot the previous section set up. Because the library’s checks are compiled as Swift, rather than exposed to the Objective-C runtime, they never showed up in ObjC.classes, but they do appear here as Swift symbols.
Whenever a module comes back with at least one match the script logs the module’s name and how many matches it found, then loops over those matches and prints each symbol’s address and name. The address is the important part. It’s the exact location of that function in the memory, which is what you use to hook it later. The result is a targeted map of where the jailbreak detection code actually lives in the process, showing which module it sits in and the precise addresses of it’s symbols. That is exactly what we need before hooking those functions to defeat the check.
if (Swift.available) {
    console.log("[+] Successfully Connected and Detected Swift");
    const moduleMap = new ModuleMap();
    moduleMap.values().forEach(function (mod) {
        const matches = mod.enumerateSymbols().filter(function (symbol) {
            return symbol.name.includes("IOSSecuritySuite");
        });
        if (matches.length > 0) {
            console.log("[*] Found: " + matches.length + " match(es) in: " + mod.name);
            matches.forEach(function (symbol) {
                console.log(
                    "Symbol Address: " + symbol.address +
                    " Symbol Name: " + symbol.name
                );
            });
        }
    });
} else {
    console.log("[-] Swift Not Available");
}
The video below shows the results from running the script above with frida -U -l list_swift_symbols.js -f com.darkbank.defcon.
The Joys of Mangling
In compiler construction name mangling is a technique used to solve various problems caused by the need to resolve unique names for programming entities in many modern programming languages.
Swift uses name mangling to encode information such as types, namespaces, and function signatures into symbol names used by the compiler and runtime. The mangling format can vary between Swift versions.
When reverse engineering Swift applications these mangled symbols are commonly encountered in disassembly and symbol tables.
The swift-demangle utility converts them back into a human-readable form, making it much easier to identify functions for analysis and Frida hooking.
Below is an example output from this build for the Swift mangled symbol name.

Next I wanted to store the output of the previous command in output.txt, then cat that file and pipe it into swift-demangle, as shown below.
The video below shows the results from running the script above with frida -U -l list_swift_symobls.js -f com.darkbank.defcon > output.txt.
The video below shows the results from running the script above with cat output.txt | swift-demangle.
After reading through the output I felt I had enough information and searched on Frida Code Share for IOSSecuritySuite.
Frida CodeShare
Frida CodeShare is an online community platform where developers and security researchers share, discover, and run custom scripts for the Frida dynamic instrumentation toolkit. It lets you test code against running apps without writing scripts from scratch.
I use the site to review code and learn more about writing my own Frida scripts. As always, review any script before running it on your devices.
I found a script called Check1 that seemed to check all the boxes.
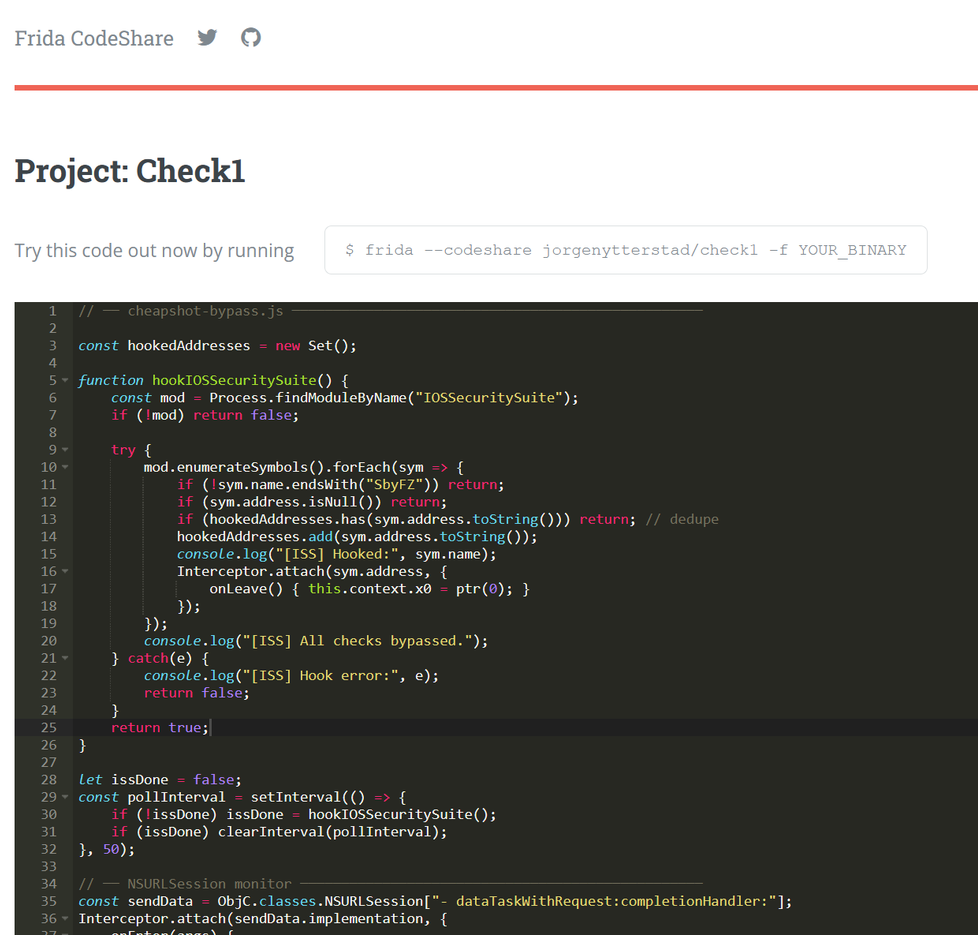
Let’s take a look at what its main function does.
The function starts by locating the IOSSecuritySuite module in the process with Process.findModuleByName(). If the module isn’t loaded it returns false right away, since there’s nothing to hook.
Assuming the module is found, and not null, it enumerates that module’s symbols and works through them one at a time. For each symbol it applies a few filters before doing anything. It skips any symbol whose name doesn’t end in SbyFZ, which is the mangled Swift suffix that identifies the jailbreak-check functions we’re after. It skips symbols with a null address, since there’s nothing there to attach to. And it skips any address already recorded in hookedAddresses, which prevents the script from hooking the same function twice. Any address that clears those checks gets added to that set and logged as hooked.
The actual bypass happens with Interceptor.attach(). Rather than hooking the function on the way in, it uses an onLeave callback, which runs as the function returns. Inside that callback it sets this.context.x0 to a null pointer. On ARM64 x0 is the register that holds a function’s return value, so overwriting it forces every one of these checks to hand back a “not jailbroken” result, no matter what the original code computed. This is the same idea as forcing a detection method to return false, done at the register level.
Once every matching symbol has been hooked, it logs that all checks were bypassed and returns true. If anything throws along the way, the catch block logs the error and returns false so you know the hook didn’t fully succeed.
function hookIOSSecuritySuite() {
    const mod = Process.findModuleByName("IOSSecuritySuite");
    if (!mod) return false;

    try {
        mod.enumerateSymbols().forEach(sym => {
            if (!sym.name.endsWith("SbyFZ")) return;
            if (sym.address.isNull()) return;
            if (hookedAddresses.has(sym.address.toString())) return; // dedupe
            hookedAddresses.add(sym.address.toString());
            console.log("[ISS] Hooked:", sym.name);
            Interceptor.attach(sym.address, {
                onLeave() { this.context.x0 = ptr(0); }
            });
        });
        console.log("[ISS] All checks bypassed.");
    } catch(e) {
        console.log("[ISS] Hook error:", e);
        return false;
    }
    return true;
}
The video below shows the results from running the script above with frida -U -l code_share_bypass.js -f com.darkbank.defcon.
It appears the script has failed and we have not bypassed the controls.
At this point we have two options. Go back to Frida CodeShare and try other scripts till one sticks, or review why this didn’t work?
Let’s choose the latter and learn about static linking vs dynamic linking.
Static vs. Dynamic Linking
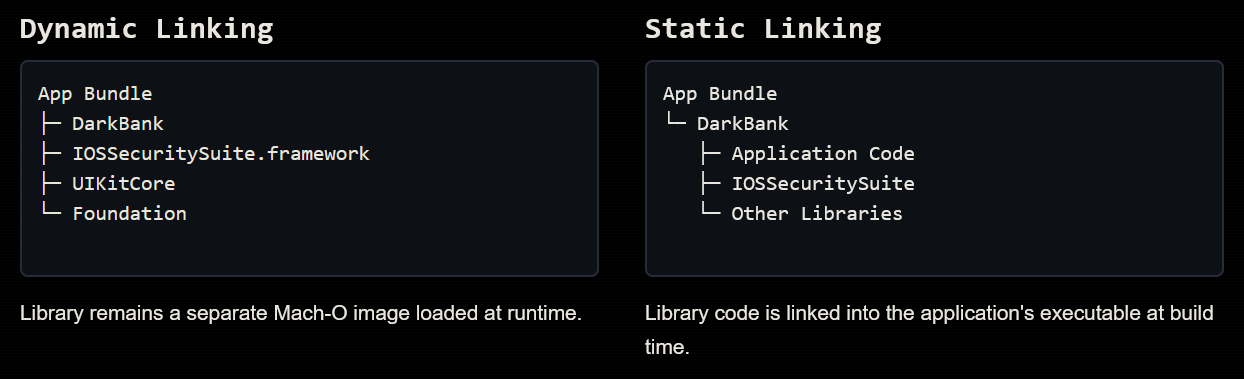
A statically linked library is merged into the application’s executable instead of being loaded as a separate Mach-O image. Therefore, Frida must enumerate symbols from the application’s main executable rather than a separate framework.
Process.findModuleByName(name) and Process.getModuleByName(name) returns a Module whose address or name matches the one specified. In the event that no such module could be found, the find-prefixed functions return null whilst the get-prefixed functions throw an exception.
Finally Bypassing IOSSecuritySuite
Before we can dig into how IOSSecuritySuite is linked, we need the exact name of the application’s main binary. The script below pulls it for us.
The ObjC.available check and else branch work the same as in the earlier scripts, so the only new piece is the third line. Process.mainModule is a reference to the process’s main module, which is the app’s own executable rather than any of the frameworks or libraries loaded alongside it. It’s name property gives us the exact name of that binary, which is what we’ll use in the next step to inspect how the app was built and see whether IOSSecuritySuite is linked into this main binary or loaded as a separate module.
if (ObjC.available) {
    console.log("[+] Successfully Connected and Detected Objective-C");
    console.log(`[+] Module name is : ${Process.mainModule.name}`)
} else {
    console.log("[-] ObjC not available");
}
The video below shows the results from running the script above with frida -U -l get_name.js -f com.darkbank.defcon.
Now that we know the name of the application’s main binary, we can update the Check1 script to replace IOSSecuritySuite with DarkBank in Process.findModuleByName().
function hookIOSSecuritySuite() {
    const mod = Process.findModuleByName("DarkBank"); // <-- Changed to DarkBank
    if (!mod) return false;

    try {
        mod.enumerateSymbols().forEach(sym => {
            if (!sym.name.endsWith("SbyFZ")) return;
            if (sym.address.isNull()) return;
            if (hookedAddresses.has(sym.address.toString())) return; // dedupe
            hookedAddresses.add(sym.address.toString());
            console.log("[ISS] Hooked:", sym.name);
            Interceptor.attach(sym.address, {
                onLeave() { this.context.x0 = ptr(0); }
            });
        });
        console.log("[ISS] All checks bypassed.");
    } catch(e) {
        console.log("[ISS] Hook error:", e);
        return false;
    }
    return true;
}
With that simple change we are able to bypass the security controls and run the application on the jailbroken device!
Key Takeaways
- Frida enables runtime analysis without modifying or rebuilding the target application.
- Application enumeration is the foundation of successful runtime analysis and identify Objective-C classes, Swift symbols, and implemented security controls before attempting a bypass.
- Swift name mangling can obscure security-related functions, but tools such as
swift-demanglemake those symbols understandable. - Frida hooks code loaded into the process. With static linking, library code becomes part of the application’s executable rather than a separate framework image.
- Understanding how an application’s security controls are implemented is often more valuable than relying on generic bypass scripts.
References
- Frida.re -> https://frida.re
- Frida Basics -> https://learnfrida.info/basic_usage
- Swift Demangle GitHub -> https://github.com/oozoofrog/SwiftDemangle
- IOSSecuritySuite GitHub -> https://github.com/securing/IOSSecuritySuite
- Check1 Frida CodeShare -> https://codeshare.frida.re/@jorgenytterstad/check1/
- How to detect Frida toolkit abuse in your mobile app -> https://fingerprint.com/blog/exploring-frida-dynamic-instrumentation-tool-kit/
- OWASP Mobile Application Security Testing Guide (MASTG) -> https://mas.owasp.org/MASTG/
YouTube Video
if you wish to check out the YouTube video I made around this content, you can watch it here.
This concludes the write up on Leveraging Frida to Bypass Mobile Application Security Controls. I hope you found value in this content. Let me know if you have any questions and thank you for reading! <3